DIY Fresh Breath Dog Treats: A Simple Mint & Parsley Recipe
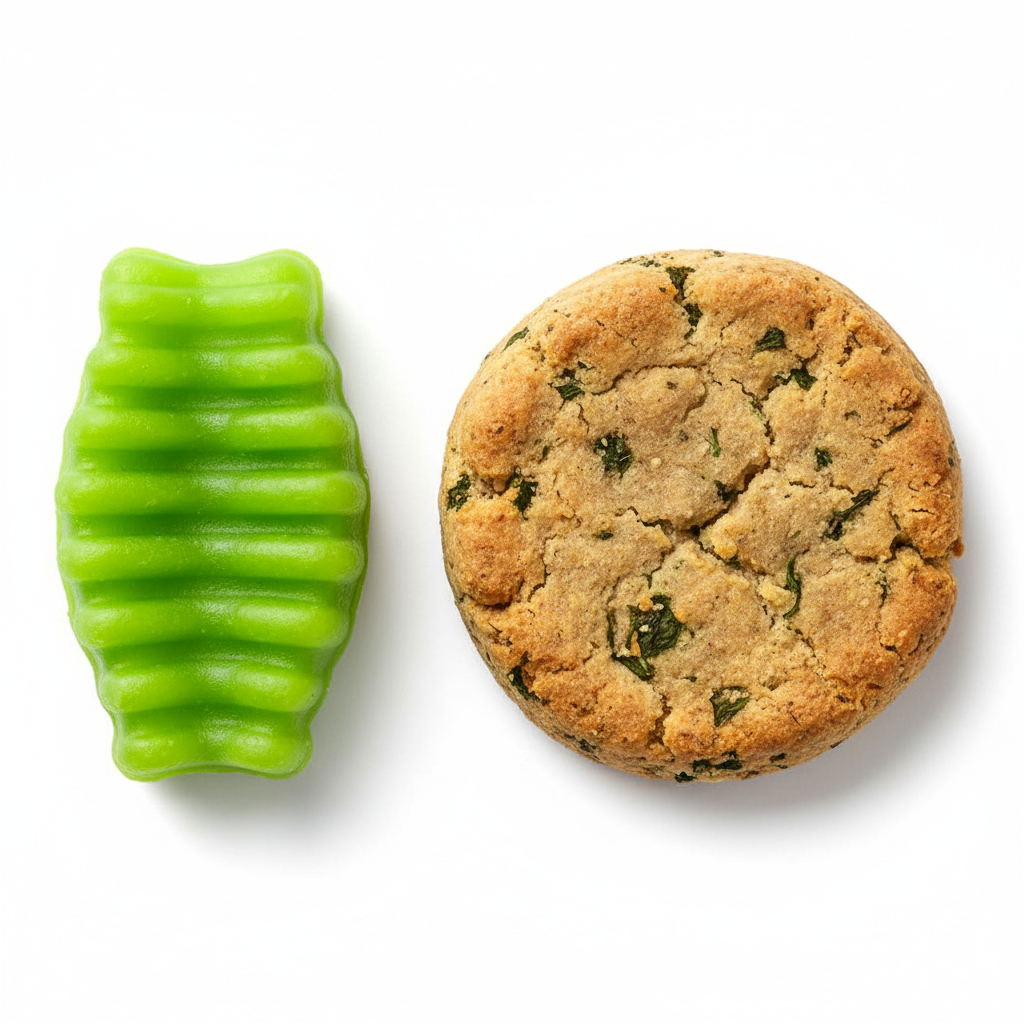
Bad dog breath. It’s that invisible wall that can instantly separate you from your furry best friend. Many pet owners resign themselves to it, or worse, they throw money at brightly colored, oddly shaped commercial ‘dental chews’ that promise a miracle cure. But have you ever flipped that bag over and analyzed the ingredients? It’s often a laundry list of fillers, unpronounceable chemicals, and sweeteners. You’re paying a premium for a cleverly marketed biscuit that does little for long-term oral health.
I’m The Canine Nutrition Hacker, and my mission is to empower you to see through the marketing noise. True health—and fresh breath—starts with real ingredients. We’re going to bypass the commercial nonsense and create a treat that is not only incredibly effective but also ridiculously easy and cheap to make. This recipe for Mint & Parsley Fresh Breath Treats is your first step toward taking back control of what goes into your dog’s body.
CRITICAL SAFETY DISCLAIMER: I am a dedicated canine nutrition analyst, not a veterinarian. The information provided here is for educational purposes. These treats are intended for supplemental feeding and to help with bad breath; they are not a replacement for professional dental care or a balanced diet. Always consult with your veterinarian before introducing new foods into your dog’s diet, especially if your dog has underlying health conditions, allergies, or is pregnant or nursing. Ensure all ingredients you use are 100% free of xylitol, an artificial sweetener that is highly toxic to dogs.
Deconstructing Commercial ‘Dental Chews’: The Ugly Truth
Before we build the perfect treat, we must first understand what we’re fighting against. The ‘dental and fresh breath’ aisle at the pet store is a minefield of deceptive marketing. Let’s perform a forensic analysis on a typical, popular dental chew.
The First 5 Ingredients: A Red Flag Analysis
The first five ingredients make up the bulk of any product. In many best-selling dental chews, you’ll find a variation of this list: Wheat Flour, Glycerin, Wheat Gluten, Gelatin, Water. Let’s break this down:
- Wheat Flour & Wheat Gluten: These are cheap fillers and common allergens for many dogs. They provide minimal nutritional value and can contribute to inflammation and digestive upset in sensitive pets.
- Glycerin: A humectant used to keep treats soft and chewy. While generally considered safe in small amounts, it’s a type of sugar alcohol that adds sweetness and empty calories. Why does a dog treat need to be sweet?
- Gelatin: A binding agent. While it can have some joint benefits, its quality can vary wildly.
What’s missing? Any significant, active ingredient that genuinely promotes long-term dental health or freshens breath from within. The ‘mechanical abrasion’ they advertise is often minimal. You’re essentially paying for a cleverly shaped, wheat-based, sweetened chew.
Beyond the Fillers: Artificial Additives
Scroll further down that ingredient list and you’ll find the real culprits. You’ll often see things like ‘Natural Poultry Flavor,’ which is a vague, low-quality ingredient. Worse, you’ll find artificial colors like FD&C Blue No. 1 or Yellow No. 5. Your dog does not care if its treat is a vibrant green. This is purely for human marketing appeal and these dyes have been linked to hyperactivity and other health concerns. It’s a classic case of form over function, and you’re paying for it.
Hacker Tip: Never trust the front of the bag. The marketing claims of ‘veterinarian recommended’ or ‘cleans teeth’ mean very little. The non-negotiable truth is always in the ingredient list and the guaranteed analysis. If you can’t pronounce it, or if it sounds like it belongs in a chemistry set, question why it’s in your dog’s food.
The Hero Ingredients: A Forensic Look at Mint and Parsley
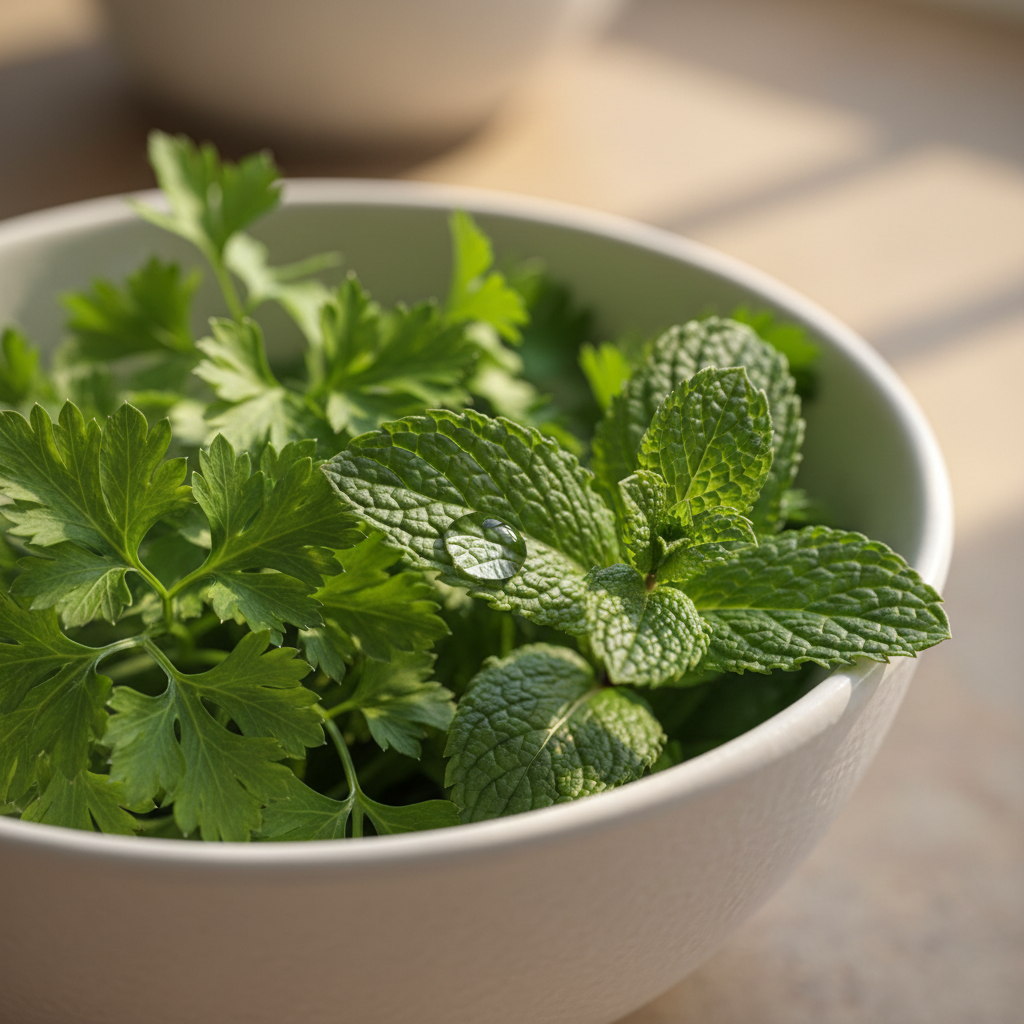
Our DIY recipe shuns fillers and focuses on a few powerful, functional ingredients. Every component serves a distinct purpose in promoting your dog’s well-being and combating bad breath. This is the core principle of nutrition hacking: maximum efficacy with minimal, high-quality ingredients.
The Dynamic Duo for Deodorizing
- Parsley (specifically Italian Flat-Leaf): This isn’t just a garnish. Parsley is a nutritional powerhouse rich in chlorophyll. Think of chlorophyll as nature’s internal deodorizer. It works systemically to help neutralize odor-causing bacteria from the inside out, rather than just masking the smell. It’s also packed with vitamins K, C, and A, which support immune function and vision.
- Mint (Spearmint or Peppermint): This is the frontline soldier against bad breath. The natural menthol in mint provides that immediate cooling and freshening effect. But it’s more than a mask; mint has natural antibacterial properties that can help reduce the buildup of odor-causing bacteria in the mouth. CRITICAL WARNING: Never use English Pennyroyal, as it is toxic to dogs. Stick to the common spearmint or peppermint found in your grocery store’s produce section.
The Supporting Cast: Building a Better Treat
The base of our treat is just as important as the active ingredients. We’re ditching the wheat for superior, functional alternatives.
- Oat Flour: We use oat flour (which you can make by simply blending rolled oats in a blender) because it’s a fantastic, gluten-free option. Oats are a good source of soluble fiber, which aids in digestion, and they contain valuable nutrients like iron and B vitamins. They provide a solid, wholesome structure for our treat.
- Coconut Oil: This ingredient is a must-have. Coconut oil contains lauric acid, which has proven antimicrobial, antibacterial, and antifungal properties. It can actively help combat the bacteria in your dog’s mouth that leads to plaque, gingivitis, and bad breath. It also helps bind the treats and adds a healthy fat that is great for skin and coat.
- Egg: The ultimate binder, an egg holds the dough together while adding a boost of high-quality protein and essential amino acids.
Every single ingredient in this recipe is chosen for its direct contribution to your dog’s health. There are no fillers, no artificial colors, and no empty calories. This is the difference between a ‘treat’ and a functional, nutritional supplement.
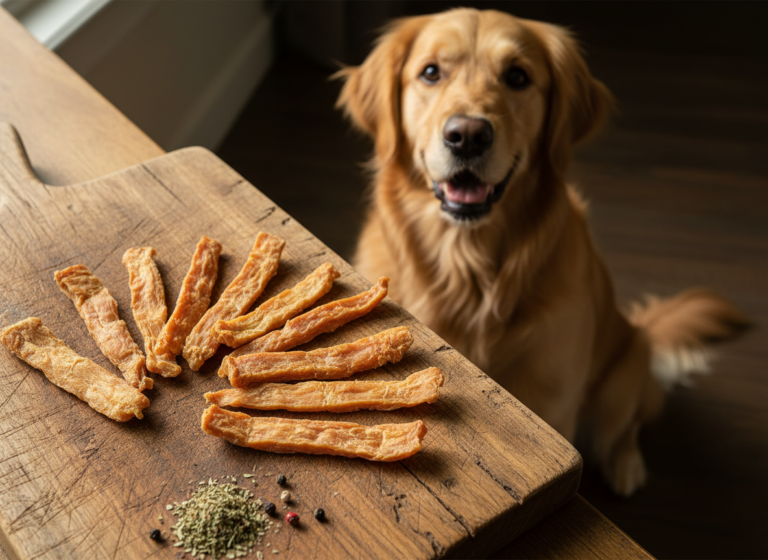
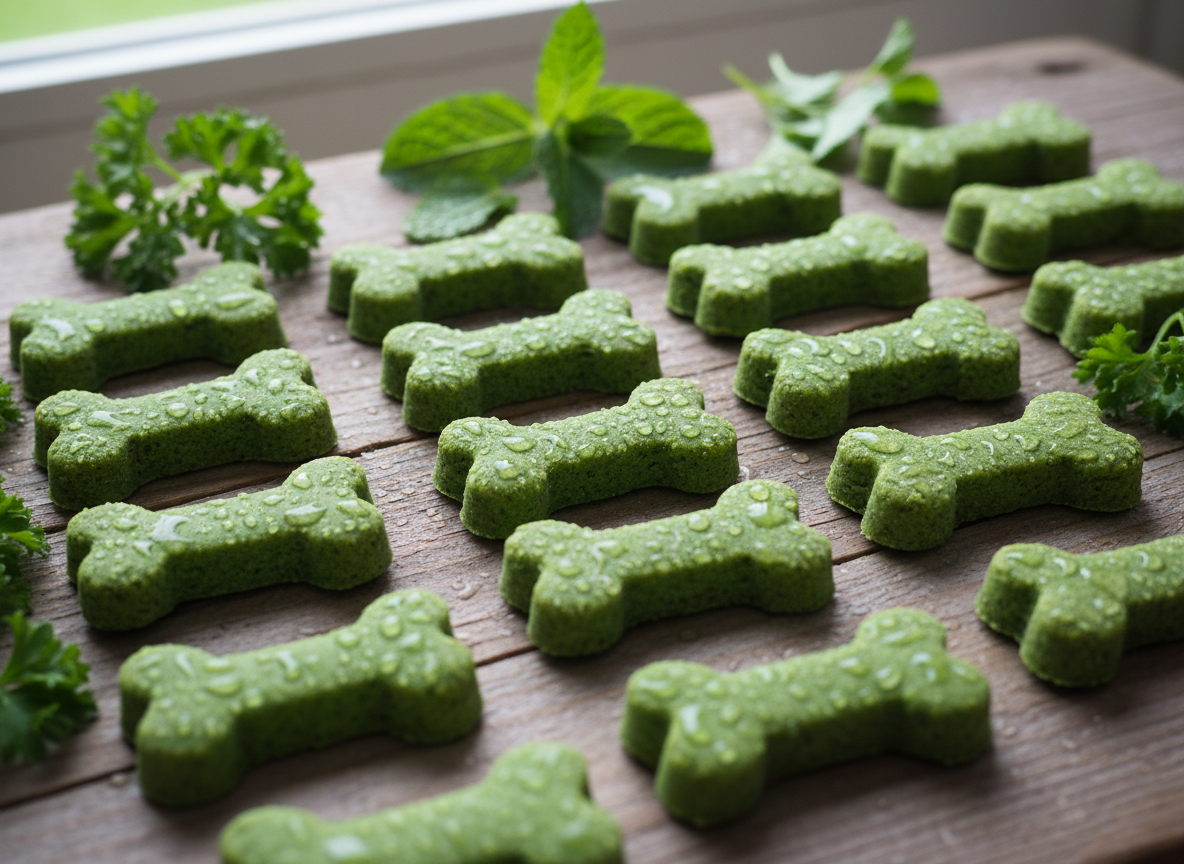
The Blueprint: Your Step-by-Step Recipe for Fresh Breath Treats
This is the official Canine Nutrition Hacker blueprint. It’s simple, fast, and requires no special culinary skills. Follow these instructions precisely for a perfect batch every time.
Yields: Approx. 30-40 treats | Prep Time: 15 mins | Cook Time: 20-25 mins
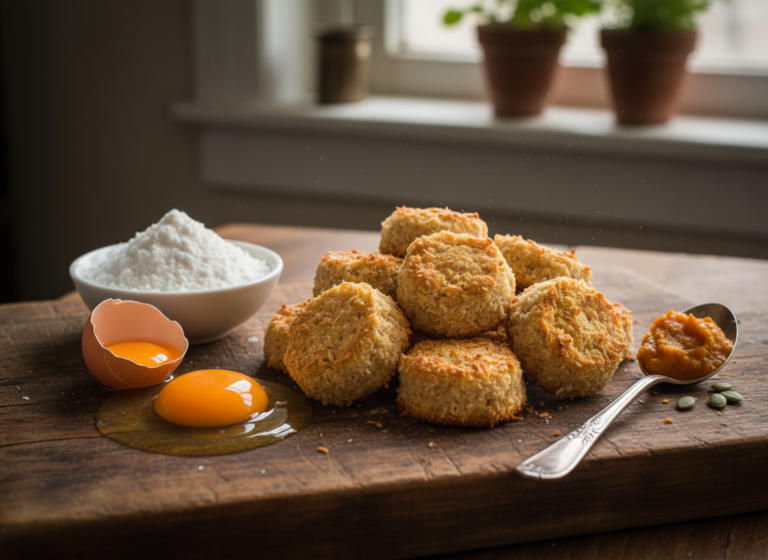
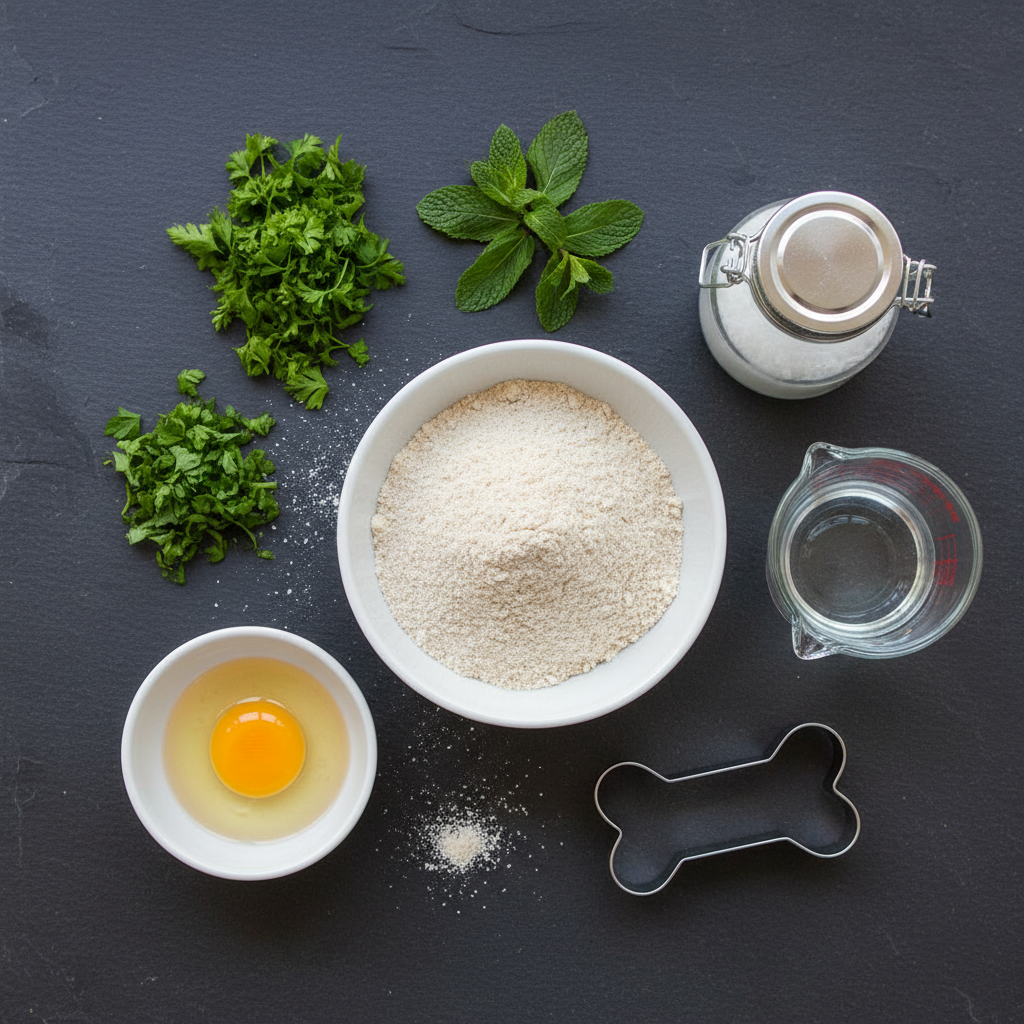
Ingredients:
- 2 1/2 cups of Oat Flour (make your own by blending 2 1/2 cups of old-fashioned rolled oats until fine)
- 1/2 cup finely chopped fresh Italian flat-leaf parsley
- 1/4 cup finely chopped fresh mint leaves (spearmint or peppermint only)
- 1 large egg
- 1/4 cup of melted, unrefined coconut oil
- 1/2 cup of water, plus more if needed
Instructions:
- Preheat & Prep: Preheat your oven to 350°F (175°C). Line a large baking sheet with parchment paper for easy cleanup.
- Combine Dry Ingredients: In a large mixing bowl, whisk together the oat flour, chopped parsley, and chopped mint. Ensure the herbs are evenly distributed throughout the flour.
- Combine Wet Ingredients: In a separate, smaller bowl, whisk the egg. Then, add the melted coconut oil and 1/2 cup of water, and whisk until everything is well combined.
- Mix Dough: Pour the wet ingredient mixture into the bowl of dry ingredients. Mix with a spatula or wooden spoon until a sticky dough begins to form.
- Knead & Roll: Turn the dough out onto a lightly floured (use extra oat flour) surface. Knead it gently for a minute or two until it comes together into a cohesive ball. If it’s too dry, add water one tablespoon at a time. If it’s too sticky, add a bit more oat flour. Roll the dough out to about 1/4-inch thickness.
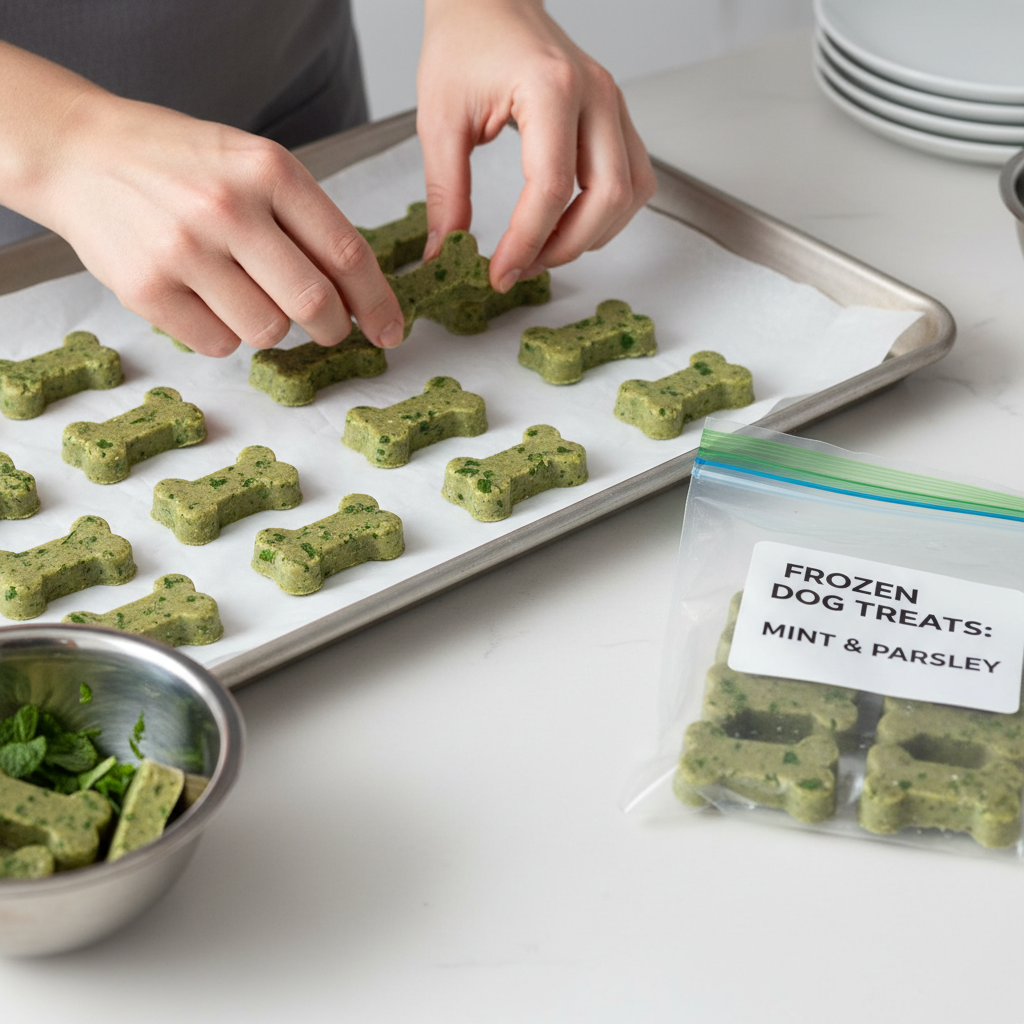
- Cut & Place: Use a small cookie cutter (a bone shape is classic!) to cut out the treats. Place them about 1/2 inch apart on your prepared baking sheet. You can re-roll the scraps to use all the dough.
- Bake: Bake for 20-25 minutes, or until the edges are golden brown and the treats are firm to the touch. For a crunchier treat that provides more mechanical cleaning, turn off the oven and let the treats sit inside as it cools down for another 30 minutes.
- Cool Completely: Remove the treats from the oven and transfer them to a wire rack to cool completely. This is a crucial step for proper storage.
Hacker Tip: For an extra boost of Omega-3s and fiber, add one tablespoon of finely ground flaxseed to your dry ingredients. It’s fantastic for skin and coat health and adds virtually no cost.
The Bottom Line: A Cost-Per-Treat Forensic Analysis
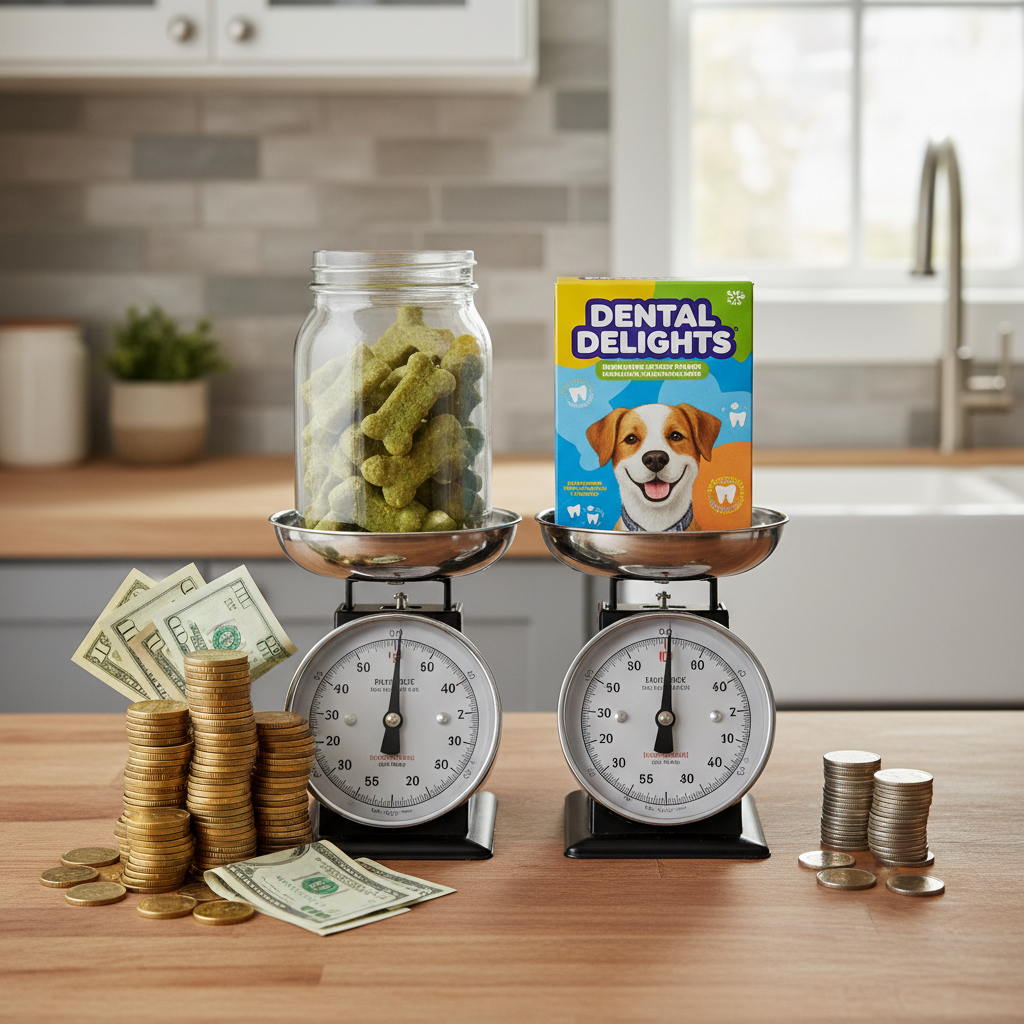
The ‘convenience’ of store-bought treats comes at a steep price, not just in questionable ingredients but in actual dollars. Let’s run the numbers and see the true cost of fresh breath. The analysis below is based on average US grocery store prices. Your costs may vary slightly, but the savings ratio will be similar.
| Item | DIY Recipe Cost (Approx.) | Premium Brand (e.g., Greenies) | Verdict |
|---|---|---|---|
| Primary Ingredient | Oat Flour (~$1.50 for batch) | Wheat Flour/Glycerin (Low Cost, High Markup) | DIY Wins: Wholesome, allergen-friendly base. |
| Active Ingredients | Fresh Parsley & Mint (~$2.00) | Vague ‘Natural Flavors’, Vitamins/Minerals | DIY Wins: Fresh, potent, and natural ingredients. |
| Total Batch Cost | ~$4.00 for ~35 treats | ~$15.00 for a 12oz box (36 treats) | DIY Wins: Massive cost savings. |
| Cost Per Treat | ~$0.11 per treat | ~$0.42 per treat | DIY Wins: Almost 4x cheaper. |
| Annual Savings (1 treat/day) | DIY Annual Cost: ~$40.15 | Brand Annual Cost: ~$153.30 | Total Savings: ~$113.15 per year! |
The numbers don’t lie. By investing just 30 minutes a month, you can save over $100 per year per dog, and that’s just comparing it to one of the mid-tier brands. More importantly, you are providing a treat with 100% transparency. You know every single thing that goes into it. That peace of mind is priceless. You’re not just saving money; you’re making a significant upgrade in quality and nutritional value. This is the essence of hacking your dog’s nutrition—achieving superior results for a fraction of the cost.
Hacker Protocol: Batching, Storing, and Serving
You’ve baked a perfect batch of Fresh Breath Treats. Now, proper storage is critical to maintain their freshness and potency. Following this protocol ensures your efforts aren’t wasted and that you always have a healthy treat on hand.
Short-Term Storage (Up to 1 Week)
Once the treats are completely cool—and I mean completely, as any residual warmth will create condensation and lead to mold—you can store them in an airtight container. A glass jar with a good seal is ideal. Keep them in the refrigerator. They will remain fresh and potent for up to 7 days.
Long-Term Storage (Up to 3 Months)
This recipe is perfect for batching. To store for the long term, you’ll want to freeze them.
- Flash Freeze: Arrange the cooled treats in a single layer on a baking sheet. Make sure they are not touching. Place the baking sheet in the freezer for about 1-2 hours, or until the treats are frozen solid.
- Bag and Label: Transfer the frozen treats into a freezer-safe zip-top bag or a vacuum-sealed bag. Squeeze out as much air as possible to prevent freezer burn. Be sure to label the bag with the contents and the date.
- Store: The treats will last for up to 3 months in the freezer. To serve, simply take out a few treats and let them thaw on the counter for 10-15 minutes.
Insider Secret: Freezing not only preserves the treats but can also provide an extra benefit. A cold, crunchy treat can be more satisfying for a dog to chew on and can offer a soothing effect for teething puppies or dogs with mild gum inflammation.
Serving Guidelines
These are treats, not a meal replacement. Moderation is key. As a general guideline:
- Small Dogs (under 20 lbs): 1 treat per day.
- Medium Dogs (20-50 lbs): 2 treats per day.
- Large Dogs (over 50 lbs): 3 treats per day.
Always monitor your dog when giving any new treat. And remember, these treats are a fantastic tool in your arsenal against bad breath, but they do not replace the need for regular teeth brushing and professional veterinary dental cleanings. They are one part of a comprehensive oral health strategy.
Conclusion
You now possess the knowledge and the blueprint to fight back against bad dog breath and deceptive marketing. You’ve seen how commercial ‘dental chews’ are often built on a foundation of cheap fillers and artificial additives. In contrast, you’ve learned how a few simple, powerful, and natural ingredients can deliver superior results for a fraction of the cost. This Mint & Parsley Fresh Breath Treat recipe is more than just a way to make a snack; it’s a declaration that you are in control of your dog’s health.
Embrace the Canine Nutrition Hacker mindset. Scrutinize labels. Question ingredients. Demand better for your pet and your wallet. By investing a small amount of time, you’ve provided your dog with a wholesome, beneficial treat, saved a significant amount of money, and taken a proactive step toward better oral hygiene. Remember, while these treats are a powerful tool, they are part of a larger picture. Consistent teeth brushing and regular vet check-ups are non-negotiable for long-term dental health. Now go ahead, bake a batch, and enjoy those fresh, slobbery kisses.