DIY Ant-Proof Dog Bowl Stand for Outdoor Summer Feeding
The summer feeding ritual is a familiar battle for many dog owners. You place a bowl of fresh food outside for your companion, and within minutes, a determined black line of ants marches in to claim it. It’s a frustrating cycle of wasted food, a hungry dog, and constant vigilance. Commercial ‘ant-proof’ bowls are often flimsy, overpriced plastic contraptions that barely work. They are a temporary fix, not a permanent solution.
This is where the Canine Nutrition Hacker mindset applies beyond the food itself—it extends to the entire feeding system. Why pay a premium for a product designed to fail when you can engineer a fortress for a fraction of the cost? We’re not just making a dog bowl stand; we’re building a permanent, customized, and impenetrable defense system against pests. This guide will walk you through the entire process, from material analysis to final deployment, empowering you to solve this common problem with your own hands.
The Blueprint: Deconstructing the Ant-Proof Design

Safety & Material Analysis: The Foundation of a Successful Build
Before a single piece of wood is cut, we must address safety. This is non-negotiable. Your workshop is not a playground for your pet. Ensure your dog is secured in another area while you are working with power tools to prevent injury from noise, dust, or accidents.
SAFETY DISCLAIMER: You are responsible for your own safety when using power tools. Always wear appropriate personal protective equipment (PPE), including safety glasses and gloves. Furthermore, the materials you choose are critical for your pet’s health. Only use non-toxic, pet-safe wood sealants and finishes. Many common wood stains and varnishes contain volatile organic compounds (VOCs) that can be harmful if ingested or inhaled by your dog. Research your products carefully; look for labels that explicitly state ‘pet-safe,’ ‘food-safe,’ or ‘zero-VOC.’
Required Materials:
- Lumber: One 1″ x 10″ x 4′ board of untreated pine, cedar, or poplar. Cedar has natural insect-repelling properties, but untreated pine is the most budget-friendly option. Avoid pressure-treated wood, as the chemicals used are toxic to pets.
- Legs: One 2″ x 2″ x 4′ board for the legs, or four pre-made furniture legs.
- Fasteners: 1 1/2″ exterior-grade wood screws. Using exterior grade prevents rusting.
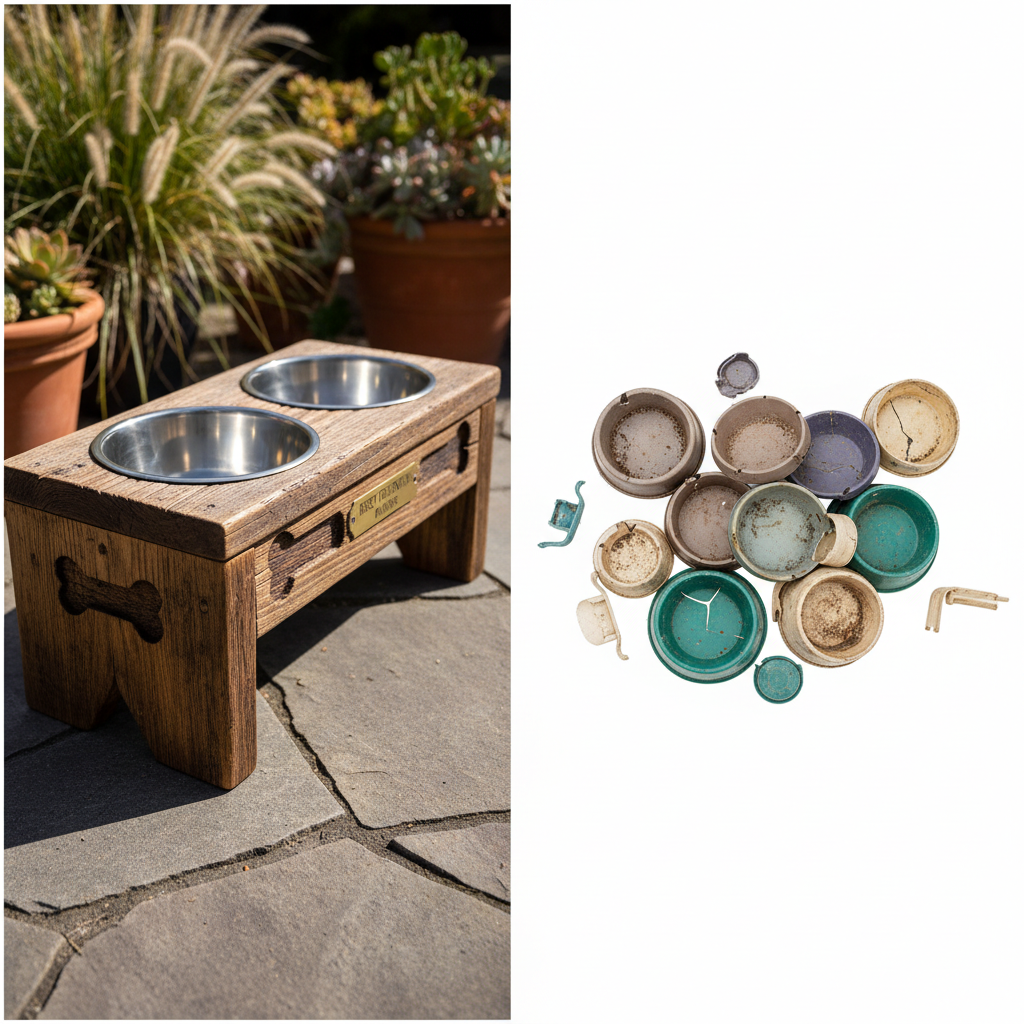
- Moats: Four small, shallow tins or containers. Tuna cans (cleaned thoroughly), metal pet food lids, or furniture caster cups work perfectly. They must be wider than the legs.
- Sealant: A can of pet-safe, waterproof wood sealant or finish.
Required Tools:
- Measuring Tape & Pencil
- Saw (a circular saw, miter saw, or even a hand saw will work)
- Jigsaw (for cutting the bowl holes)
- Power Drill with bits
- Sandpaper (medium and fine grit) or an orbital sander
- Safety Glasses
Hacker Tip: Before you go to the hardware store, check your scrap pile. This project is perfect for using leftover lumber from a decking project or an old shelf. The goal is a robust, functional piece, not a fine piece of furniture. Repurposing materials is the ultimate cost-saving hack.
Cost Analysis: DIY Hacker Build vs. Store-Bought Solutions
The pet product market thrives on convenience, often at a steep markup. Commercial ant-proof solutions range from simple plastic moat bowls to elaborate, expensive feeding stations. Let’s break down the real-world costs to see how much you’re really saving by investing an hour of your time.
We’ll analyze the cost and benefits for a medium-to-large dog. The numbers expose the clear financial advantage of the DIY approach, not to mention the superior quality and durability you get from building it yourself.
| Feature | DIY Hacker Stand | Mid-Range Plastic Moat Bowl | Premium ‘Designer’ Feeder |
|---|---|---|---|
| Estimated Cost | $15 – $25 (or less with scrap wood) | $20 – $30 per bowl | $75 – $150+ |
| Durability | Extremely High (Solid Wood) | Low (Plastic, prone to cracking/fading) | Medium to High (Varies) |
| Customization | Fully Customizable (Height, bowl size, number of bowls) | None (Fixed size) | Limited Options |
| Effectiveness | 100% (Physical water barrier) | High (until water evaporates or gets dirty) | Often relies on gimmicks or less effective moats |
| Verdict | Superior value, durability, and customization. A permanent solution. | A temporary, disposable fix that needs frequent replacement. | Overpriced for the function provided. You pay for aesthetics, not superior performance. |
The analysis is clear. For less than the cost of a single, flimsy plastic bowl, you can build a solid wood, fully customized feeding station that will last for years. You save not only money upfront but also on replacement costs down the line. Your total savings over five years could easily exceed $100.
Step-by-Step Build Instructions: The 60-Minute Ant Fortress
This is a straightforward build, perfect for even a novice woodworker. Follow these steps precisely for a stable and effective final product. The key is to measure twice and cut once.
-
Measure and Cut the Platform & Legs
First, determine the height. A proper stand should allow your dog to eat with a straight spine, not crouching down. The top of the stand should be roughly level with your dog’s lower chest. For a 50lb dog, a height of 8-10 inches is typical. Cut four legs to this length from your 2×2 board. Next, determine the size of the top platform. It should be large enough to hold the bowl(s) with at least 2 inches of clearance around them. A 12″ x 18″ platform is a good starting point for one large bowl. Cut your 1×10 board to this size.
-
Sand All Components
Use medium-grit sandpaper to smooth all cut edges and surfaces of the platform and the four legs. This step is crucial for preventing splinters that could harm you or your pet. Follow up with fine-grit sandpaper for a smoother finish, ready for sealing.
-
Assemble the Frame
Place the platform top-down on your workbench. Position one leg in each corner, ensuring it’s flush with the edges. To prevent the wood from splitting, drill two pilot holes through the platform and into the top of each leg. Secure each leg with two 1 1/2″ wood screws. Your stand should now be sturdy and level.
-
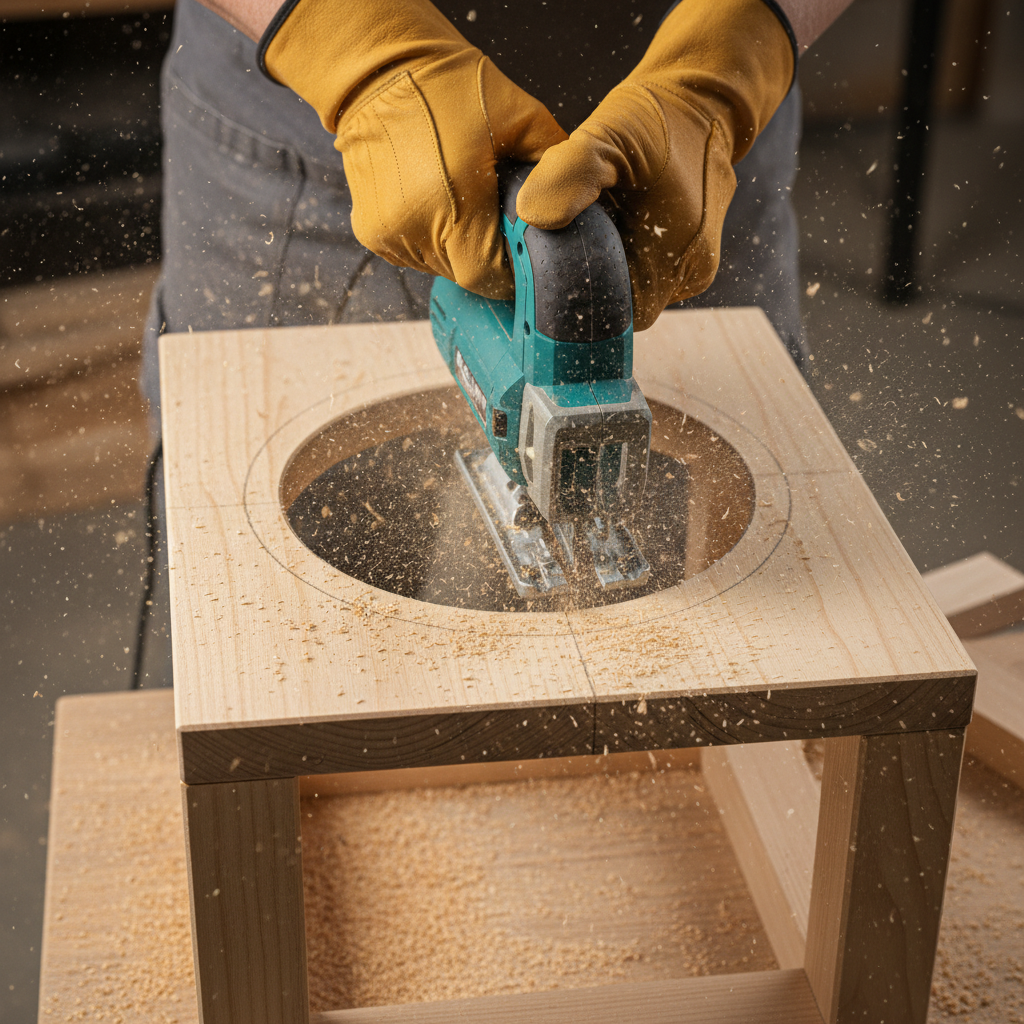
Trace and Cut the Bowl Hole(s)
Flip the stand upright. Place your dog’s food bowl upside down on the platform where you want it to sit. Trace around the rim with a pencil. Now, for the critical part.
Insider Secret: Do not cut on your traced line. The bowl will fall straight through. Instead, measure the width of the bowl’s lip (usually about 1/2 inch). Draw a second, smaller circle inside your first trace line. This inner circle is your cut line. It creates a ledge for the bowl’s lip to rest on securely.
Drill a starter hole just inside your cut line, large enough to fit your jigsaw blade. Carefully cut along the inner circle with your jigsaw. Sand the inner edge of the hole smooth.
-
Apply Pet-Safe Sealant
In a well-ventilated area, apply a generous coat of your chosen pet-safe, waterproof sealant to all surfaces of the stand. Pay special attention to the cut edges and the inside of the bowl hole, as these areas are most susceptible to water damage. Let it dry completely according to the manufacturer’s instructions, which may take 24-72 hours. Apply a second coat for maximum protection against the elements.
Deployment and Long-Term Maintenance Strategy
With your Ant Fortress built and cured, it’s time to deploy it. The setup is simple, but a few pro tips will ensure maximum effectiveness and longevity.
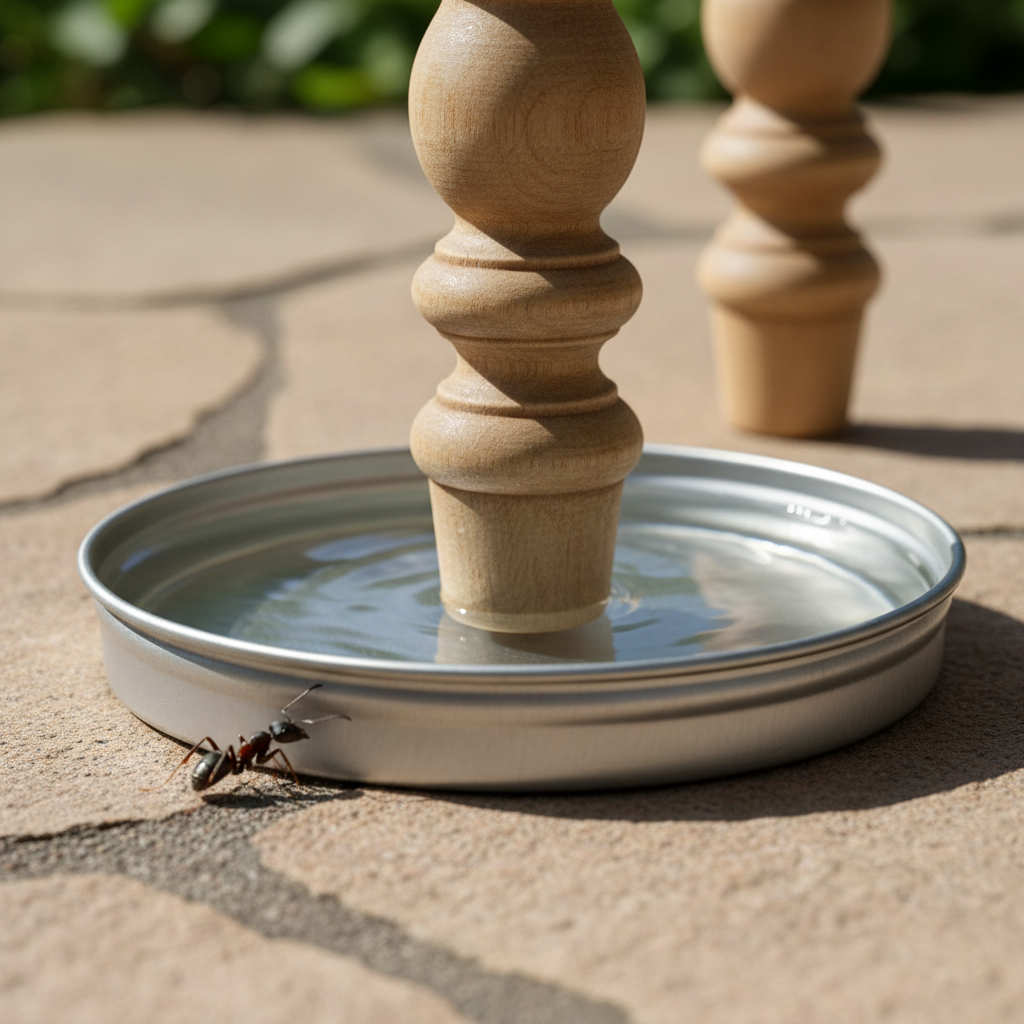
Initial Setup: Creating the Moats
- Choose a level spot on your patio, deck, or in your yard for the feeding station.
- Place your four small tins or ‘moat’ containers on the ground where the legs of the stand will go.
- Carefully place the stand with each leg centered inside one of the tins.
- Fill each tin with about a half-inch of water. Do not overfill. You only need enough to create an impassable barrier for ants.
- Place your dog’s bowls in the stand and fill with food and water. The system is now active.
Pro Maintenance Tips for a Pest-Free Zone:
- Clean the Moats Weekly: Stagnant water is a breeding ground for mosquitos and can get filled with debris. Once a week, dump the old water, wipe the tins clean, and refill. This simple step is critical.
- Annual Resealing: If the stand is kept outdoors year-round, inspect the finish annually before the summer season. If you see any signs of wear or cracking, lightly sand the surface and apply a fresh coat of pet-safe sealant to maintain its waterproof integrity.
- Keep the Surrounding Area Clean: Don’t invite pests to the party. Regularly sweep up spilled kibble and clean the bowls daily. A clean feeding station is less attractive to all types of pests.
Hacker Tip: Add a single drop of dish soap to each water moat. This breaks the surface tension of the water, so any insects that attempt to cross will sink immediately instead of potentially floating across. It’s a simple chemistry trick that adds another layer of security.
Conclusion
You have successfully engineered a solution to a persistent problem. You didn’t just buy a product; you identified a weakness in commercial offerings and built something superior, tougher, and perfectly suited to your dog’s needs. This DIY Ant-Proof Dog Bowl Stand is more than a project; it’s a testament to the hacker mindset of taking control, saving significant money, and providing the absolute best for your pet. Enjoy a summer of peaceful, ant-free outdoor feedings, knowing you built the perfect defense with your own two hands.