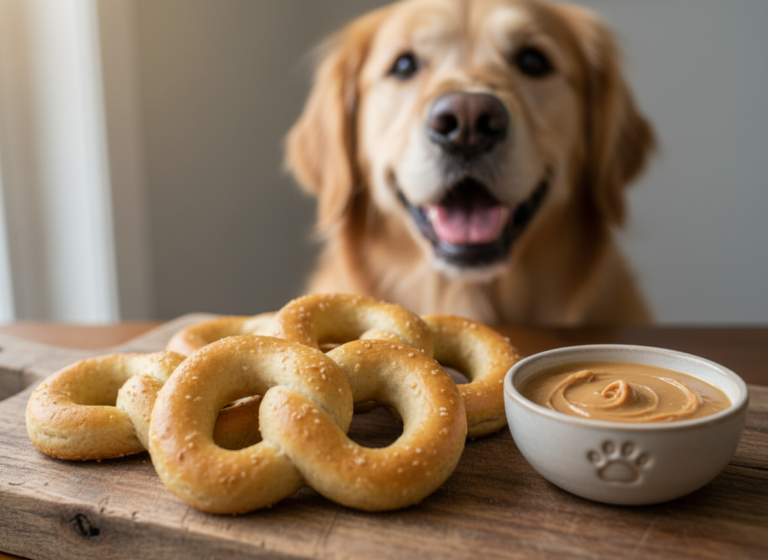
Paw-fect Pizza: Dog Friendly Crust Recipe Using Coconut Flour
You’re sitting down to enjoy a slice of pizza, and you see those eyes. That soulful, pleading stare that says, ‘Just one bite?’ We’ve all been there. But sharing your pizza is one of the worst nutritional mistakes you can make. Commercial pizza is a minefield of toxic ingredients for dogs: onions, garlic, excessive sodium, high-fat cheese, and processed meats. The dough itself, typically made from refined white flour, offers zero nutritional value and can trigger allergies in sensitive dogs.
This is where you, the savvy pet owner, hack the system. Forget the commercial junk and the dangerous table scraps. We’re going to build a better, safer, and more nutritious ‘pizza’ from the ground up. This isn’t just a treat; it’s a statement. It’s proof that you can provide your dog with exciting, delicious food without compromising their health. Our secret weapon is coconut flour—a grain-free powerhouse that transforms this treat into a high-fiber, low-carb snack. Get ready to fire up the oven and become your dog’s personal gourmet chef.
Before You Bake: A Critical Safety Disclaimer
A Canine Nutrition Hacker’s Mandatory Briefing
Let’s get one thing straight: I am a canine nutrition analyst, not a veterinarian. The information and recipe provided here are for supplemental feeding and should be considered a treat, not a meal replacement. A treat should never constitute more than 10% of your dog’s daily caloric intake. Before introducing any new food into your dog’s diet, especially if your dog has pre-existing health conditions like pancreatitis, diabetes, or food allergies, you must consult with your veterinarian. They can help you determine if these ingredients are appropriate for your specific dog’s needs. Every dog is an individual, and what works for one may not work for another. The safety and health of your animal is your number one responsibility. Proceed with informed caution.
Ingredient Forensics: Why Coconut Flour is a Superior Choice

Deconstructing the Dough: The Coconut Flour Advantage
The foundation of any pizza is the crust. In the world of commercial dog food and treats, the ‘crust’ is often a collection of cheap, inflammatory fillers. Ingredients like wheat, corn, and soy are common culprits for skin issues, digestive upset, and allergic reactions in many dogs. This is why we’re bypassing them entirely and using a nutritionally superior alternative: coconut flour.
What is Coconut Flour?
Coconut flour is made from dried, ground coconut meat. It’s a byproduct of coconut milk production and is a staple in grain-free and low-carb baking. But for our purposes, it’s a nutritional powerhouse for our dogs.
The Hacker’s Analysis: Benefits of Coconut Flour
- Grain-Free & Hypoallergenic: For dogs with sensitivities to grains like wheat or corn, coconut flour is an excellent, non-inflammatory alternative.
- High in Fiber: It contains significantly more fiber than traditional flour. This aids in digestive health, promotes regular bowel movements, and can help your dog feel fuller for longer, which is beneficial for weight management.
- Low in Carbohydrates & Sugar: Unlike starchy flours that can spike blood sugar, coconut flour is low on the glycemic index, making it a safer choice, particularly for dogs needing stable energy levels.
- Contains Healthy Fats: It provides a source of Medium-Chain Triglycerides (MCTs), which are fats that are more easily digested and converted into energy. Some studies suggest MCTs can support cognitive function, especially in senior dogs.
Insider Secret: Coconut flour is incredibly absorbent, acting like a sponge for liquids. This is its secret power and its biggest challenge. You will use far less coconut flour than you would wheat flour, and the dough will have a unique, dense texture. Do not try to substitute it 1:1 in other recipes; it requires a specific liquid-to-flour ratio to work correctly.
The Blueprint: Your Step-by-Step Coconut Flour Pizza Crust Recipe
The Official Canine Nutrition Hacker Recipe
This recipe is the result of rigorous testing to find the perfect balance of texture and taste for a discerning canine palate. Follow these instructions precisely. Remember, baking with coconut flour is a science.
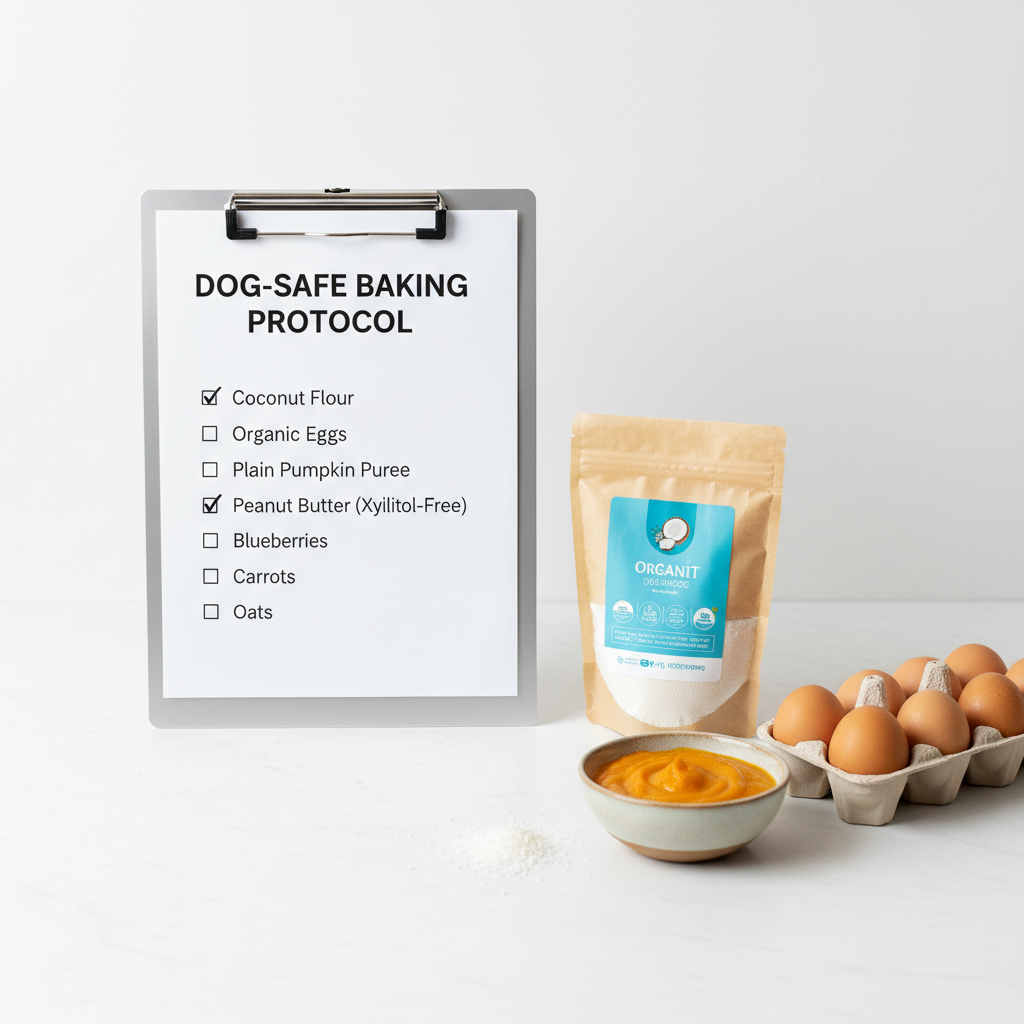
Crust Ingredients
- 1/2 cup Coconut Flour
- 4 large Eggs
- 1/4 cup Plain Pumpkin Puree (ensure it is 100% pumpkin, NOT pie filling)
- 1/4 cup Water or Low-Sodium Chicken Broth (no onion or garlic)
- 1 tablespoon Coconut Oil, melted
Step-by-Step Instructions
- Preheat & Prep: Preheat your oven to 350°F (175°C). Line a baking sheet with parchment paper. This is non-negotiable, as the dough can be sticky.
- Combine Wet Ingredients: In a medium-sized bowl, whisk together the 4 eggs, pumpkin puree, water/broth, and melted coconut oil until smooth and fully combined.
- Introduce Dry Ingredient: Add the 1/2 cup of coconut flour to the wet ingredients. Stir with a spatula until a thick, uniform dough forms. It will be denser and stickier than traditional pizza dough. Let the dough sit for 5 minutes to allow the coconut flour to fully absorb the liquid.
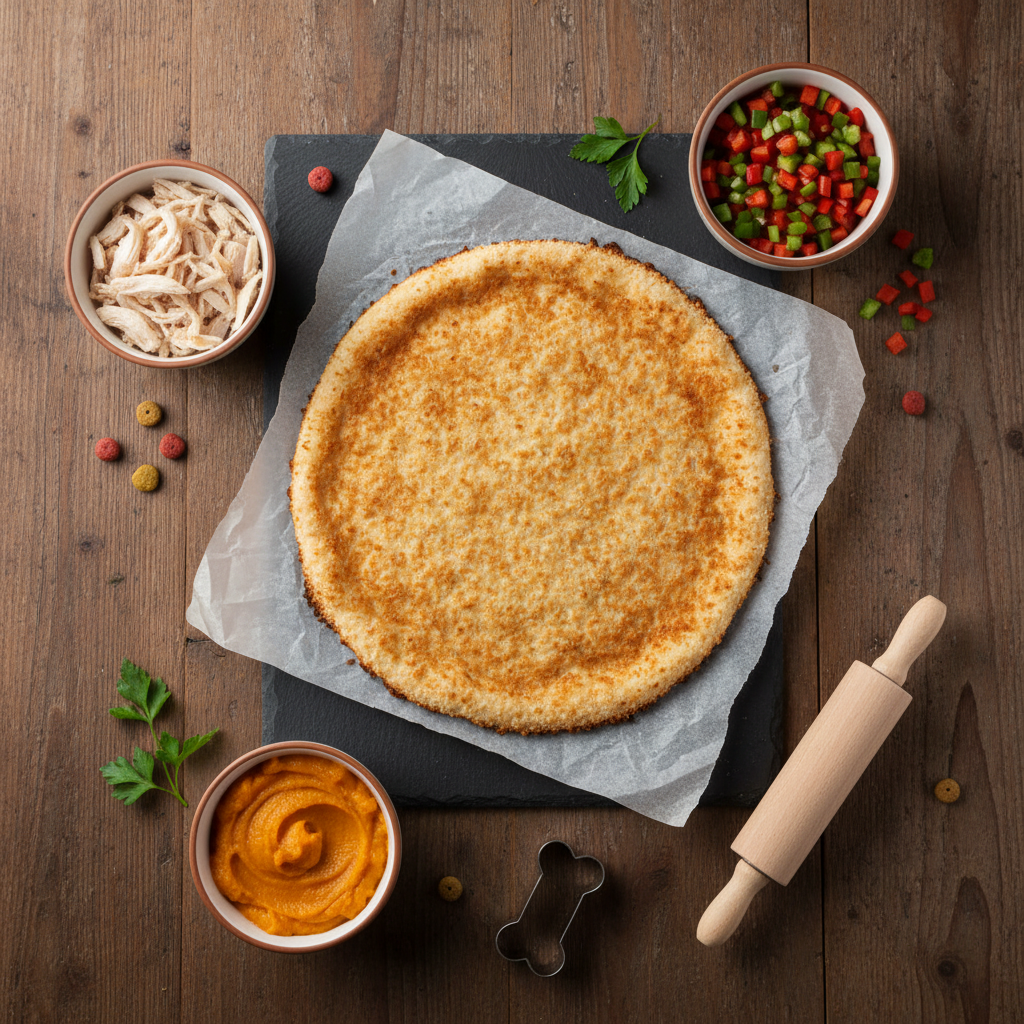
- Form the Crust: Scoop the dough onto the center of your parchment-lined baking sheet. Using your hands or a spatula dipped in water (to prevent sticking), press and shape the dough into a thin, round pizza crust, approximately 8-10 inches in diameter. Aim for about 1/4-inch thickness.
- Pre-Bake the Crust: Bake the crust for 15 minutes. The edges should be slightly golden and the center should feel firm to the touch. This pre-baking step is crucial for ensuring the crust is sturdy enough to hold toppings.
- Add Toppings & Final Bake: Remove the crust from the oven. Add your dog-safe sauce and toppings (see next section). Return the pizza to the oven and bake for an additional 5-7 minutes, or until the toppings are heated through.
- Cool Completely: This is the most important step for your dog’s safety. Let the pizza cool on a wire rack until it is completely at room temperature. Never serve hot food to your dog. Once cool, cut into small, bite-sized pieces appropriate for your dog’s size.
The Topping Strategy: Building a Safe & Delicious Pizza
Fortifying Your Creation: Approved Toppings Only
The toppings are where you can customize the pizza to your dog’s preferences, but it’s also where danger lies. Human pizza toppings are off-limits. Here is your approved arsenal.
Safe ‘Sauce’ Bases (Use a thin layer)
- Pumpkin Puree: Excellent for digestion. Use 100% pure pumpkin.
- Plain, Low-Fat Yogurt: A good source of probiotics. Ensure it contains no artificial sweeteners like xylitol.
- Mashed Sweet Potato: A beta-carotene-rich alternative.
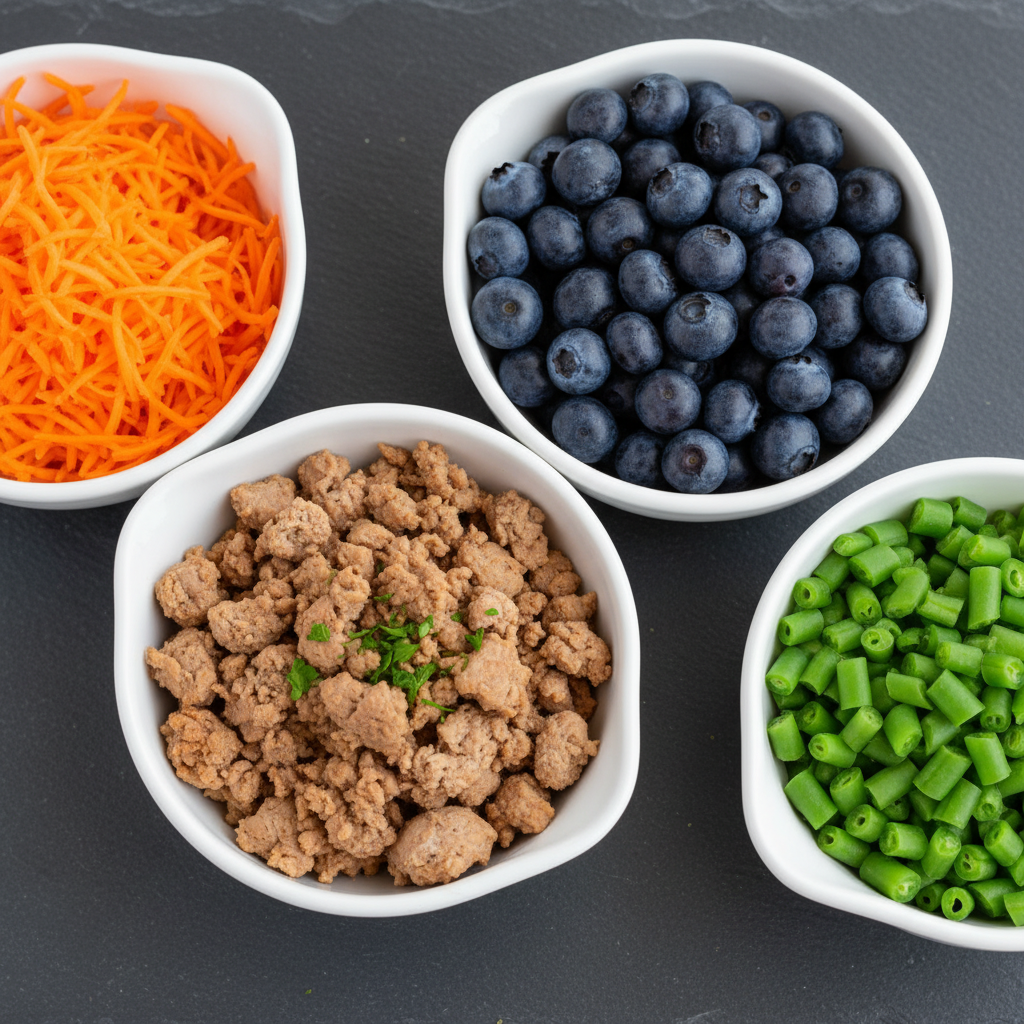
Approved Protein Toppings (Cooked & Unseasoned)
- Shredded Chicken Breast
- Lean Ground Turkey or Beef (drained of all fat)
- Cooked Salmon (excellent source of Omega-3s)
- A single, cooked egg, crumbled
Nutrient-Dense Veggies & Fruits (Use in moderation)
- Shredded Carrots
- Finely Diced Bell Peppers (red, yellow, or orange)
- Steamed and Mashed Green Beans or Peas
- A few Blueberries (a great source of antioxidants)
The ‘Cheese’ Component (Use Sparingly)
Most dogs are lactose intolerant to some degree. If you must add cheese, use a very small amount of a low-lactose option like mozzarella or a sprinkle of nutritional yeast for a cheesy flavor without the dairy.
DANGER ZONE: ABSOLUTELY NO-GO TOPPINGS
This is a non-negotiable list of toxic ingredients. Under no circumstances should these ever be on your dog’s pizza.
- Onions & Garlic: Highly toxic, can damage red blood cells.
- Grapes & Raisins: Can cause acute kidney failure.
- Mushrooms: Many varieties are toxic. It’s safer to avoid them all.
- Avocado: Contains persin, which can be toxic to dogs.
- Processed Meats: Pepperoni, sausage, and bacon are extremely high in sodium and fat, which can lead to pancreatitis.
- Xylitol: A sugar substitute found in some sauces (like ketchup) that is extremely lethal to dogs.
Economics & Logistics: Cost Breakdown & Batching
Cost vs. Convenience: The DIY Pizza Breakdown
One of the core tenets of the Canine Nutrition Hacker is that premium nutrition doesn’t have to carry a premium price tag. High-end ‘gourmet’ dog treats can cost a fortune for what often amounts to cleverly marketed, mediocre ingredients. Let’s break down the real cost.
| Item | Cost of DIY Dog Pizza (Approx.) | Cost of Premium ‘Gourmet’ Store-Bought Treat (Single) |
|---|---|---|
| Primary Ingredient | Coconut Flour, Eggs | Proprietary Flour Blend, Glycerin, Natural Flavors |
| Protein Source | Real Chicken Breast or Lean Beef | Chicken Meal or Hydrolyzed Protein |
| Control Over Ingredients | 100% Control – No Fillers, No Allergens | Zero Control – Hidden Sugars, Salt, Preservatives |
| Cost Per Treat (1 Pizza) | ~$2.50 – $3.50 | ~$4.00 – $7.00 |
| Verdict | Vastly superior nutrition and ingredient quality for a significantly lower cost. | Overpriced for the quality. You pay for marketing and convenience, not superior nutrition. |
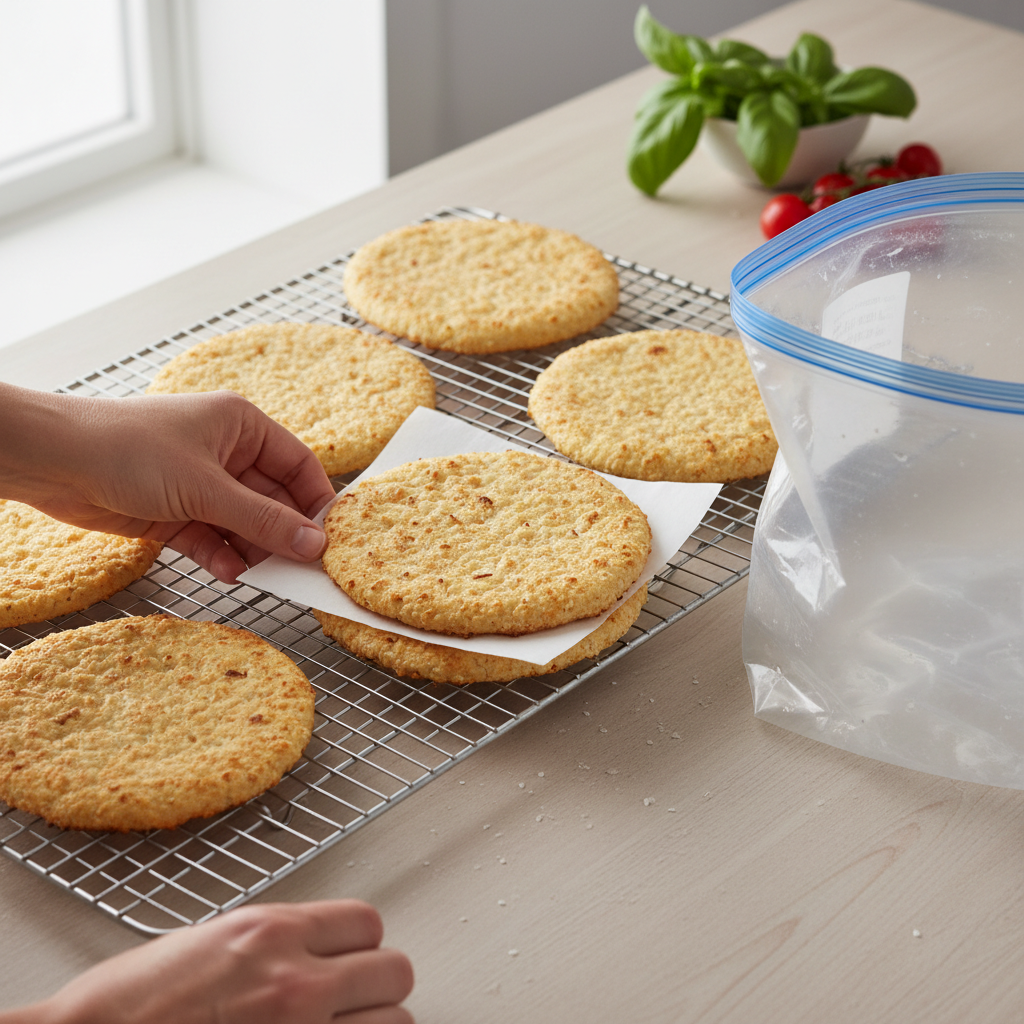
Batch Cooking & Storage: The Hacker’s Efficiency Tip
Your time is valuable. Don’t just make one pizza. Use this recipe to batch-prepare crusts for future use. It’s the most efficient way to provide high-quality treats on demand.
- Method 1 (Freezing Uncooked Dough): Prepare the dough as directed. Form it into individual crust-sized discs, separate them with sheets of wax paper, and place them in a freezer-safe bag or container. They can be frozen for up to 3 months. To use, thaw in the refrigerator overnight, then bake as directed.
- Method 2 (Freezing Pre-Baked Crusts): This is my preferred method. Pre-bake the crusts for the initial 15 minutes. Let them cool completely on a wire rack. Once cool, stack them with wax paper in between and freeze in a freezer-safe container. To use, simply pull one out, add your toppings, and bake from frozen for 10-12 minutes at 350°F (175°C). You have a near-instant gourmet treat ready to go.
Conclusion
You have now moved beyond the role of a mere pet owner and have become a proactive canine nutritionist. By creating this dog-friendly pizza, you’ve done more than just make a tasty snack. You’ve rejected the low-quality, high-cost commercial treat industry and taken direct control over the fuel you provide for your dog. You’ve vetted every ingredient, eliminated harmful additives, and tailored a treat specifically to your dog’s well-being.
Remember, this recipe is a template. Use the approved ingredients list to experiment with toppings your dog loves. Always serve this treat in moderation, as part of a balanced, species-appropriate diet. Continue to read labels, question ingredients, and challenge the status quo. That is the essence of being a Canine Nutrition Hacker.