Genius Edible Pupsicle Stick Ideas (No More Waste!)
Look at that frozen dog treat you bought from the store. You see the brightly colored, dog-friendly ‘ice cream,’ but what do I see? I see a plastic cup destined for a landfill and a flimsy wooden stick that could splinter. It’s waste. It’s inefficient. It’s a missed opportunity. As The Canine Nutrition Hacker, my philosophy is simple: every single component of your dog’s diet should serve a purpose. That includes the handle on their favorite frozen treat.
Forget the waste. We’re about to upgrade your dog’s summer snack game by engineering a better pupsicle—one that’s 100% edible, packed with nutrients from base to stick, and designed to provide a safe, satisfying chew. This isn’t just about making a cute snack; it’s about taking control, eliminating junk, and turning treat time into a powerful nutritional moment.
SAFETY DISCLAIMER: Before we begin, let’s be clear. I am a canine nutrition analyst, not a veterinarian. The recipes and ideas here are for healthy, adult dogs. If your dog has allergies, diabetes, pancreatitis, or any other health condition, you must consult your veterinarian before introducing new foods. Always know your dog’s specific dietary needs and introduce new ingredients one at a time to monitor for any adverse reactions.
The Foundation: Choosing Your Pupsicle Base
The stick gets the glory, but the base is the delivery system for flavor and nutrition. A poorly chosen base is a slurry of sugar and water. A hacker’s base is a functional powerhouse. Forget plain ice; we’re using ingredients that cool your dog down while supporting their health.
Broth-Based Brilliance
Bone broth is liquid gold for dogs. It’s rich in collagen for joint health, glycine for liver detoxification, and it’s incredibly hydrating. It’s the perfect savory foundation for a pupsicle.
- What to use: Unsalted or low-sodium beef, chicken, or turkey bone broth. You can make it yourself or buy a high-quality, canine-specific brand.
- The Hacker’s Method: Slowly simmer bones with a splash of apple cider vinegar for 12-24 hours to extract the maximum amount of nutrients. Strain and cool before using.
- Warning: Never use conventional human broths or stocks. They are loaded with sodium, onions, and garlic, which are toxic to dogs.
Yogurt & Kefir Creations
For a creamy, probiotic-packed treat, plain yogurt or kefir is unparalleled. Probiotics are the beneficial bacteria that support a healthy gut microbiome, which is the cornerstone of your dog’s immune system.
- What to use: Plain, unsweetened Greek yogurt or kefir. Greek yogurt is thicker and higher in protein.
- Key Benefit: The live cultures can aid in digestion and are perfect for dogs with minor tummy troubles.
- The Rule: Absolutely no xylitol or other artificial sweeteners. Read the label like a forensic document. Only ‘pasteurized milk’ and ‘live active cultures’ should be on the ingredient list.
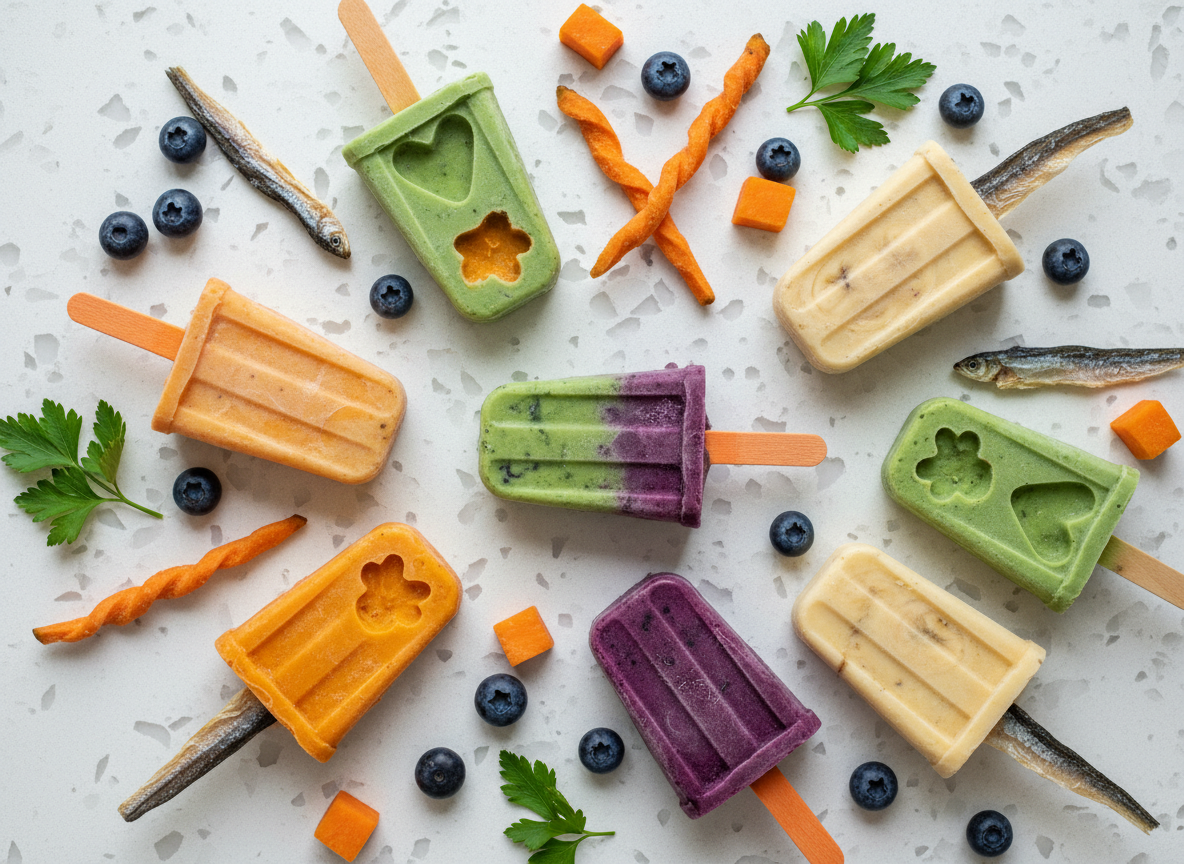
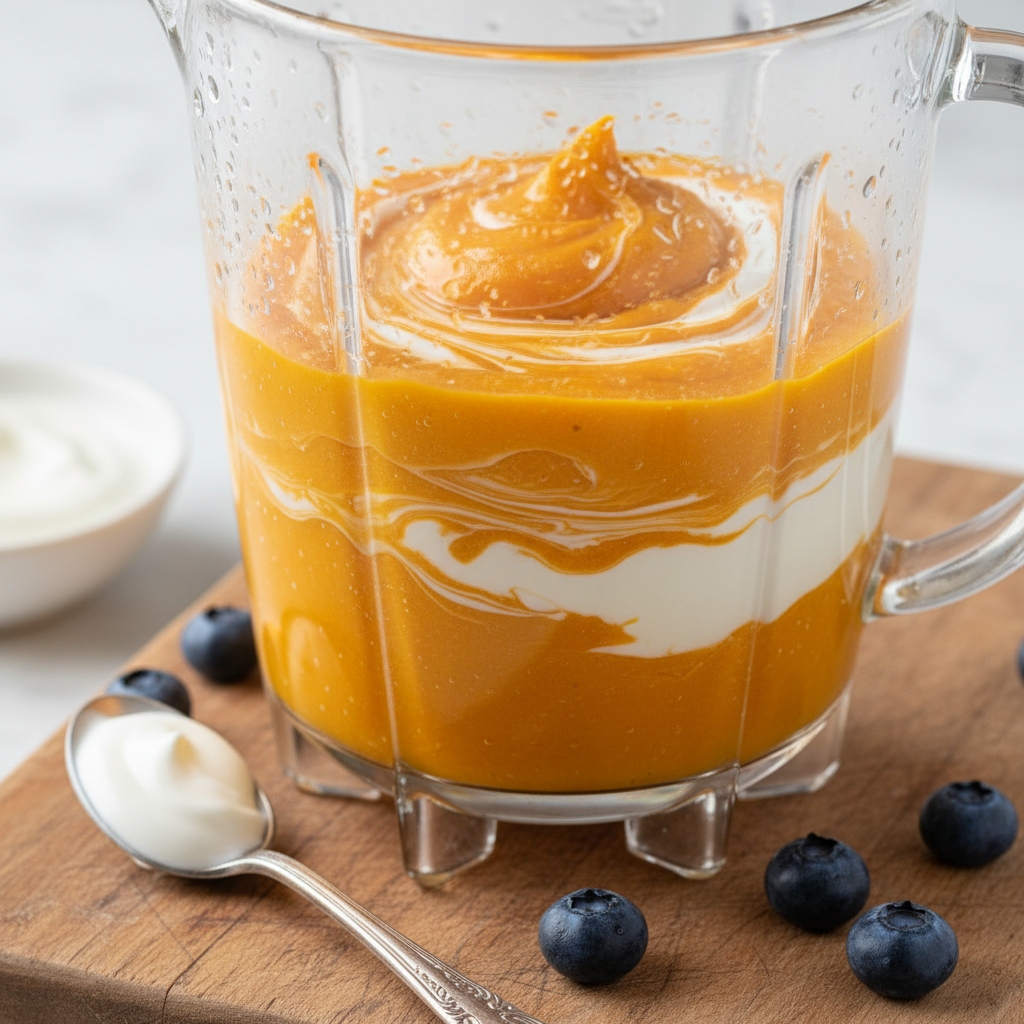
Fruit & Veggie Purées
This is where you can customize the pupsicle to your dog’s taste and nutritional needs. Blending dog-safe fruits and vegetables creates a vitamin-rich, flavorful base.
- Hero Ingredients: Pumpkin purée (100% pure pumpkin, not pie filling) for digestion, blueberries for antioxidants, bananas for potassium, and pureed carrots for beta-carotene.
- Ingredients to Avoid: Grapes, raisins, onions, garlic, macadamia nuts, and anything with added sugar or sweeteners.
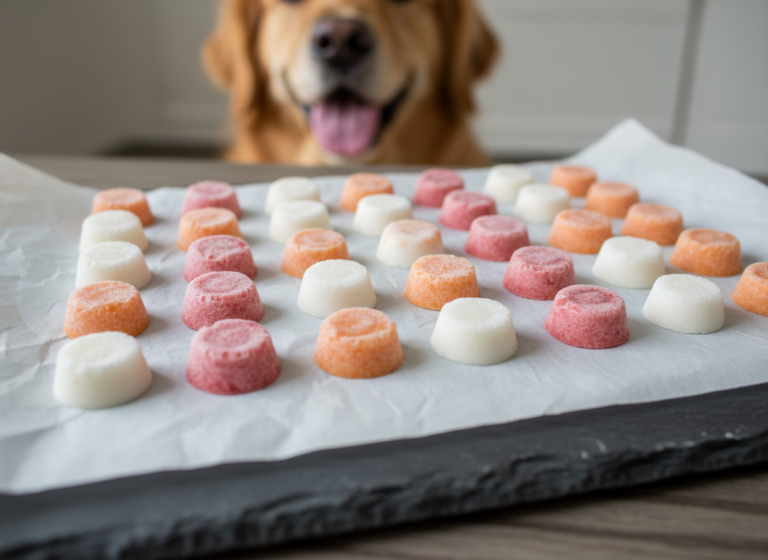
Hacker Tip: Use silicone molds instead of plastic trays. They are far superior for easy release. Molds designed for baby food or large ice cubes are perfect. A quick dip in warm water for 5 seconds will make the pupsicle slide right out.
The Main Event: Crafting Simple & Sturdy Edible Sticks
This is where we eliminate waste and add a second layer of enrichment. The ideal edible stick is firm enough to be frozen into the base, durable enough to hold up to licking, and provides a satisfying final chew once the frozen part is gone.
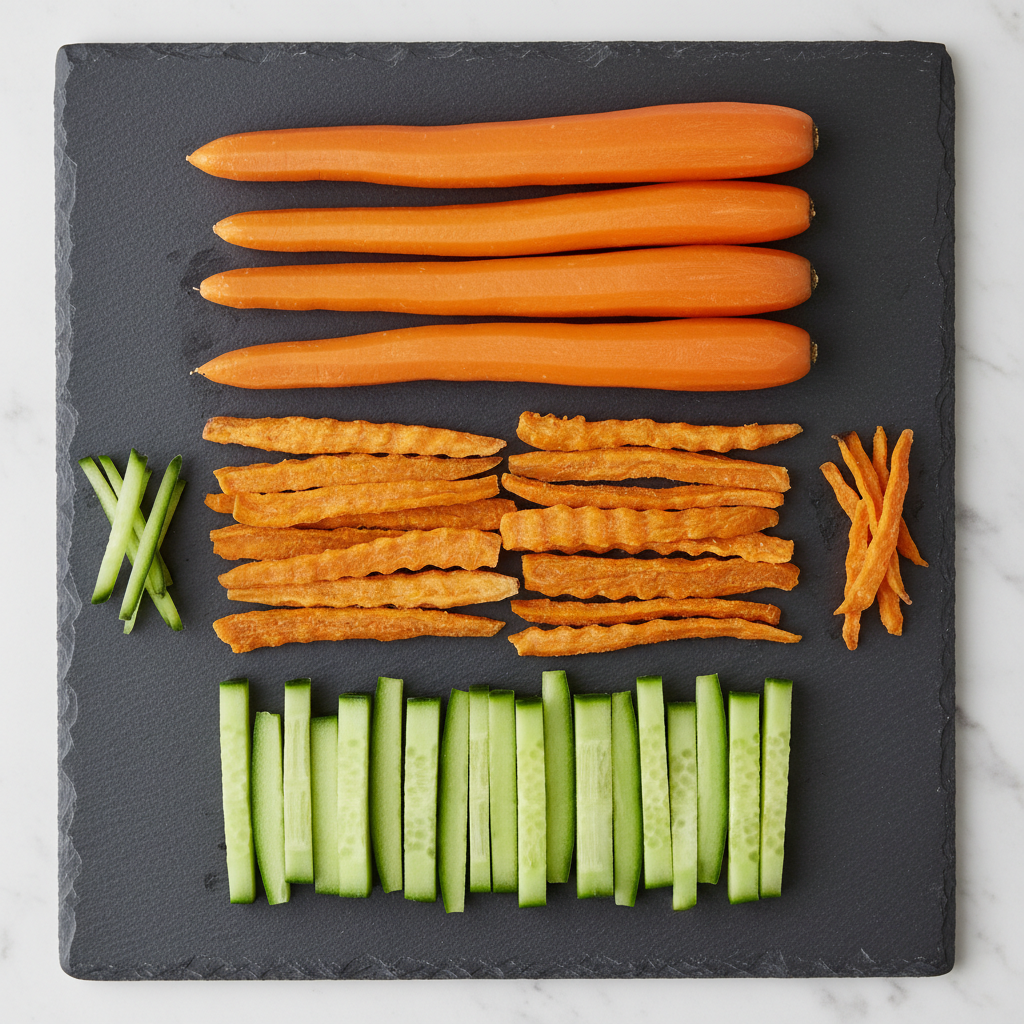
The Classic Carrot Stick
Simple. Effective. Inexpensive. A whole, peeled carrot is the perfect entry-level edible stick. It’s packed with Vitamin A and fiber, and the crunchy texture helps clean teeth.
- Selection: Choose a medium-to-large carrot that is thick enough to not snap easily.
- Prep: Peel it, cut off the ends, and ensure it’s long enough to act as a handle. For smaller dogs, you can use baby carrots.
- Best For: Any pupsicle base. It’s a versatile, all-around winner.
The Dehydrated Sweet Potato Chew
This is a significant upgrade in durability. Dehydrating slices of sweet potato turns them into a tough, chewy, jerky-like stick that dogs find irresistible. They are a fantastic source of dietary fiber and vitamins.
- Wash and slice a sweet potato lengthwise into 1/4-inch thick planks.
- Place the slices on a dehydrator tray without overlapping.
- Dehydrate at 135°F (57°C) for 8-12 hours, or until they are tough and leathery, but not brittle.
- No Dehydrator? You can use your oven on its lowest temperature setting with the door propped open slightly. It takes longer and requires more monitoring, but it works.
The Cucumber Spear
For a hydrating, ultra-low-calorie option, a thick spear of cucumber is an excellent choice. It’s perfect for dogs on a diet or for a refreshing treat on a particularly hot day.
- Prep: Use a thick-skinned cucumber like an English cucumber. Cut it into long, thick spears. The skin adds a bit of durability.
- Benefit: Cucumbers are over 95% water, making them exceptionally good for hydration.
Advanced Pupsicle Stick Engineering: For the Dedicated Owner

Ready to take it to the next level? These sticks are for the true hacker looking to maximize nutritional value and create a high-value, long-lasting experience for their dog. These require more effort but deliver superior results.
The Dehydrated Meat Jerky Stick
This is the ultimate high-protein stick. Using lean ground meat, you can create dense, durable jerky sticks that will drive your dog wild. This is pure, single-ingredient protein without the fillers found in commercial jerky.
- Choose your protein: Use 93% or 99% lean ground turkey, chicken, or beef.
- Form the sticks: A jerky gun is the easiest tool. If you don’t have one, place the ground meat between two sheets of parchment paper and use a rolling pin to flatten it into a 1/4-inch thick sheet. Cut it into strips.
- Dehydrate: Place strips on a dehydrator tray and dehydrate at 160°F (71°C) for 4-8 hours, or until dry and tough.
The Dried Fish Skin Roll
For a massive boost of Omega-3 fatty acids, which are critical for skin, coat, and joint health, nothing beats fish. Rolled and dried fish skins are commercially available and make for a phenomenal, albeit pungent, pupsicle stick.
- Source: Look for single-ingredient fish skins from reputable brands, often sold as ‘fish chews’ or ‘cod skins.’
- Benefit: These are pure canine superfoods. The powerful scent is also highly stimulating for a dog’s senses.
- Warning: Your freezer may smell like a fish market, but your dog’s coat will look amazing.
The ‘Bully Stick Stub’ Hack
Every owner of a power chewer knows the danger of the last two inches of a bully stick—it’s a major choking hazard. Don’t throw it away. Repurpose it.
Insider Secret: When a bully stick gets too small to be chewed safely, take it away and save it. Collect these stubs in a bag in your freezer. When you make pupsicles, use the stub as the ‘stick.’ The dog has to work through the entire frozen treat to get to their high-value prize, and because it’s embedded in ice, they are forced to chew it more slowly and safely once they reach it. This is the ultimate zero-waste, high-enrichment hack.
Cost Analysis: The True Price of a Zero-Waste Treat
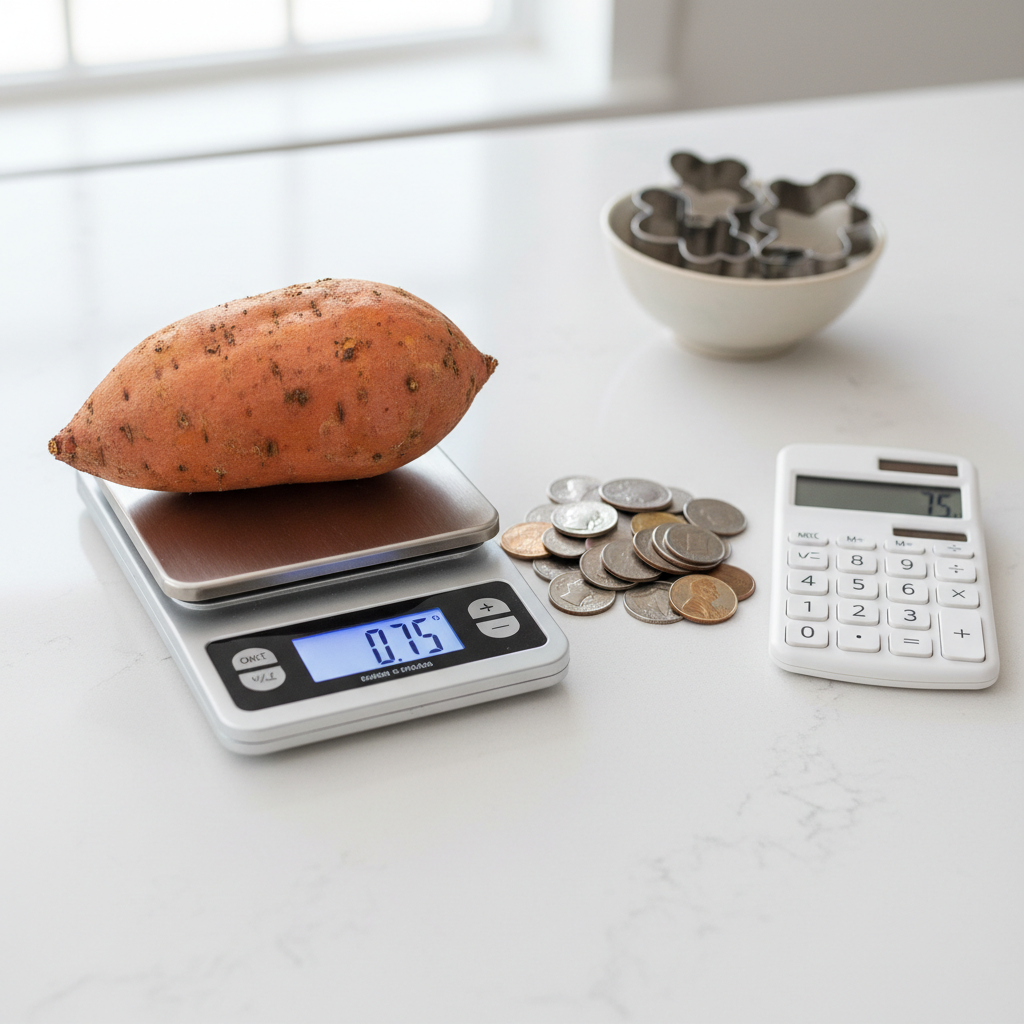
Commercial ‘dog ice creams’ are a triumph of marketing over substance. They are often sold in tiny, single-serving plastic cups for exorbitant prices, and their ingredient lists can be questionable. Hacking your own pupsicles isn’t just about better nutrition; it’s a strategic move to save significant money. Let’s break down the real cost.
While there’s an upfront investment in ingredients and a small amount of electricity if using a dehydrator, the per-treat cost plummets when you buy ingredients in bulk. A single large carrot costs pennies. A tub of plain yogurt can make a dozen pupsicles. The value proposition is undeniable.
| Treat Type | Average Cost Per Treat | Key Ingredients | Waste Factor | The Hacker’s Verdict |
|---|---|---|---|---|
| DIY Carrot/Yogurt Pupsicle | $0.25 | Plain Yogurt, Whole Carrot | Zero. The carrot peel can be composted. | Nutritionally superior and economically brilliant. The clear winner. |
| Store-Bought Frozen Yogurt Cup | $2.50 – $4.00 | Water, Fructose, Maltodextrin, Whey Protein | High. Single-use plastic cup and lid. | Overpriced sugar water. A classic case of paying for packaging, not product. Avoid. |
| DIY Sweet Potato/Broth Pupsicle | $0.55 | Low-Sodium Bone Broth, Sweet Potato | Zero. Sweet potato skins are edible or compostable. | Excellent value for a long-lasting, nutrient-dense chew and treat combination. |
| Store-Bought ‘Novelty’ Pupsicle | $3.00+ | Rice Flour, Tapioca Starch, Pea Protein, Artificial Flavoring | High. Plastic wrapper and wooden stick. | A collection of cheap fillers and starches designed to look cute. Zero functional value. |
The Hacker’s Guide to Pupsicle Prep & Storage
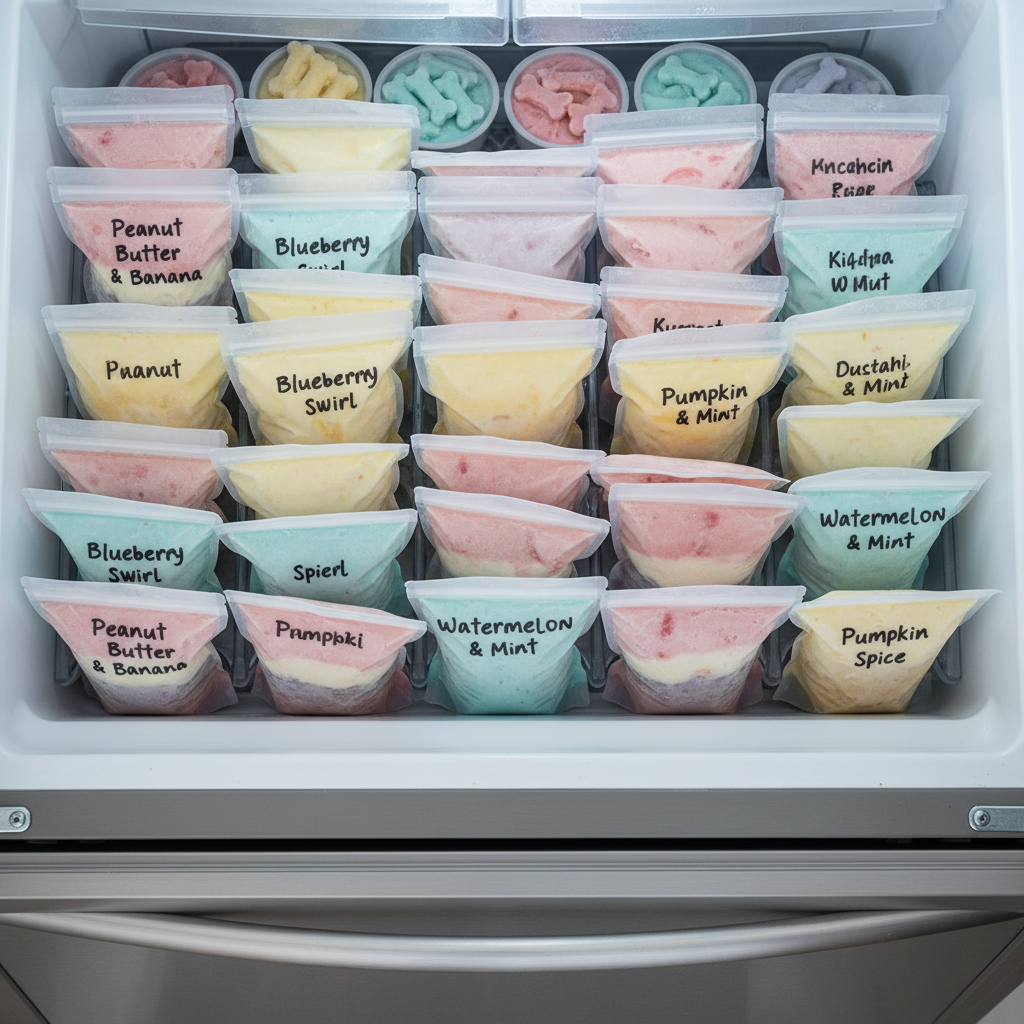
Efficiency is key. You’re not going to make a single pupsicle every day. The smart move is to batch-prep a month’s worth of treats in one session. This saves time, reduces cleanup, and ensures you always have a healthy, frozen treat ready to go.
Batching for Success
Dedicate one afternoon. Make your purées and broths, prep your edible sticks (carrots, cucumbers), and get your dehydrated items (sweet potato, jerky) ready. Set up an assembly line: fill your molds, insert your sticks, and place them in the freezer on a level baking sheet to catch any drips and ensure they freeze evenly.
Insider Secret: For extra durability, partially freeze your pupsicle base for 30-45 minutes *before* inserting the edible stick. This creates a slushy consistency that grips the stick and helps it set perfectly straight in the center.
Freezer Management & Storage Solutions
Once your pupsicles are frozen solid (give them at least 4-6 hours), the next step is crucial for long-term storage and preventing freezer burn.
- De-mold: Remove all the pupsicles from their molds. This frees up your molds to make another batch immediately.
- Store Smart: The best storage containers are reusable silicone freezer bags. They are pliable, seal tightly, and don’t take up as much rigid space as plastic containers.
- Label Everything: Use a permanent marker to label each bag with the date and the ingredients (e.g., ‘Pumpkin/Yogurt + Carrot Stick – 08/15’). This helps you rotate your stock and is critical if you have a dog with allergies and are experimenting with different bases.
Warning: These treats are made with real food, which means they can be messy as they melt. Supervise your dog and serve them outdoors, in a crate, or on an easily cleanable surface like a tile floor or a large lick mat to contain the drips.
Conclusion
You now have the blueprint to fundamentally change how you think about frozen treats. We’ve moved beyond the wasteful, nutritionally-void products on pet store shelves and into a realm of functional, purposeful, and cost-effective nutrition. By crafting 100% edible pupsicles, you are eliminating plastic waste, providing your dog with a superior source of vitamins and hydration, and adding a powerful layer of mental enrichment to their day.
This is the core philosophy of The Canine Nutrition Hacker: question everything, analyze the ingredients, and take control. Stop buying junk and start creating. Your dog’s health and your wallet will thank you for it.