How to Remove Biofilm (Pink Slime) From Dog Water Bowls
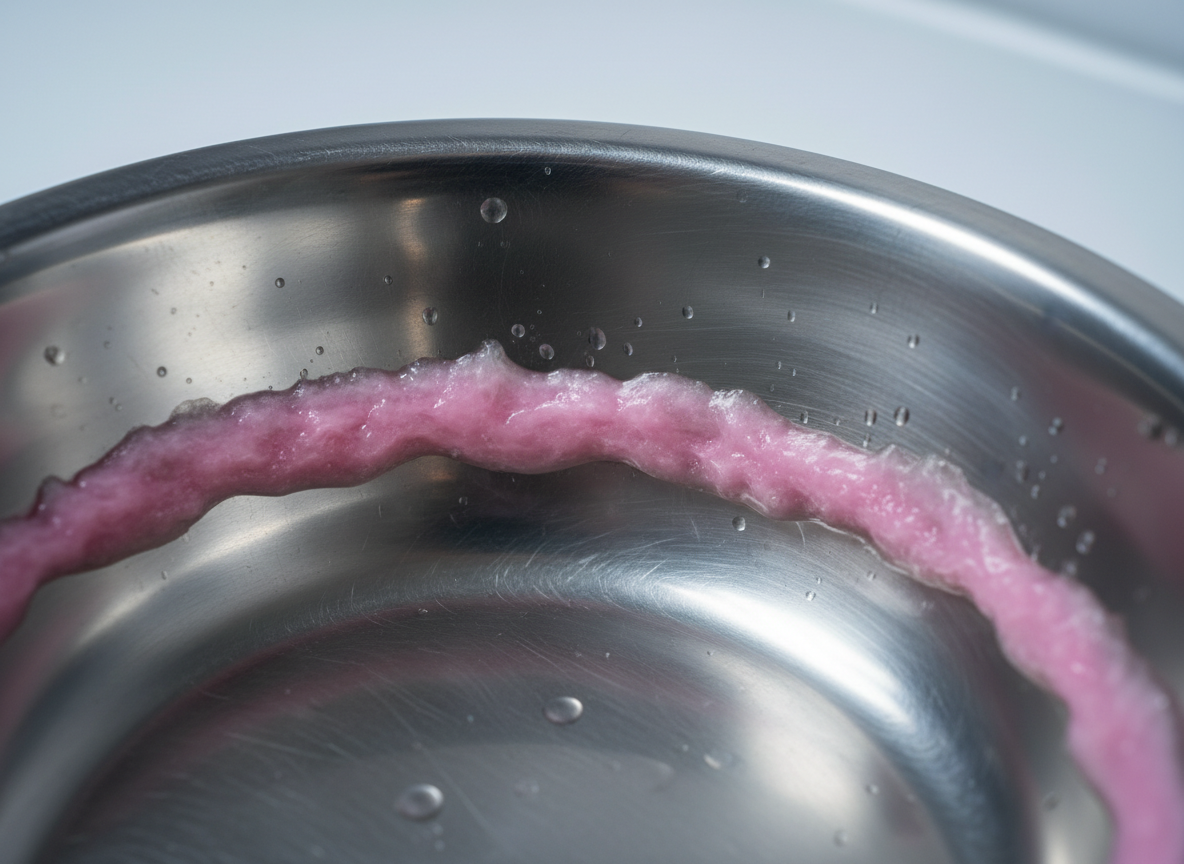
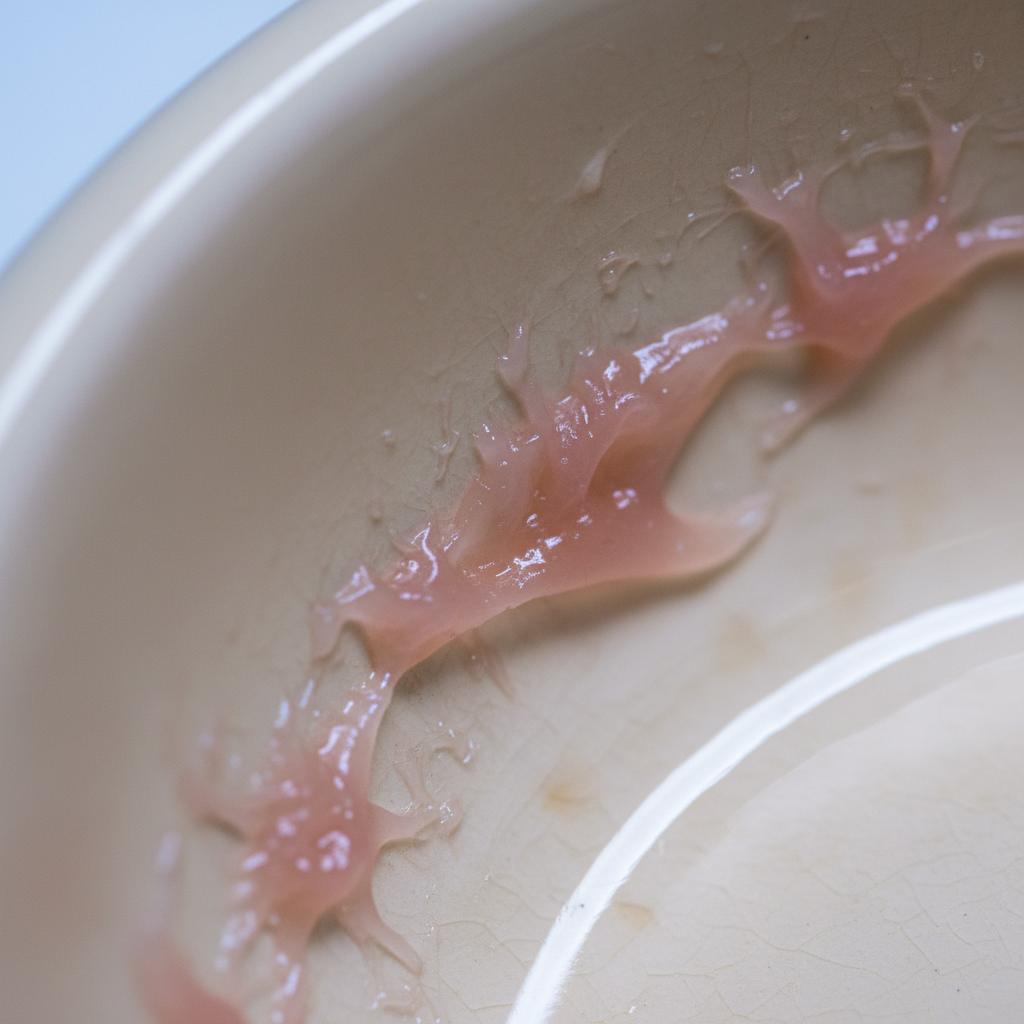
You see it at the waterline of your dog’s bowl: a faint, pinkish-orange ring. You might wipe it away, thinking it’s just food residue or mineral deposits from your tap water. This is a critical mistake. That ‘pink slime’ is not an innocent stain; it is a living, organized colony of bacteria known as biofilm. As The Canine Nutrition Hacker, my job is to expose hidden threats to your dog’s health, and this slimy menace is a significant one. It’s often caused by an airborne bacterium called Serratia marcescens, which thrives in the perpetually moist environment of a water dish. This biofilm can harbor a host of other opportunistic pathogens, potentially leading to gastrointestinal upset, urinary tract infections, and other health complications. A simple rinse does nothing to combat it. This guide provides the forensic analysis and a tactical, step-by-step protocol to permanently eradicate this threat and fortify your dog’s primary hydration source.
Deconstructing the Enemy: A Forensic Analysis of Biofilm
To defeat an enemy, you must first understand it. Biofilm isn’t just a collection of random bacteria; it’s a sophisticated, self-sustaining community. These microorganisms secrete a slimy, glue-like substance that allows them to adhere to surfaces—in this case, your dog’s water bowl. This matrix acts as a fortress, protecting the bacteria within from simple cleaning methods and even some disinfectants.
The Primary Culprit: Serratia marcescens
The characteristic pink or orange hue is a signature of Serratia marcescens. This bacterium is ubiquitous in our environment—found in soil, dust, and water. It travels through the air and lands in your dog’s bowl, where it finds the perfect conditions to multiply: a steady supply of water and trace nutrients from your dog’s saliva and backwash. Once established, it creates the foundational slime layer, inviting other, potentially more dangerous, bacteria like E. coli and Listeria to join the colony.
Insider Secret: Many pet owners mistake biofilm for ‘hard water scale’ or soap scum. They are fundamentally different. Scale is a mineral deposit and is inert. Biofilm is a living bacterial city that is actively growing and poses a direct biological risk to your pet every time they take a drink. Treating it as a simple stain is a dangerous oversight.
The protective matrix of the biofilm is what makes it so resilient. A quick wipe with a paper towel or a rinse under the tap only removes the outermost layer, leaving the base of the colony intact and ready to regrow, often within hours. Effective removal requires a two-pronged attack: physical destruction of the matrix followed by chemical disinfection of the underlying bacteria.
Your Arsenal: The Right Tools and ‘Hero Ingredients’ for Eradication

Forget fancy, overpriced pet store cleaners. The most effective weapons against biofilm are likely already in your kitchen. A successful eradication mission depends on using the right tools and agents to both physically and chemically break down the bacterial fortress. Do not attempt to simply use a dishcloth; you need dedicated equipment for this job to avoid cross-contamination.
Essential Tools & Agents:
- A Dedicated, Stiff-Bristled Brush: This is your primary weapon for physical abrasion. A dish sponge won’t do; its soft surface will glide right over the slime. You need bristles that can scour the surface and break apart the biofilm’s structure.
- Non-Toxic, Unscented Dish Soap: Acts as a surfactant, helping to lift and remove loosened grime and bacteria. Ensure it is thoroughly rinsed.
- White Vinegar: An acidic powerhouse. The acetic acid in vinegar is highly effective at dissolving mineral deposits that can anchor biofilm and works as a natural disinfectant to kill bacteria.
- Baking Soda: A mild abrasive. When made into a paste, it provides the grit needed to scrub away the slime without scratching most bowl surfaces (like stainless steel or ceramic).
Below is a tactical breakdown of your primary cleaning agents. You must understand their function to deploy them effectively.
| Cleaning Agent | Mechanism of Action | Safety Profile | Primary Use Case |
|---|---|---|---|
| White Vinegar | Acidic Disinfectant (Acetic Acid) | Pet-safe when thoroughly rinsed. | Disinfecting soak after scrubbing. Breaks down stubborn buildup. |
| Baking Soda | Mild Abrasive | Completely pet-safe. | Physical scrubbing paste to break the biofilm’s protective matrix. |
| Unscented Dish Soap | Surfactant | Pet-safe when thoroughly rinsed. Avoid scented versions which can deter dogs. | Final wash to remove all loosened residue and cleaning agents. |
CRITICAL WARNING: Never use harsh chemicals like bleach, ammonia-based cleaners, or other household disinfectants on pet bowls. Even trace amounts left after rinsing can be toxic to your dog.
The Eradication Protocol: A Step-by-Step Tactical Guide
Follow this protocol precisely. Sequence is critical for success. Skipping a step or changing the order will dramatically reduce the effectiveness of your efforts and allow the biofilm to regrow quickly.
- Step 1: Empty and Disassemble. Discard any remaining water. If your bowl has any removable parts or is part of a fountain, disassemble it completely. Put on your cleaning gloves.
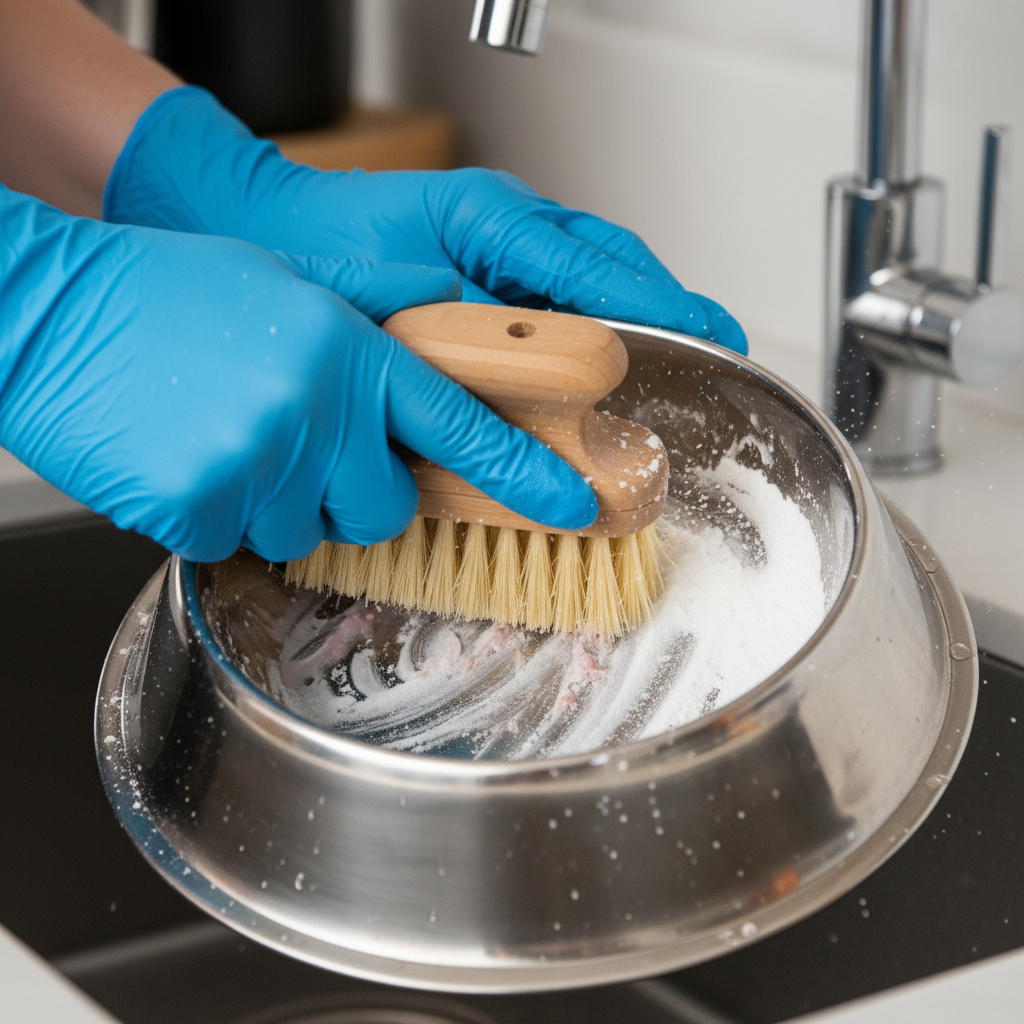
- Step 2: The Abrasive Assault. Do not wet the bowl first. Create a thick paste using baking soda and a small amount of water. Apply the paste to the inside of the bowl and use your stiff-bristled brush to scrub vigorously. Focus on the waterline, but cover every square inch of the interior surface. This physical scouring is the most critical step for destroying the biofilm’s protective layer.
- Step 3: The Disinfecting Soak. Once scrubbed, rinse the baking soda paste away. Place the bowl in a sink or basin and fill it with a solution of one part white vinegar to three parts hot water. Ensure the bowl is completely submerged. Let it soak for a minimum of 30 minutes. This allows the acetic acid to penetrate the now-weakened biofilm and kill the bacteria.
- Step 4: The Final Decontamination Wash. After the soak, drain the vinegar solution. Wash the bowl thoroughly with hot water and a small amount of unscented dish soap to remove any remaining vinegar residue and loosened particles.
- Step 5: The Critical Rinse. This step is non-negotiable. Rinse the bowl under warm running water for at least 30-60 seconds. You must remove every trace of soap and vinegar. Dogs have sensitive noses and any remaining scent can deter them from drinking.
- Step 6: Air Dry Completely. Use a clean, dedicated towel to dry the bowl, or better yet, let it air dry completely. Remember, Serratia marcescens thrives in moisture. A bone-dry bowl gives it no place to start a new colony.
Hacker Tip: The most common failure point is ineffective scrubbing. People are afraid to scratch their bowls. Don’t be. A few microscopic scratches on a stainless steel bowl are far less dangerous than a thriving bacterial colony. Apply significant pressure in Step 2. Your goal is to physically obliterate the slime structure before you even think about disinfecting.
Fortifying Your Defenses: A Proactive Prevention Strategy
Eradicating biofilm is only half the battle; preventing its return is the long-term mission. This requires a shift from reactive cleaning to a proactive strategy of water hygiene. Your goal is to create an environment where biofilm cannot establish a foothold.
1. Bowl Material is Mission-Critical
The single most important factor in preventing biofilm is the material of the bowl itself. Plastic is your worst enemy. It develops micro-scratches from daily use, creating microscopic crevices where bacteria can hide and flourish, safe from your brush. Your choice of bowl is your first line of defense.
| Bowl Material | Biofilm Resistance | Durability & Cleaning Ease | Hacker’s Verdict |
|---|---|---|---|
| Stainless Steel | Excellent | Excellent. Non-porous and can withstand aggressive scrubbing and high-temperature sanitizing. | The Gold Standard. The non-porous surface offers no place for bacteria to hide. Worth the investment. |
| Ceramic (Glazed) | Good | Good, but inspect for cracks. A chip or crack in the glaze compromises its non-porous barrier. | A Strong Runner-Up. Ensure it has a lead-free, food-grade glaze. Discard immediately if chipped or cracked. |
| Plastic | Poor | Poor. Scratches easily, creating a haven for bacteria. Can degrade over time. | Avoid at all costs. No amount of cleaning can effectively sanitize a scratched plastic bowl. It is a perpetual biofilm factory. |
2. The Daily Wash Protocol
The protocol you just learned isn’t for weekly cleaning. The scrubbing and washing part (Steps 2, 4, 5, 6) must be done every single day. The vinegar soak can be reserved for a weekly deep-clean or whenever you see slime starting to form. Daily washing prevents the initial bacterial settlers from ever forming a protected colony.
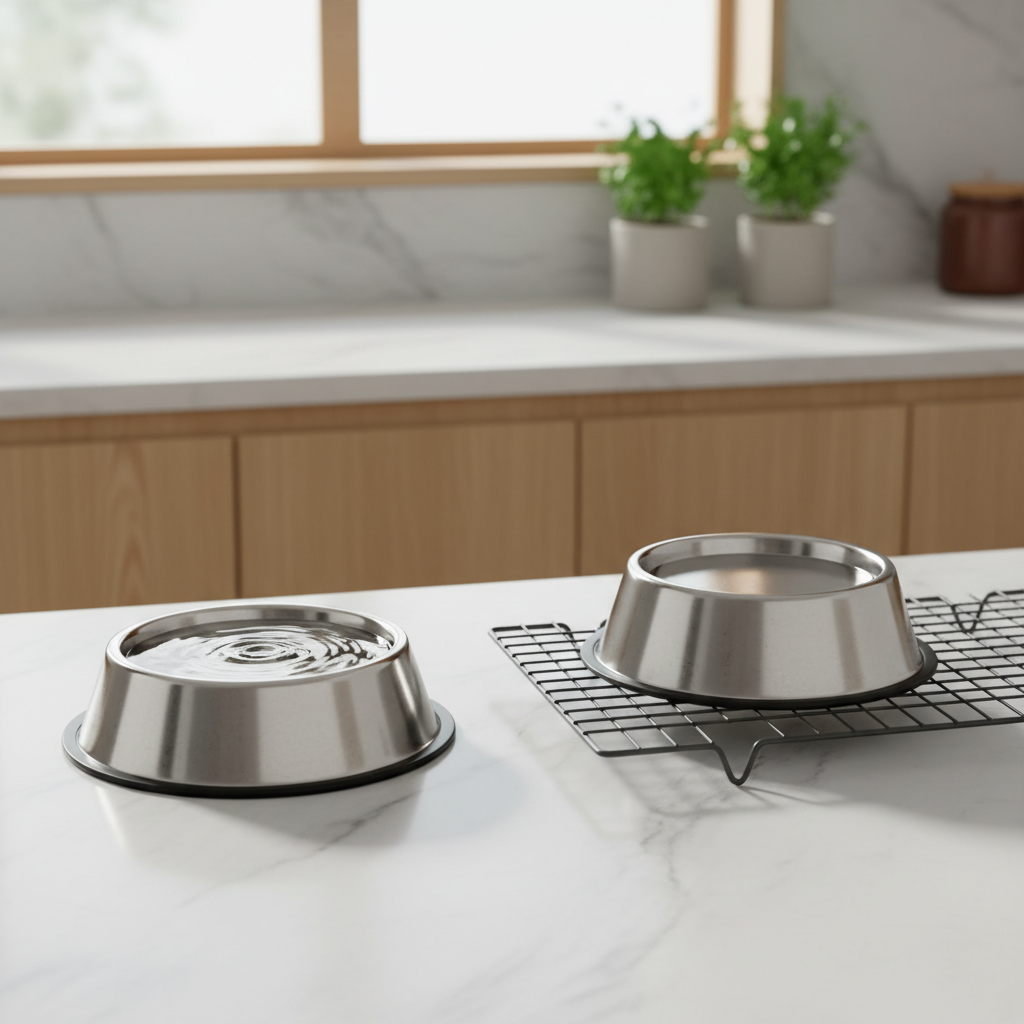
3. Implement a Two-Bowl Rotation
The ultimate hacker strategy is to have at least two identical stainless steel bowls for your dog. Use one bowl for 24 hours. At the end of the day, put it in the dishwasher (if dishwasher-safe) or hand-wash it using the protocol. While it’s being cleaned and is drying completely, you can put the second, already clean bowl into service. This rotation ensures your dog always has a perfectly clean, dry bowl, breaking the cycle of bacterial growth.
Conclusion
That pink ring in your dog’s water bowl is not a harmless stain to be wiped away; it is a visible indicator of a bacterial siege. It is a direct threat to your pet’s health. By understanding that biofilm is a living colony, you can now appreciate why a simple rinse is an act of surrender. You are now equipped with the knowledge and the tactical protocol to fight back effectively.
The solution is not found in expensive, chemical-laden products. It’s found in understanding the enemy and applying a consistent strategy of physical abrasion, natural disinfection, and uncompromising daily hygiene. Upgrading to a stainless steel bowl and implementing a daily wash protocol are the two most impactful changes you can make. This isn’t about being obsessive; it’s about being a responsible, informed pet owner who controls every variable affecting their dog’s well-being. You are the gatekeeper of your dog’s health, and that responsibility extends all the way to the bottom of their water bowl.
Disclaimer: This article is for informational purposes only and does not constitute veterinary medical advice. The information provided is not intended to be a substitute for professional veterinary advice, diagnosis, or treatment. If you have any concerns about your pet’s health, please consult with a licensed veterinarian.