DIY ‘Red Velvet’ Dog Treats Using Natural Beet Powder
Walk down any pet store aisle and you’ll be bombarded with a rainbow of colorful treats promising to make your dog happy. But have you ever stopped to question what makes those ‘cherry’ or ‘bacon’ flavored bites so vividly red? I’m The Canine Nutrition Hacker, and I’m here to tell you it’s often not what you think. The ingredient lists of popular commercial treats are a minefield of artificial colors like Red 40, chemical humectants, and low-grade fillers designed for shelf appeal, not canine health.
We’re conditioned to associate bright colors with flavor and quality, a psychological trick that manufacturers exploit to sell you overpriced junk. Today, we’re hacking the system. We’re ditching the chemicals and embracing a powerhouse of natural nutrition to create a treat that’s not only visually stunning but also genuinely beneficial for your dog: The ‘Red Velvet’ Dog Treat, colored and supercharged with natural beet powder. This isn’t just a recipe; it’s a statement. It’s you, the savvy pet owner, taking back control from corporate marketing and giving your dog something made with intelligence and care. Prepare to upgrade your treat game for good.
The Mandatory Safety Briefing: A Word from The Hacker

Before we dive into the kitchen, we need to establish the ground rules. My mission is to empower you with information, but safety is non-negotiable. This is the most critical part of any DIY guide, so read it carefully.
Disclaimer: I Am Not A Veterinarian
The information provided here is for educational purposes, based on extensive research and experience in canine nutrition analysis. It is not a substitute for professional veterinary advice. These treats are intended for intermittent or supplemental feeding only. They are not a balanced meal and should not replace your dog’s regular, nutritionally complete diet. Always consult with your veterinarian before introducing new foods into your dog’s diet, especially if your dog has underlying health conditions such as diabetes, kidney disease, or known allergies. Every dog is an individual, and what works for one may not be suitable for another.
On The Topic of Beets
Beet powder is generally very safe for dogs in moderation. However, there are two things to be aware of:
- Oxalates: Beets contain oxalates, which in very high quantities can contribute to the formation of calcium oxalate bladder stones in susceptible breeds. The amount in these treats is minimal and poses virtually no risk to a healthy dog, but it’s a crucial piece of information if your dog has a history of urinary issues. Again, consult your vet.
- Beeturia (The Pink Pee Phenomenon): Don’t be alarmed if you notice a pink or reddish tinge to your dog’s urine or feces after they’ve consumed these treats. This harmless phenomenon is called beeturia. It’s simply the unmetabolized pigments from the beets passing through the system and is no cause for concern.
Hacker Tip: When sourcing your beet powder, look for a product that is 100% pure beetroot, with no added sweeteners, anti-caking agents, or preservatives. The quality of your ingredients dictates the quality of the final product.
Deconstructing the ‘Red Velvet’ Lie: Artificial Dyes vs. Beetroot Power

The term ‘Red Velvet’ in the human world implies a specific flavor profile. In the dog treat world, it’s often just a marketing gimmick that means ‘we added red dye.’ Let’s dissect the difference between the industry standard and the hacker’s alternative.
The Enemy: Artificial Colors & Fillers
Pick up a bag of popular, brightly colored dog treats. Turn it over. In the first few lines, you’ll likely find some of these culprits:
- Artificial Colors (Red 40, Yellow 5, etc.): These are petroleum-based dyes linked to hyperactivity, allergic reactions, and other health concerns in both humans and sensitive pets. They serve zero nutritional purpose; they exist only to make the product more appealing to you, the buyer.
- Propylene Glycol: A controversial humectant used to keep semi-moist treats soft. While the FDA deems it ‘Generally Recognized As Safe’ (GRAS) for dogs, it is toxic to cats and is a chemical cousin to antifreeze. Why feed it to your dog when natural alternatives exist?
- Corn Syrup / Sugar: Cheap sweeteners that add empty calories and can contribute to weight gain, diabetes, and dental problems. Dogs are drawn to them, creating a ‘junk food’ addiction.
- Meat By-Products: An ambiguous term for what’s left of a slaughtered animal after the desirable parts are removed. It’s a low-quality, inconsistent protein source.
The Hero: 100% Natural Beet Powder
Now, let’s look at our secret weapon. Beet powder isn’t just a coloring agent; it’s a functional food that brings real benefits to the table:
- Natural Pigment: The vibrant red comes from compounds called betalains, which are powerful antioxidants.
- Dietary Nitrates: Beets are rich in nitrates, which the body converts to nitric oxide. This molecule helps improve blood flow and circulation, supporting cardiovascular health—a fantastic benefit for active and senior dogs alike.
- Vitamins & Minerals: Beet powder is a good source of Folate (Vitamin B9), Manganese, Potassium, Iron, and Vitamin C, all of which play vital roles in immune function and overall health.
- Anti-Inflammatory Properties: The antioxidants in beets can help combat oxidative stress and reduce inflammation in the body.
The choice is clear. One path offers empty calories and potential health risks disguised in a pretty color. The other offers genuine nutritional enhancement that makes your dog healthier from the inside out.
The Hacker’s Blueprint: The ‘Red Velvet’ Treat Recipe
This recipe is designed for simplicity, nutritional value, and control. Every ingredient serves a purpose. There is no filler here. This is a grain-free, nutrient-dense blueprint you can customize.
Ingredient Analysis (The ‘Why’ Behind The ‘What’)
- Oat Flour (2 cups): We’re using oat flour as our base. It’s a gluten-free option that’s high in fiber, supporting healthy digestion. You can easily make your own by blending rolled oats in a high-speed blender until fine.
- Organic Beet Powder (2-3 tablespoons): The star of the show. Use 2 tablespoons for a rich pink, and 3 for a deep ‘red velvet’ color. It provides color and a powerhouse of nutrients.
- Unsweetened Applesauce (1/2 cup): Acts as a natural sweetener and binder, replacing sugar or corn syrup. It also provides moisture and dietary fiber. Ensure it contains no xylitol, which is highly toxic to dogs.
- Egg (1 large): An excellent source of digestible protein, selenium, and riboflavin. The egg also works as a crucial binder to hold the dough together.
- Melted Coconut Oil (1/4 cup): A healthy fat that supports skin and coat health, improves digestion, and can even boost cognitive function.
Step-by-Step Instructions
- Preheat & Prep: Preheat your oven to 350°F (175°C). Line a large baking sheet with parchment paper for easy cleanup.
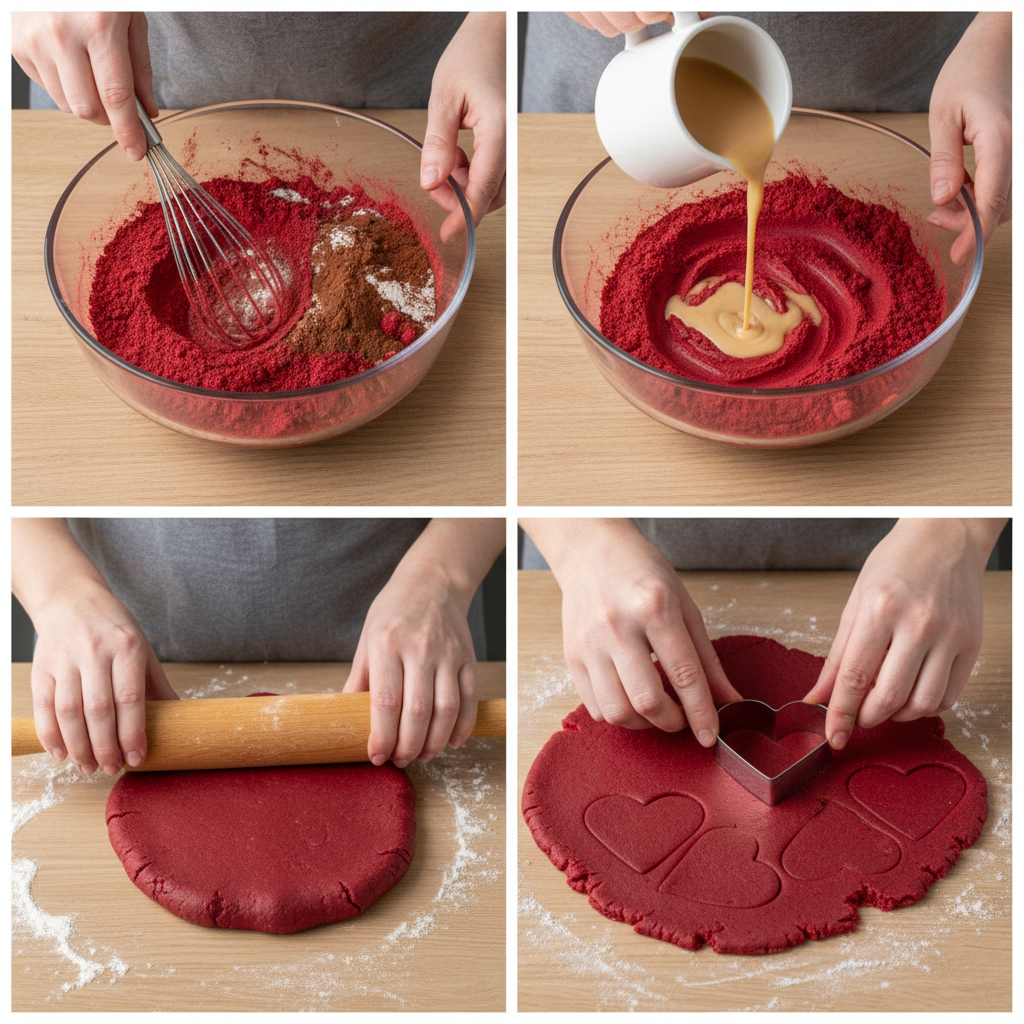
- Combine Dry Ingredients: In a large mixing bowl, whisk together the oat flour and beet powder until the color is uniform and there are no clumps.
- Combine Wet Ingredients: In a separate, smaller bowl, whisk the egg, then mix in the unsweetened applesauce and melted coconut oil until well combined.
- Mix Dough: Pour the wet ingredients into the bowl of dry ingredients. Mix with a spatula or wooden spoon until a thick, slightly sticky dough forms. If the dough is too dry, add a tablespoon of water at a time. If it’s too sticky, add a sprinkle of oat flour.
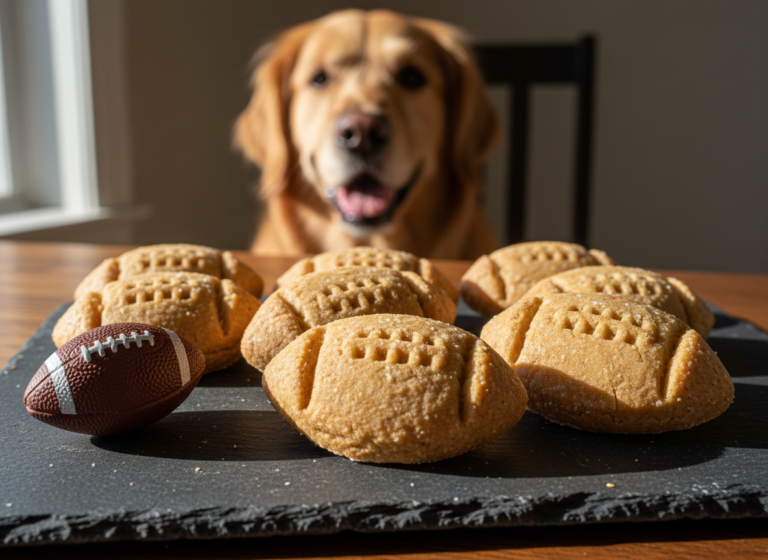
- Roll & Cut: Lightly dust your work surface and a rolling pin with oat flour. Turn the dough out and roll it to about 1/4-inch thickness. Use your favorite cookie cutters (heart shapes work great for the ‘red velvet’ theme) to cut out the treats.
- Bake: Place the cut-out treats on the prepared baking sheet. Bake for 20-25 minutes. For a crunchier treat, turn off the oven, crack the door open, and let them cool inside the oven for another hour.
- Cool Completely: Transfer the baked treats to a wire rack to cool completely before serving or storing. This is a critical step to prevent mold.
Insider Secret: The bake time determines the texture. A shorter bake time (around 20 minutes) will yield a slightly softer treat, while a longer bake time with the oven-off cooling method will create a very crunchy, biscuit-like treat that helps clean teeth.
The Cost Analysis: DIY Savings vs. Boutique Bribes
One of the biggest lies in the premium pet food industry is that high quality must come with an exorbitant price tag. By sourcing ingredients yourself, you cut out the marketing, packaging, and distribution costs, leading to massive savings without sacrificing quality. Let’s break down the numbers for a typical batch of our DIY treats versus a comparable ‘gourmet’ product.
This analysis assumes you’re buying ingredients in standard consumer sizes, not bulk. Your costs may be even lower if you buy in larger quantities.
| Component | DIY ‘Red Velvet’ Treats (Approx. Cost per Batch) | Premium Boutique ‘Berry’ Treats (Typical Cost) |
|---|---|---|
| Base Flour | Oat Flour (2 cups): $1.20 | Often a proprietary ‘grain-free blend’ |
| Color/Superfood | Beet Powder (3 tbsp): $0.75 | ‘Cranberry’, ‘Beet’ (minimal amount for label claim) |
| Binder/Moisture | Applesauce & Egg: $0.90 | Vegetable Glycerin, Cane Molasses |
| Healthy Fat | Coconut Oil (1/4 cup): $0.80 | Canola Oil or Sunflower Oil |
| Total Cost per Batch | ~ $3.65 | $12.99 – $16.99 per 8oz bag |
| Treats per Batch | Approx. 40-50 treats (depending on cutter size) | Approx. 30-40 treats |
| Cost per Treat | ~ $0.08 per treat | ~ $0.40 per treat |
| Verdict | Superior ingredients, complete cost control, and a savings of over 75% per treat. | High cost for often inferior ingredients, paying for marketing and brand name. |
The numbers don’t lie. For less than the price of a single fancy coffee, you can produce a large batch of high-quality, healthy treats. You’re not just saving money; you’re investing it directly into superior ingredients. You know exactly what’s in them, there are no hidden fillers, and the nutritional value is exponentially higher. This is the core principle of the Canine Nutrition Hacker: achieve premium results without paying the premium price.
Long-Term Storage & Batching: The Efficiency Hack

You’ve invested the time to make a superior product; now let’s make sure it lasts. Proper storage is essential to maintain freshness and prevent spoilage, as our treats contain no artificial preservatives. This is where you can work smarter, not harder, by batching.
The Golden Rule: Cool Completely
Before you even think about storage, the treats must be 100% cool and dry to the touch. Any residual warmth or moisture trapped in a container will create condensation, leading to mold in a matter of days. Be patient. Let them sit on a wire rack for several hours after baking.
Short-Term Storage (Up to 1 Week)
For treats you plan to use within a week, an airtight container is your best friend. A glass jar with a good seal or a high-quality plastic container will work perfectly. Store them on the counter or in the pantry, away from direct sunlight or heat. The crunchier you baked them, the longer they will last at room temperature.
Medium-Term Storage (Up to 2 Weeks)
If you want to extend their life a bit longer without freezing, store the airtight container in the refrigerator. This will help keep them fresh and crisp for up to two weeks.
Long-Term Storage: The Freezer is Your Ally (Up to 3 Months)
This is the ultimate efficiency hack. Why make one batch when you can make three or four with minimal extra effort? Freezing is the perfect way to preserve your hard work.
- Pre-Freeze (Flash Freeze): Arrange the completely cooled treats in a single layer on a baking sheet. Place the sheet in the freezer for 1-2 hours, or until the treats are frozen solid. This crucial step prevents them from sticking together in a giant clump.
- Package for Freezing: Once frozen, transfer the treats into a freezer-safe zip-top bag or a vacuum-seal bag. Squeeze out as much air as possible before sealing. Air is the enemy of frozen food and causes freezer burn.
- Label and Date: Always label the bag with the contents (‘Red Velvet Dog Treats’) and the date they were made. They will keep their best quality for up to 3 months in the freezer.
- Thawing: To serve, simply take out as many treats as you need and let them thaw on the counter for about 15-20 minutes. There’s no need to reheat them.
Hacker Tip: Create a ‘Treat Library’ in your freezer. Make different recipes on different weekends (e.g., pumpkin spice, peanut butter, sardine crisps) and freeze them in labeled bags. You’ll have a rotating variety of healthy, homemade options ready to go at a moment’s notice.
Conclusion
You’ve now moved beyond the role of a mere pet owner and into the realm of a proactive canine nutritionist. By creating these DIY ‘Red Velvet’ Dog Treats, you’ve done more than just bake; you’ve successfully hacked the system. You’ve bypassed the deceptive marketing, rejected the questionable ingredients, and refused to pay a premium for artificial junk. You’ve replaced it all with whole-food nutrition, transparent ingredients, and significant cost savings.
This recipe is a blueprint. Feel free to experiment by adding other dog-safe ingredients like a tablespoon of parsley for fresh breath or a sprinkle of ginger for digestion. The power is now in your hands. Every time you reach for one of these homemade treats instead of a commercial bag, you’re making a conscious choice for the health and longevity of your dog. That’s the ultimate goal, and the most rewarding part of being a Canine Nutrition Hacker.