How to Make Dehydrated Beef Kidney Dog Treats (Stink-Free Method)
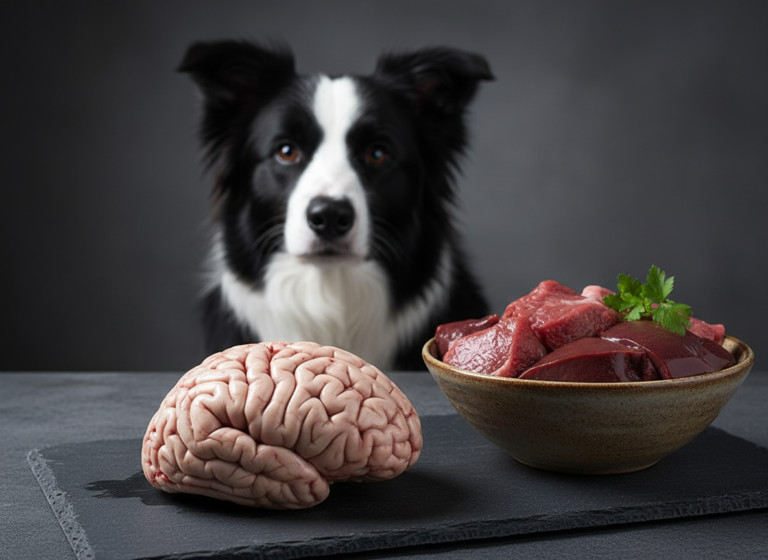
Walk down any pet store aisle and you’re bombarded with slick packaging and premium price tags for so-called ‘gourmet’ dog treats. A closer look at the label often reveals a laundry list of fillers, preservatives, and ingredients you can’t pronounce. As The Canine Nutrition Hacker, I’m here to tell you there’s a better way. It’s cheaper, healthier, and gives you 100% control over what goes into your dog’s body. The answer? Organ meats. Specifically, the nutritional powerhouse that is beef kidney.
Beef kidney is one of the most nutrient-dense and affordable proteins you can find. It’s a treasure trove of vitamins and minerals that support everything from your dog’s eyesight to their energy metabolism. But let’s address the elephant in the room: the smell. Many pet owners are deterred from preparing organ meats at home because of the potent, unpleasant odor. That ends today. This guide will not only walk you through the process of making irresistible, crispy beef kidney treats but will also reveal the critical, stink-free method that makes the entire process clean, simple, and odor-free. Prepare to hack your dog’s treat jar, save a significant amount of money, and provide a single-ingredient snack that puts commercial products to shame.
The Nutritional Case: Why Beef Kidney is a Canine Superfood

Before we get to the ‘how,’ let’s dissect the ‘why.’ Understanding the nutritional payload of beef kidney will solidify your decision to make it a staple treat. This isn’t just a random piece of meat; it’s a targeted nutritional supplement disguised as a high-value reward. Commercial treats often rely on fillers like corn, wheat, and soy, then add synthetic vitamins back in. Beef kidney, on the other hand, is a whole food source where the nutrients are naturally occurring and highly bioavailable.
The Nutrient Profile Decoded:
- Vitamin A: An absolute powerhouse for vision, immune function, and cellular health. Organ meats like kidney contain a far more concentrated dose than muscle meat.
- B Vitamins (B2, B3, B5, B12): This group is critical for energy metabolism. They help your dog’s body convert food into usable energy, supporting everything from a game of fetch to healthy brain function. Vitamin B12 is particularly vital for the nervous system and red blood cell formation.
- Iron: Essential for producing hemoglobin, the protein in red blood cells that carries oxygen throughout the body. An iron-rich diet supports stamina and prevents anemia.
- Selenium: A potent antioxidant that helps protect the body from damage caused by free radicals, supporting a healthy immune system and cognitive function, especially in aging dogs.
- Protein: Of course, kidney is an excellent source of high-quality protein, providing the essential amino acids needed to build and repair muscle tissue.
Hacker Tip: Whenever possible, source your beef kidney from grass-fed cattle. Grass-fed organs have a superior fatty acid profile, including a better omega-6 to omega-3 ratio, and higher levels of certain antioxidants compared to their grain-fed counterparts. It’s a small upgrade that pays significant nutritional dividends.
The Forensic Cost Breakdown: DIY vs. Commercial Treats

The ‘premium’ label on commercial single-ingredient treats comes with a premium price tag. But are you actually paying for quality, or just marketing and packaging? Let’s run the numbers. A typical 4-ounce bag of dehydrated beef kidney treats from a boutique brand can cost anywhere from $15 to $25. We can do much better.
Beef kidney is one of the most affordable proteins at the butcher counter, often selling for just a few dollars per pound because it’s less in-demand by human consumers. Remember that dehydration removes water weight, so one pound (16 ounces) of raw kidney will yield approximately 4-5 ounces of finished, dry treats. Let’s compare.
| Metric | DIY Beef Kidney Treats | Premium Store-Bought |
|---|---|---|
| Source Cost (per pound) | ~$3.00 – $5.00 | N/A (Processed) |
| Yield from 1 lb Raw | ~4.5 ounces | N/A |
| Cost per Finished Ounce | ~$0.88 | ~$5.00 |
| Ingredient Quality Control | 100% (You choose the source) | Unknown (Varies by brand) |
| Additives/Preservatives | None | Potential for ‘natural’ preservatives |
| Hacker’s Verdict | Massive Savings & Superior Quality | Convenient but Extremely Overpriced |
The math is undeniable. By investing a small amount of time, you can produce a higher quality product for a fraction of the cost. For the price of one small bag of commercial treats, you can make a batch that is four to five times larger. This isn’t just saving money; it’s a strategic investment in your dog’s health and your wallet.
The Insider’s Secret: The Stink-Free Soaking Method
This is the most critical section of this guide. This is the hack that separates the pros from the frustrated beginners. The characteristic odor of kidney comes from residual blood and metabolic waste products. Our goal is to gently and effectively purge these compounds before the dehydration process even begins. Follow these steps precisely for an odor-free kitchen.
SAFETY DISCLAIMER: I am a canine nutrition analyst, not a veterinarian. The information provided here is for educational purposes. These treats are intended for supplemental feeding only and should not replace a balanced diet. Always consult with your veterinarian before making significant changes to your dog’s diet, especially if they have underlying health conditions like kidney disease.
Step 1: The Initial Rinse and Trim
First, rinse the whole kidney under cold running water. You’ll notice a thin, translucent membrane covering the organ. Use a small, sharp knife to pierce this membrane and peel it off. It should come away easily. Next, trim away the hard, white core of fat and connective tissue from the center of the kidney. Discard the membrane and white core.
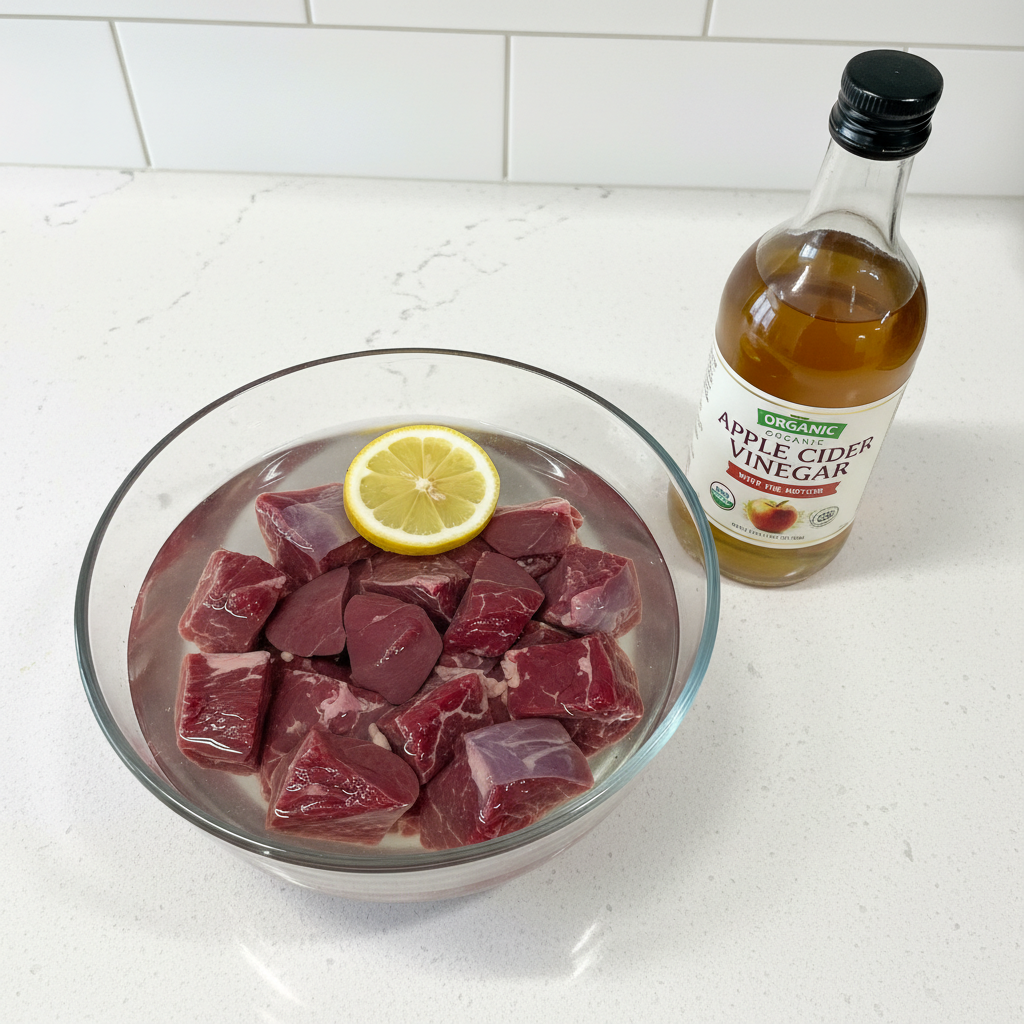
Step 2: The Acidic Soak
This is the secret. Cut the trimmed kidney into large, manageable chunks. Place them in a glass or stainless steel bowl and cover them with cold water. Now, add your acidic agent. You can use either apple cider vinegar or lemon juice. The mild acid works to neutralize the alkaline compounds that cause the odor. Use a ratio of approximately 1 tablespoon of acid per 4 cups of water. Ensure the kidney pieces are fully submerged. Cover the bowl and place it in the refrigerator to soak for 1 to 2 hours. Do not skip this step.
Step 3: The Final Rinse and Pat Dry
After soaking, discard the water. You will be amazed at how much discoloration is in the water and how little odor is on the meat. Rinse the kidney chunks one last time under cold water. Now, for the final crucial part of the prep: getting them dry. Place the chunks on a thick layer of paper towels and pat them thoroughly dry. The drier the surface, the more efficiently they will dehydrate, resulting in a crispier final product.
The Canine Nutrition Hacker’s Recipe: Perfect Dehydrated Kidney Treats
With the prep work done, the rest of the process is straightforward. The key to a perfect result is uniformity in slicing and patience during the drying process. Do not rush it.
Equipment Needed:
- A food dehydrator
- A very sharp knife
- Cutting board
- Airtight containers for storage
Ingredients:
- 1-2 lbs of beef kidney, fully prepped using the stink-free method
Step-by-Step Instructions:
- Slice Uniformly: Take your prepped, patted-dry kidney chunks and slice them into thin, even pieces. Aim for a thickness of no more than 1/4 inch. If the pieces are too thick, they will not dry completely in the center, posing a safety risk. Thinner is better.
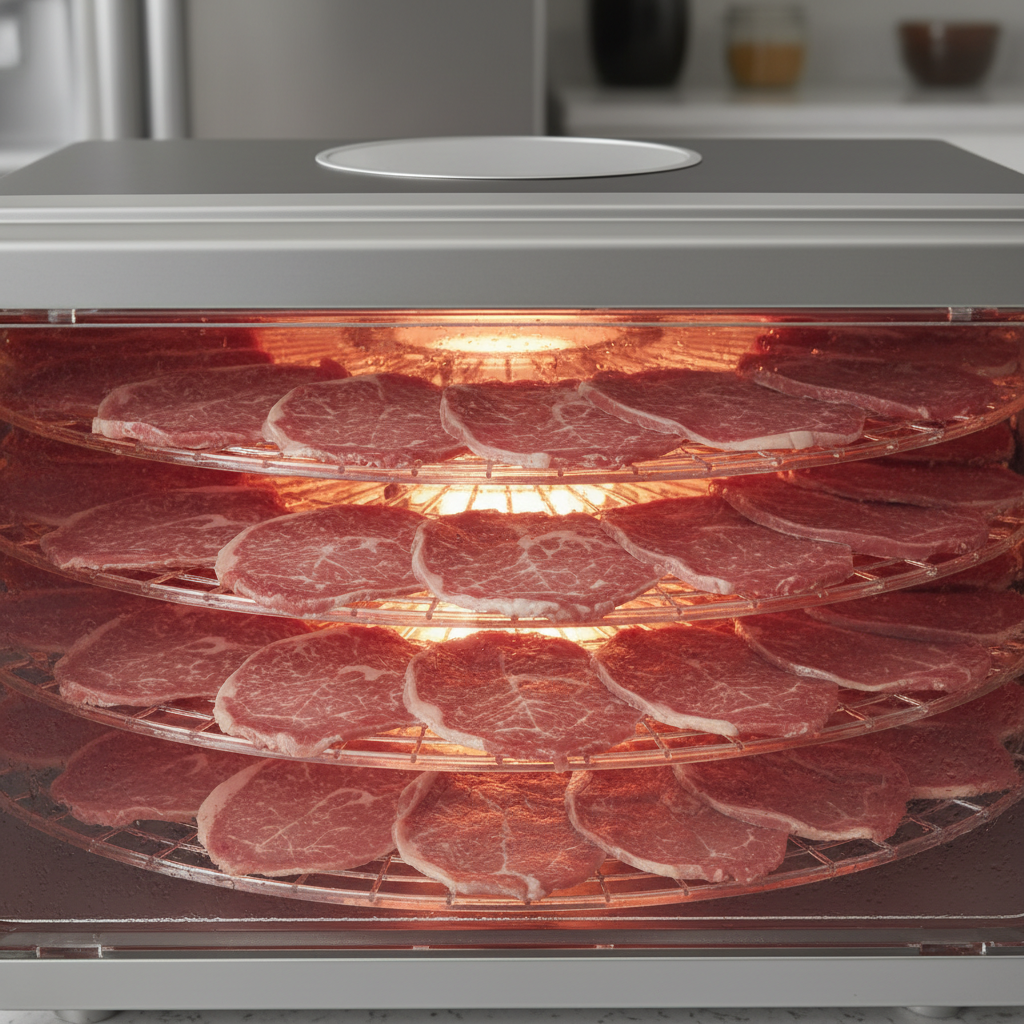
- Arrange on Trays: Place the kidney slices onto your dehydrator trays in a single layer. Ensure there is a small amount of space between each piece to allow for optimal air circulation. Do not overlap the slices.
- Set the Temperature: Set your dehydrator to a temperature between 155°F and 160°F (approximately 70°C). This temperature is high enough to safely kill potential pathogens like Salmonella or E. coli while being low enough to dehydrate the meat without cooking it.
- Dehydrate: The drying time will vary based on your dehydrator, humidity, and the thickness of your slices. Expect it to take anywhere from 6 to 10 hours.
- Check for Doneness: The treats are done when they are hard, brittle, and snap cleanly in half. If a piece bends or feels pliable, it needs more time. There should be no moisture visible when you break a piece open. Remove a test piece and let it cool completely for a few minutes before checking, as they will crisp up as they cool.
Batching & Storage: The Hacker’s Guide to Longevity
You’ve created a beautiful batch of nutrient-dense treats; now you need to store them correctly to protect your investment of time and effort. Improper storage is the number one reason homemade treats spoil.
The Conditioning Step (Do Not Skip)
Once the treats are fully dehydrated and have cooled to room temperature, there’s one final step called ‘conditioning.’ Even with perfect drying, some pieces may have slightly more residual moisture than others. To equalize this, place the cooled treats into a large, airtight glass jar, but only fill it about two-thirds full. Seal the jar and let it sit on your counter for 24 hours. Shake the jar a couple of times during this period. If you see any condensation form on the inside of the jar, the treats are not dry enough and need to go back into the dehydrator for another hour or two. This step is your final quality control check against mold.
Short-Term Storage (Up to 3 Weeks)
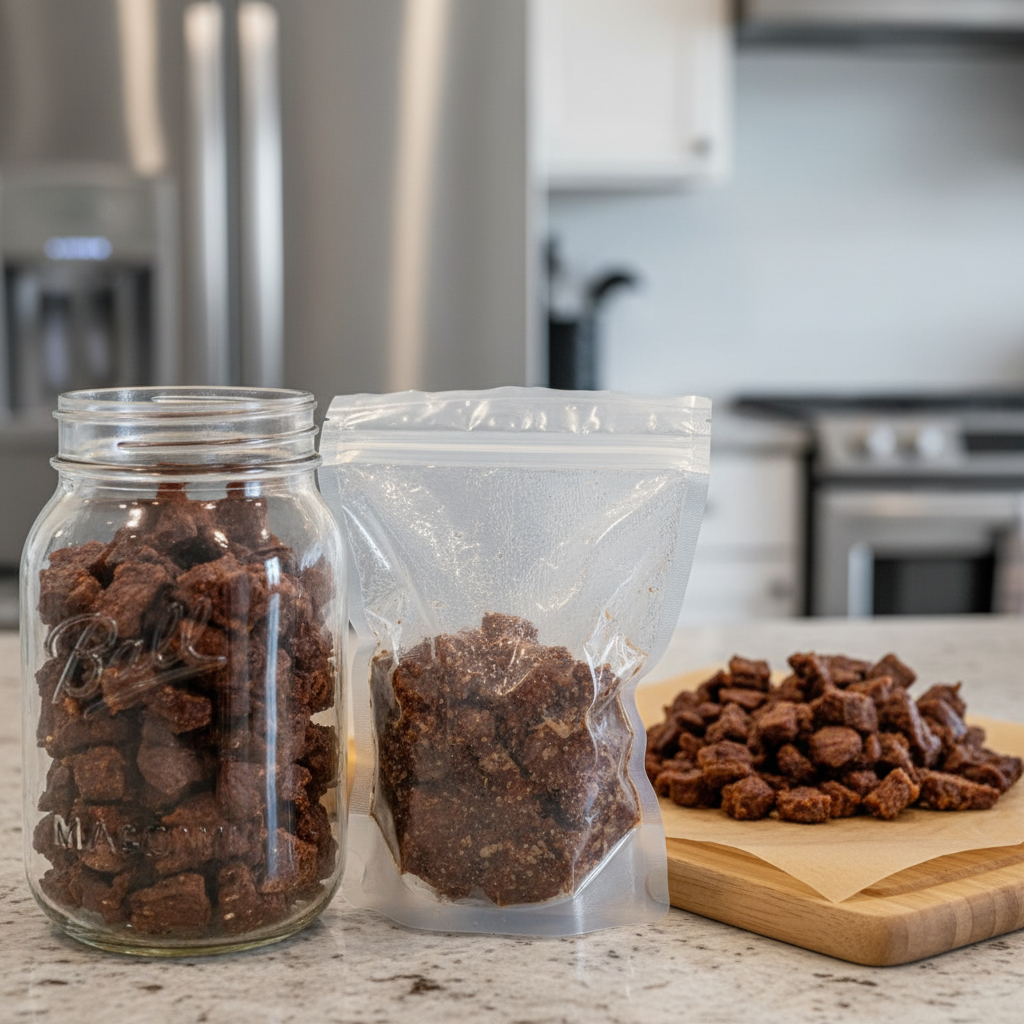
After conditioning, the treats can be stored in an airtight container in a cool, dark place like a pantry. A glass mason jar is ideal as it’s non-porous. They will remain fresh for 2-3 weeks.
Long-Term Storage (Up to 6 Months)
For maximum longevity, the freezer is your best friend. Portion the treats into freezer-safe bags. For the absolute best results, use a vacuum sealer. A vacuum sealer removes all the air, preventing freezer burn and preserving the treats in a pristine state for 6 months or even longer.
Insider Secret: If you live in a particularly humid climate, toss a food-safe desiccant packet (the kind you find in vitamin bottles or beef jerky) into your storage jar. This will absorb any ambient moisture that gets in when you open the jar, dramatically extending the pantry shelf life of your treats.
Important Warning: Always inspect your treats before feeding. If you ever see any sign of white, black, or green fuzz—which indicates mold—you must discard the entire batch immediately. Do not try to salvage any of it.
Conclusion
You now possess the knowledge to bypass the overpriced, underwhelming commercial treat market. By following this stink-free method, you’ve transformed one of the most intimidating DIY projects into a simple, clean, and incredibly rewarding process. You’ve hacked the system, taking an inexpensive, nutrient-packed organ meat and turning it into a high-value, single-ingredient treat that your dog will adore.
This is more than just a recipe; it’s a new approach to how you reward your canine companion. It’s about taking full control of their nutrition, eliminating junk ingredients, and making your money work smarter. Welcome to the world of the Canine Nutrition Hacker. Your dog—and your bank account—will thank you.