Safe Peanut-Free Cashew Butter Dog Cookies Recipe
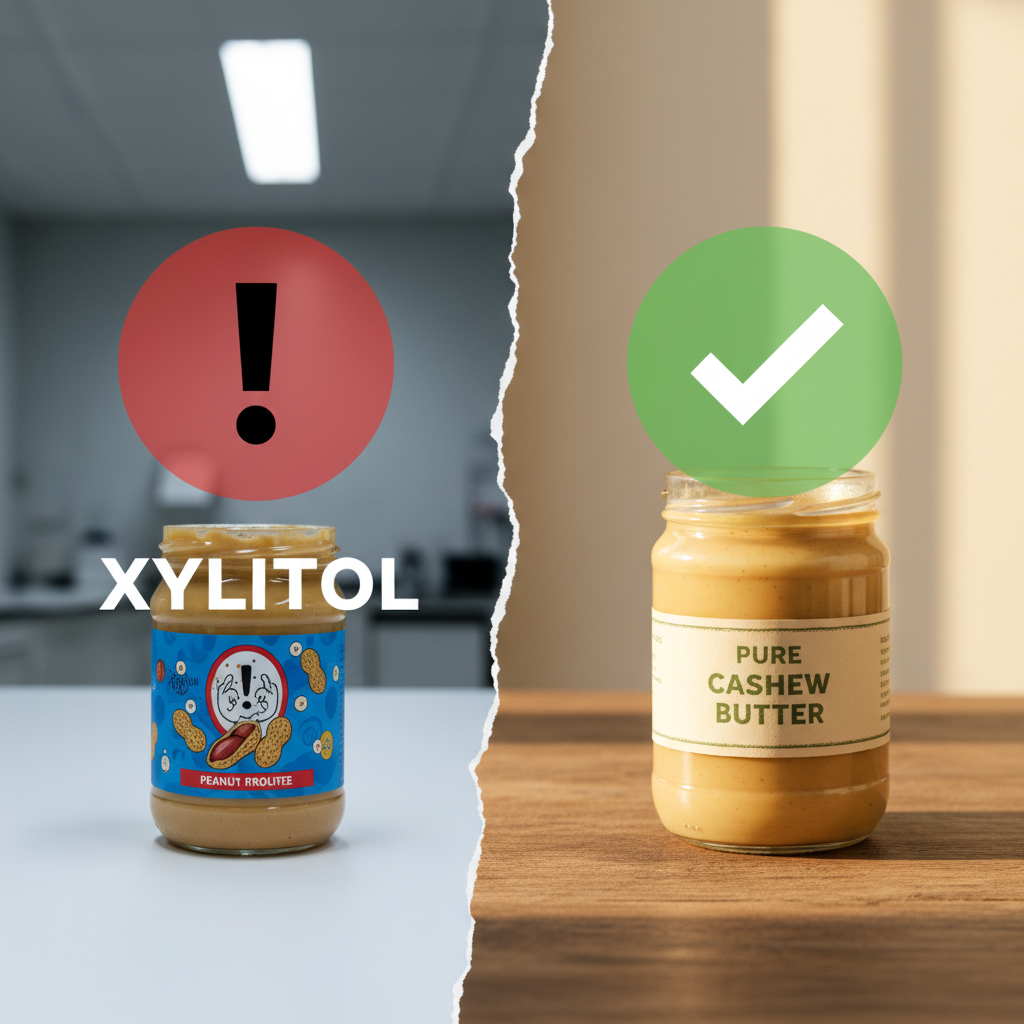
As a dog owner, you’ve been conditioned to believe one thing: dogs love peanut butter. It’s the default treat, the go-to pill-hider, the classic Kong stuffer. But the Canine Nutrition Hacker operates on data, not tradition. And the data shows that blindly trusting commercial peanut butter is one of the biggest gambles you can take with your dog’s health. The market is a minefield of hidden sugars, hydrogenated oils, and worse, the acutely toxic artificial sweetener, xylitol.
Even ‘natural’ peanut butters aren’t without risk, with potential for allergy-inducing aflatoxins from mold. It’s time to stop guessing and start knowing. This isn’t about fear-mongering; it’s about forensic nutrition. We’re going to deconstruct the peanut problem and introduce a safer, nutritionally dense alternative: cashew butter. This guide will not only arm you with the critical knowledge to identify safe ingredients but will also provide the exact blueprint for a delicious, peanut-free cashew butter dog cookie. It’s time to take back control from the marketers and become the safest chef in your dog’s life.
Deconstructing the ‘Peanut Problem’: Why a Switch to Cashews is a Savvy Move
Deconstructing the ‘Peanut Problem’: Why a Switch to Cashews is a Savvy Move
Before we build the perfect treat, we must first understand the flaws in the old model. The ubiquitous jar of peanut butter on the supermarket shelf is not formulated with your dog’s unique physiology in mind. It’s designed for human palates and profit margins, a fact that introduces unacceptable risks for a canine companion.
The Xylitol Threat: A Non-Negotiable Danger
Let’s be blunt: Xylitol is a poison to dogs. This sugar substitute is increasingly common in ‘sugar-free’ or ‘low-sugar’ peanut butter brands. While harmless to humans, in dogs, it triggers a massive, rapid release of insulin, causing a life-threatening drop in blood sugar (hypoglycemia). Symptoms can appear within 10-60 minutes and include vomiting, weakness, staggering, collapse, and seizures. In higher doses, it leads to catastrophic liver failure. The margin for error is nonexistent. A single spoonful of a xylitol-containing peanut butter can be fatal for a small dog. Relying on your ability to scan every label, every time, is a high-stakes game. The only winning move is not to play.
Aflatoxins and Allergies: The Hidden Risks in the Peanut Shell
Even if you meticulously source xylitol-free peanut butter, other dangers persist. Peanuts, being legumes that grow underground, are highly susceptible to molds like Aspergillus flavus, which produce a group of toxins called aflatoxins. These are potent carcinogens and can cause liver damage in dogs over time with chronic, low-level exposure. While commercial products are tested, acceptable levels for humans may still pose a long-term risk to our pets. Furthermore, peanuts are one of the most common food allergens in dogs, leading to itchy skin, ear infections, and digestive upset. Continuing to feed a potential allergen can perpetuate a cycle of chronic inflammation.
The Cashew Advantage: A Cleaner, Safer Profile
When sourced correctly, cashews offer a superior nutritional profile with fewer inherent risks. They are tree nuts, not legumes, reducing the aflatoxin concern. While nut allergies are possible, they are less common than peanut allergies in the canine population. Nutritionally, cashews are a powerhouse, providing:
- Healthy Monounsaturated Fats: Excellent for skin, coat, and overall cellular health.
- Magnesium and Copper: Essential minerals for bone health, nerve function, and red blood cell formation.
- Antioxidants: Help combat oxidative stress and inflammation.
The key—and this is non-negotiable—is using 100% pure, unsalted, xylitol-free cashew butter where the only ingredient is ‘cashews’. By making the switch, you eliminate the single greatest toxic threat (xylitol) and reduce exposure to common allergens and toxins, giving you a cleaner foundation for a homemade treat.
Critical Safety Protocol: Your Pre-Baking Briefing

Critical Safety Protocol: Your Pre-Baking Briefing
Executing a recipe is simple. Ensuring it’s unequivocally safe requires a hacker’s mindset. Before you touch a single ingredient, you must internalize the safety protocols. This is the most important step.
The Canine Nutrition Hacker’s Oath: I am not a veterinarian or a certified canine nutritionist. This recipe is intended for intermittent or supplemental feeding only. It is a treat, not a meal replacement, and is not a balanced source of nutrition. I will always consult my veterinarian before introducing new foods into my dog’s diet, especially if they have pre-existing health conditions like pancreatitis or are overweight. My dog’s safety is my primary responsibility.
Ingredient Forensics: Sourcing Your Supplies
Your treats are only as safe as their weakest ingredient. Scrutinize every label with suspicion.
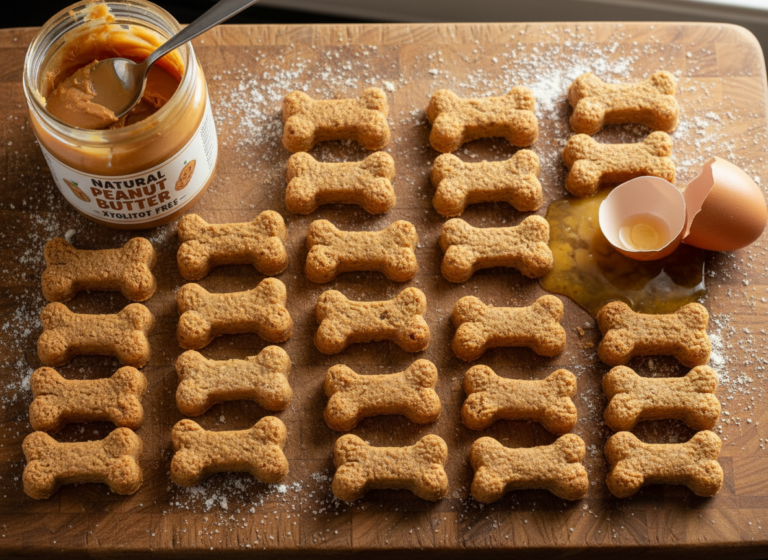
- The Cashew Butter: This is your primary checkpoint. The ingredient list must say one thing: ‘Cashews’. If it lists salt, sugar, palm oil, or any other additives, put it back. Absolutely, under no circumstances, should you use a ‘light’ or ‘sugar-free’ version without confirming it is 100% xylitol-free. When in doubt, make your own by simply blending raw, unsalted cashews in a high-powered blender until smooth.
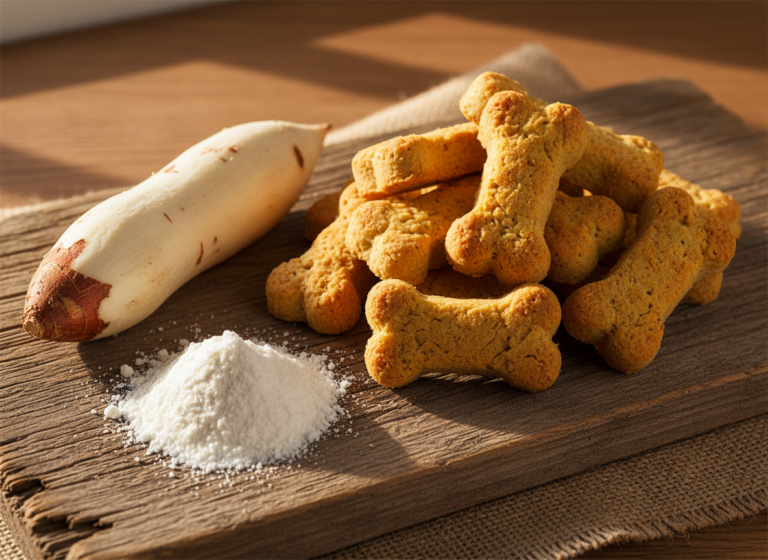
- The Flour: Whole wheat flour is a solid choice for most dogs, offering fiber and nutrients. However, if your dog has a known grain sensitivity or allergy, you must substitute it. Excellent gluten-free alternatives include oat flour (simply blend rolled oats into a fine powder) or brown rice flour. Do not use all-purpose white flour, which is nutritionally void.
- The Binder & Liquid: An egg provides protein and helps bind the dough. Water is the simple, safe liquid. Do not use milk, as many dogs are lactose intolerant.
- The Optional Sweetener: A small amount of honey can be added for palatability. It has some antibacterial properties, but it is still a sugar. Use it sparingly, or omit it entirely, especially for diabetic or overweight dogs. Ensure it is pure honey, not a honey-flavored corn syrup blend.
Your kitchen is now a clean room. You have vetted your suppliers. You are ready to proceed with confidence.
The Blueprint: Your Step-by-Step Cashew Butter Dog Cookie Recipe
The Blueprint: Your Step-by-Step Cashew Butter Dog Cookie Recipe
This is the execution phase. Follow the blueprint precisely for consistent, safe, and delicious results. This recipe is designed to be simple, minimizing variables and maximizing safety.
Ingredient Roster
- 2 cups Whole Wheat Flour (or Oat Flour for a gluten-free option)
- 1/2 cup Creamy, Unsalted, Xylitol-Free Cashew Butter
- 1 large Egg
- 1 tablespoon Honey (Optional, for palatability)
- 1/4 to 1/2 cup Water, as needed
Execution Protocol (The Steps)
- Pre-Mission Prep: Preheat your oven to 350°F (175°C). Line a large baking sheet with parchment paper to prevent sticking and ensure an easy cleanup.
- Dry Ingredient Synthesis: In a large bowl, whisk the flour to break up any clumps. This ensures a uniform texture in the final product.
- Wet Ingredient Integration: In a separate medium bowl, combine the cashew butter, egg, and optional honey. Mix vigorously with a fork or whisk until the mixture is smooth and well-incorporated. The consistency should be like a thick paste.
- Combine and Form Dough: Add the wet ingredient mixture to the bowl of dry ingredients. Begin mixing with a sturdy spoon or spatula. The mixture will be crumbly. Now, add the water, starting with 1/4 cup. Mix until a stiff dough begins to form. If it’s too dry, add more water, one tablespoon at a time, until the dough comes together into a cohesive ball. Do not over-hydrate.
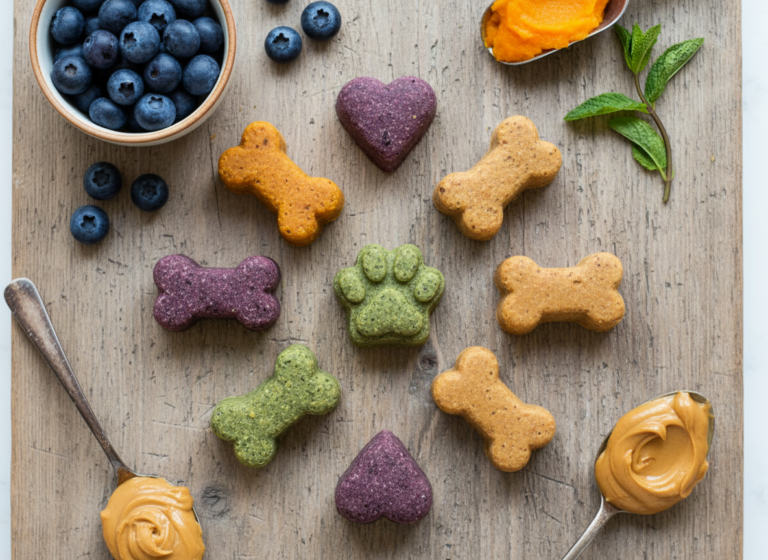
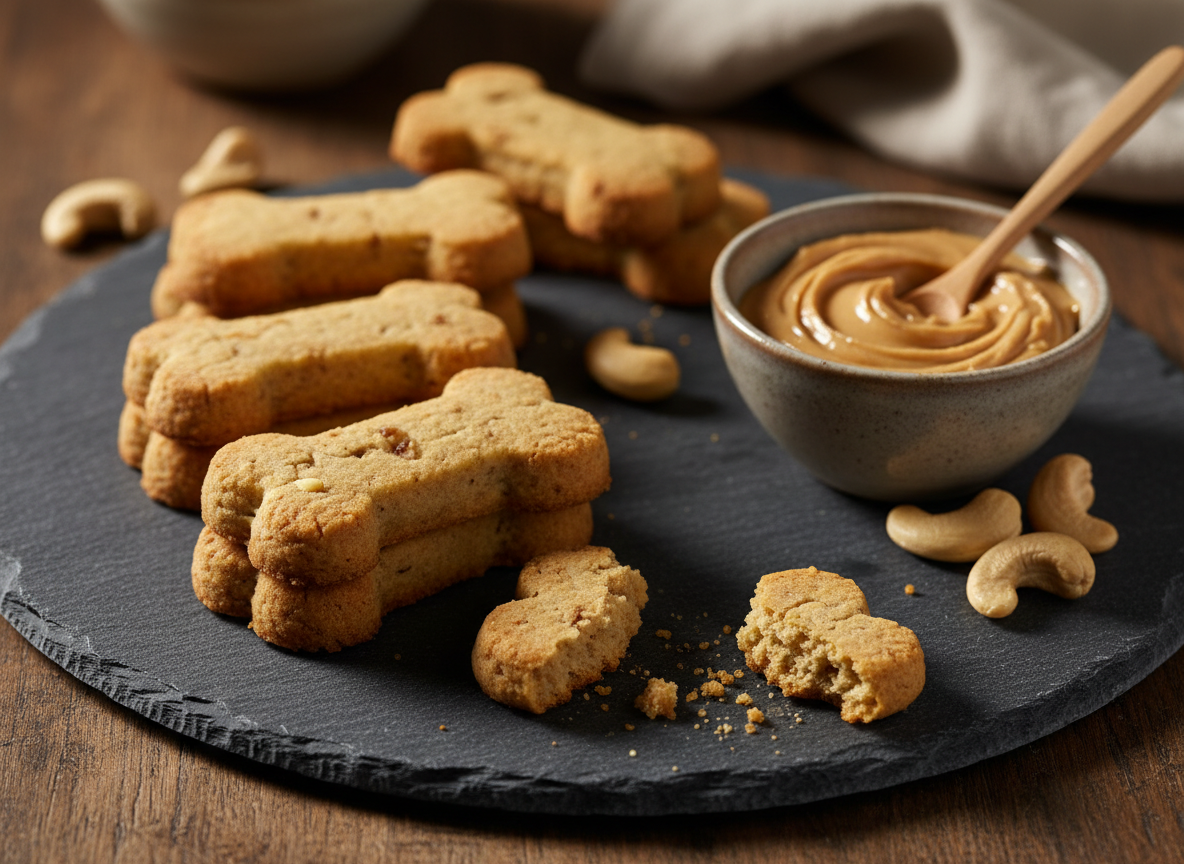
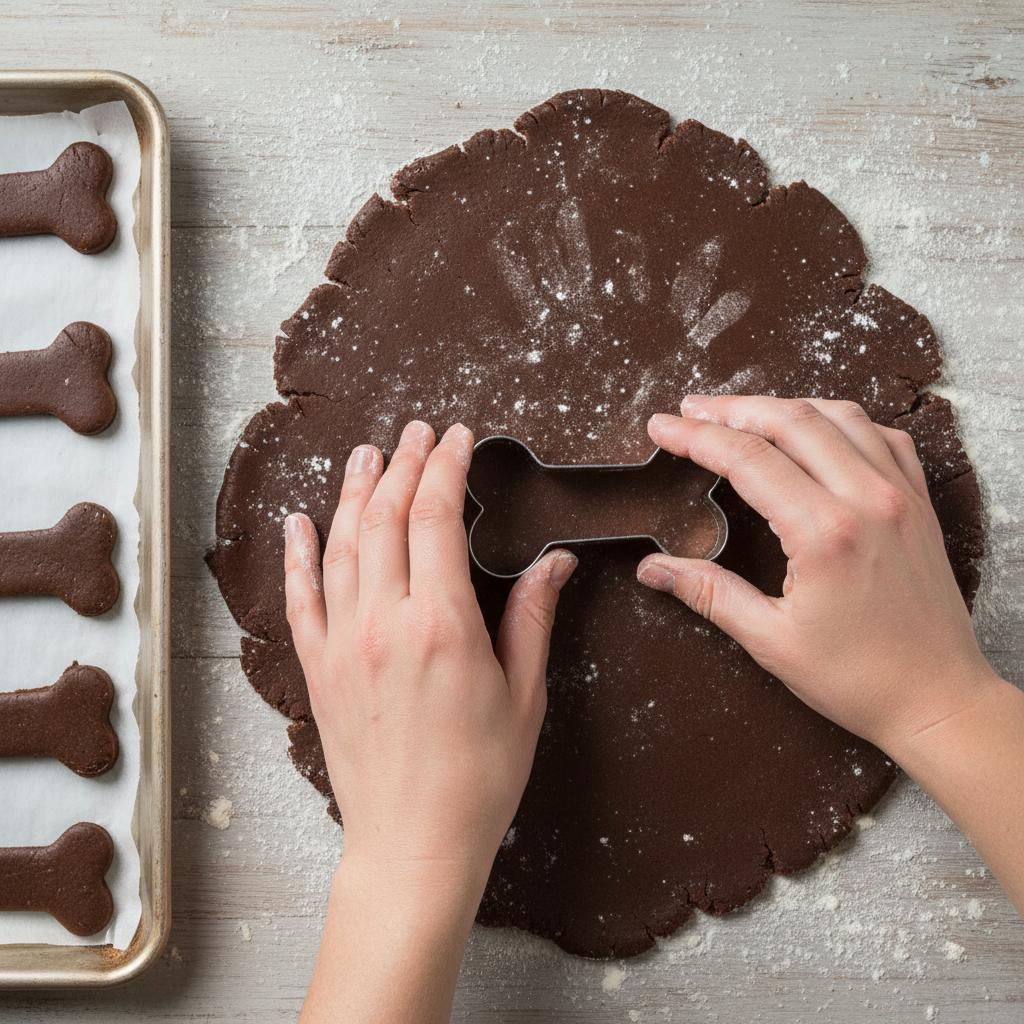
- Rolling and Cutting: Lightly flour a clean work surface. Turn the dough out and knead it 3-4 times until smooth. Using a rolling pin, roll the dough out to approximately 1/4-inch thickness. Use cookie cutters of your desired shape (bone shapes are a classic) to cut out the cookies.
- Baking Phase: Place the cut-out cookies onto your prepared baking sheet, leaving a small amount of space between them. They will not spread much. Bake for 15-20 minutes, or until the edges are golden brown. For a crispier, crunchier treat (which is better for teeth), turn off the oven, crack the door open, and let the cookies cool inside the oven for another 30-40 minutes.
- Final Cooldown: Remove the cookies from the baking sheet and place them on a wire rack to cool completely. This is a crucial step for storage; any residual warmth can create moisture and lead to mold.
The Bottom Line: Cost Analysis of DIY vs. Boutique Treats
The Bottom Line: Cost Analysis of DIY vs. Boutique Treats
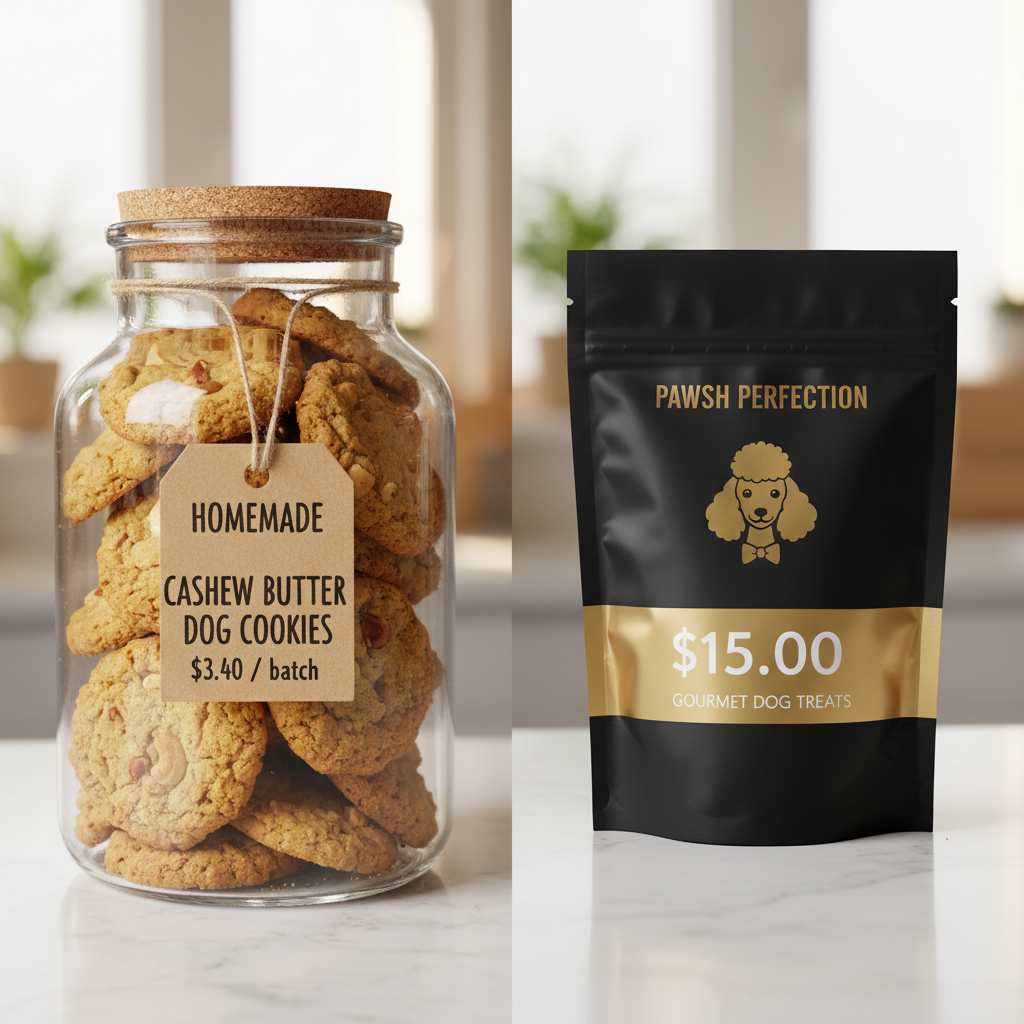
A true hacker always analyzes the cost-benefit ratio. Making your own treats isn’t just about safety; it’s about economic intelligence. You gain absolute control over quality while slashing costs. Let’s break down the numbers against a typical ‘premium’ boutique brand.
Assumptions are based on average US grocery prices. Boutique treat prices are based on a survey of popular grain-free, single-protein-source dog treats.
| Metric | DIY Cashew Butter Cookies | Premium Boutique Brand |
|---|---|---|
| Primary Ingredient | Whole Wheat Flour / Pure Cashew Butter | Pea Flour / Lentils / Named Meat Meal |
| Control Over Quality | 100% Control. You vet every ingredient. | Minimal Control. You trust their marketing and sourcing. |
| Cost of Cashew Butter (16oz jar) | ~$10.00 (Yields 4 batches) -> $2.50 per batch | N/A |
| Cost of Flour (5lb bag) | ~$4.00 (Yields ~10 batches) -> $0.40 per batch | N/A |
| Cost of Egg & Honey | ~$0.50 per batch | N/A |
| Total Cost Per Batch | ~$3.40 | ~$15.00 per 8oz bag |
| Yield Per Batch/Bag | ~40 cookies (~8oz) | ~35 cookies (~8oz) |
| Cost Per Cookie | ~$0.085 | ~$0.43 |
| VERDICT | Massive cost savings (over 80% per treat). Absolute ingredient transparency. | Convenient but expensive. Opaque sourcing and potential for unwanted fillers. |
The analysis is clear. By investing a small amount of time, you save over $11 per batch compared to a store-bought equivalent. Over a year, this translates into significant savings that can be reallocated to other aspects of your dog’s care, such as high-quality food or veterinary check-ups. This isn’t being cheap; it’s being smart. You are paying for pure ingredients, not marketing, packaging, and supply chain markups.
Mission Longevity: Storing and Batching Your Treats
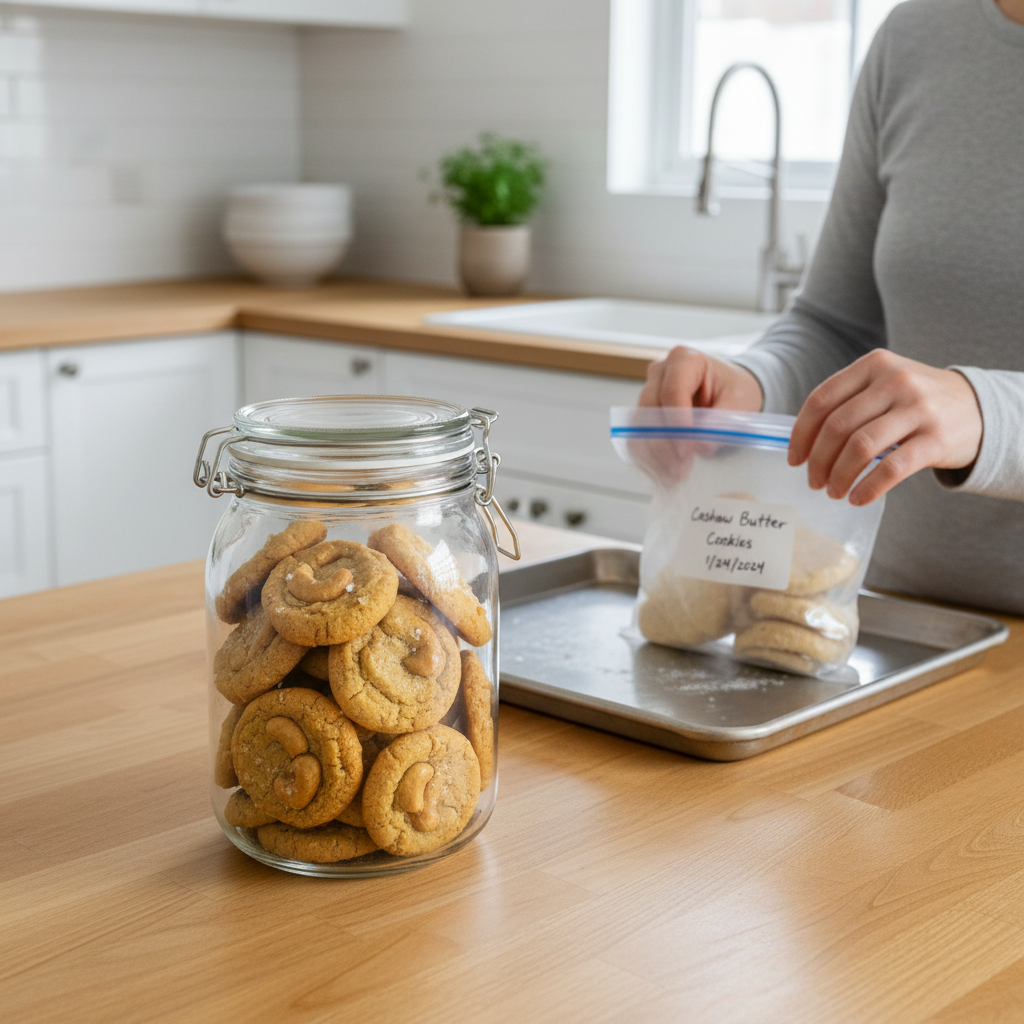
Mission Longevity: Storing and Batching Your Treats
You’ve successfully created a superior product. Now, you must protect your investment of time and resources with a proper storage strategy. Improper storage is the enemy of freshness and safety.
Airtight Containment (Short-Term Deployment)
Once the cookies are 100% cool—do not rush this step—they can be stored for short-term use. Any residual heat will create steam and condensation inside the container, which is a breeding ground for mold.
- Container: Use a glass or ceramic cookie jar with a tight-fitting lid. Airtight is key.
- Location: Store in a cool, dry place away from direct sunlight. A pantry or cupboard is ideal.
- Duration: Stored correctly, these treats will remain fresh and crisp for up to two weeks.
Cryo-Storage (Long-Term Deployment)
For the serious Canine Nutrition Hacker, batching is the key to efficiency. Making a double or triple batch of these cookies and freezing them ensures you have a ready supply of safe treats for months.
- Freezing Prep: Arrange the completely cooled cookies in a single layer on a baking sheet. Place the sheet in the freezer for 1-2 hours, or until the cookies are frozen solid. This step, known as flash-freezing, prevents them from sticking together in a giant clump.
- Packaging: Transfer the frozen cookies into a heavy-duty freezer bag or a vacuum-seal bag. Squeeze out as much air as possible before sealing. Label the bag with the date and contents.
- Duration: The cookies can be stored in the freezer for up to 3 months without significant degradation in quality.
Hacker Tip: On a hot summer day, give your dog a frozen cookie straight from the freezer. It provides a satisfying, crunchy, and cooling treat that lasts longer and helps them cool down.
By implementing a dual-storage strategy, you ensure that a safe, cost-effective, and delicious treat is always on hand, solidifying your role as your dog’s trusted nutritional gatekeeper.
Conclusion
You have now moved beyond the realm of the average pet owner. You no longer need to trust the vague promises on a brightly colored bag or hope that a corporation has your dog’s best interest at heart. You have dissected the risks, identified a superior alternative, and executed a plan to produce a safer, healthier, and more economical treat. This recipe is more than just a combination of ingredients; it’s a declaration of your commitment to your dog’s well-being. By understanding the ‘why’ behind each choice—from rejecting xylitol-laden peanut butter to properly storing your finished product—you have embraced the core philosophy of the Canine Nutrition Hacker. You are now empowered to make informed decisions, to see past the marketing, and to provide the very best for your loyal companion. Keep questioning, keep analyzing, and keep hacking your dog’s nutrition for a longer, healthier life.