Grow Your Own: Dog Safe Herb Garden for Homemade Treats
Let’s cut through the noise. The commercial dog treat industry is built on fancy packaging and marketing buzzwords designed to make you feel good about spending too much on subpar products. They toss in a pinch of ‘herbal essence’ or ‘botanical blend,’ slap a premium price tag on the bag, and call it ‘natural.’ As the Canine Nutrition Hacker, I’m here to tell you there’s a better way. It’s cheaper, healthier, and puts you in complete control. We’re talking about growing your own dog-safe herb garden.
This isn’t about becoming a master gardener overnight. This is a strategic hack to upgrade your dog’s health, eliminate processed junk, and slash your pet care budget. By investing a few dollars in seeds and soil, you gain access to a fresh, potent supply of antioxidants, vitamins, and digestive aids that processed treats can’t hope to match. You’ll know every single ingredient because you grew it yourself. It’s time to take back control from the corporations and give your dog the unadulterated, fresh nutrition they deserve.
SAFETY DISCLAIMER: I am a canine nutrition analyst, not a veterinarian. The information provided in this article is for educational purposes only. It is not a substitute for professional veterinary advice, diagnosis, or treatment. Always consult with your veterinarian before introducing new foods or herbs into your dog’s diet, especially if they have pre-existing health conditions or are on medication.
The ‘Why’: Ditching Store-Bought for Homegrown Superiority
Walk down any pet food aisle and grab a bag of ‘healthy’ herbal dog treats. Now, turn it over and read the ingredients. Past the appealing picture of a happy dog in a field, you’ll likely find a list that starts strong but quickly devolves into a chemical cocktail. You’ll see things like ‘pea protein,’ ‘potato starch,’ and ‘vegetable glycerin’—cheap fillers to add bulk and texture. You might find ‘natural chicken flavor,’ a proprietary concoction that could be anything but natural. And the herbs they proudly advertise? They’re often present in trace amounts, a dusty, heat-treated powder that has lost most of its nutritional potency.
The fundamental problem is a lack of transparency and a reliance on shelf-stability. To last for months or years in a warehouse and on a store shelf, these treats must be loaded with preservatives. The delicate phytonutrients and volatile oils that make herbs so beneficial are often the first casualties of the manufacturing process.
Now, contrast that with a fresh sprig of parsley from your own garden. It’s vibrant, packed with chlorophyll, Vitamin K, and volatile compounds that actively combat bad breath. The rosemary you snip is teeming with antioxidants that haven’t been degraded by processing. This is the core of the Canine Nutrition Hacker philosophy: prioritize fresh, whole ingredients over processed, packaged products. You bypass the fillers, the artificial preservatives, the ambiguous flavors, and the marketing markup. You provide pure, potent, and bioavailable nutrients in their most effective form.
Hacker Tip: The ‘best by’ date on a bag of treats isn’t for your dog’s benefit; it’s for the retailer’s. True freshness is measured in hours and days, not months and years. Your garden provides on-demand freshness that no commercial product can replicate.
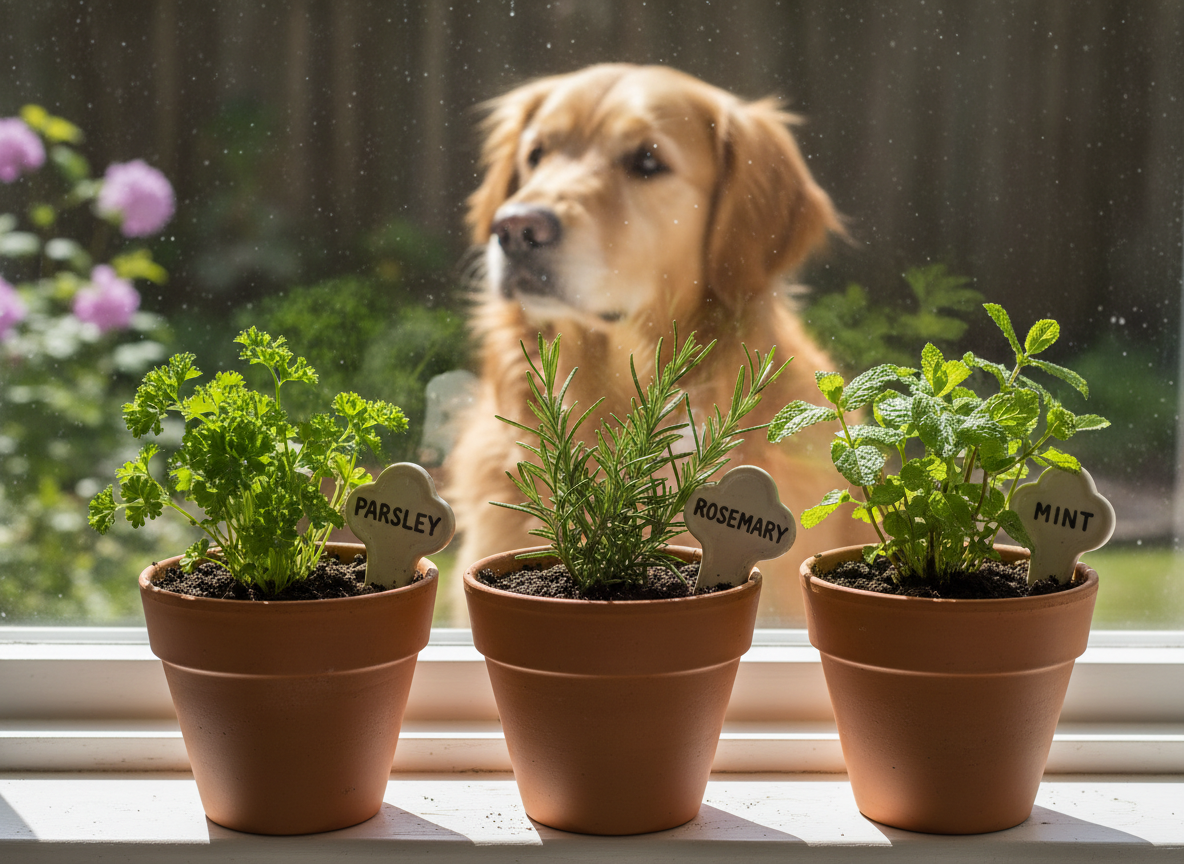
The Blueprint: Your Top 5 Dog-Safe Herbs to Plant Today
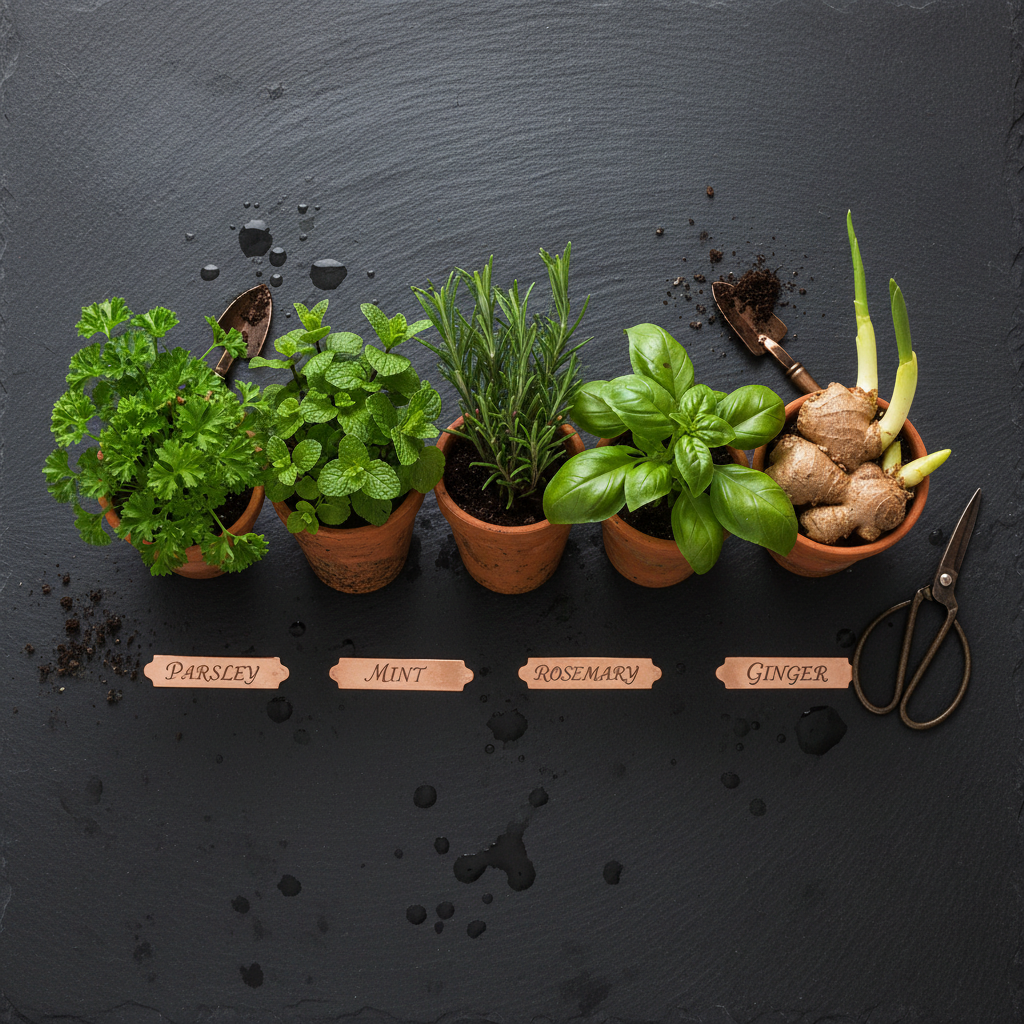
Building your canine herb garden doesn’t require a green thumb, just a sunny spot and a little planning. These five herbs are notoriously easy to grow, even in pots, and offer a powerhouse of benefits for your dog. Start with these proven winners.
Parsley (Petroselinum crispum)
Often dismissed as a mere garnish, parsley is a nutritional giant. It’s an excellent source of flavonoids, antioxidants, and vitamins A, C, and K. But its most famous benefit is its ability to freshen breath thanks to its high chlorophyll content. How to Use: Finely chop a small amount (about a teaspoon for a medium-sized dog) and add it to food or treats. Use flat-leaf or curly parsley, but avoid spring parsley, which can be toxic to dogs in large amounts.
Mint (Mentha spicata or piperita)
A fantastic digestive aid, mint can help soothe an upset stomach and combat nausea. Like parsley, it’s also a great natural breath freshener. It’s an incredibly vigorous grower, so it’s best to plant it in its own container to prevent it from taking over your garden. How to Use: A few chopped fresh leaves are all you need. Important Warning: Never use English Pennyroyal (Mentha pulegium), as it is highly toxic to dogs.
Rosemary (Rosmarinus officinalis)
This fragrant herb is a potent antioxidant and a natural preservative due to its antimicrobial properties. It can help support your dog’s immune system and has been shown to have cardiovascular benefits. Rosemary is a hardy, drought-tolerant plant that loves sunshine. How to Use: Rosemary is powerful, so use it sparingly. A tiny pinch of the finely chopped fresh leaves is sufficient for a batch of treats.
Basil (Ocimum basilicum)
Sweet basil is more than just a culinary delight; it’s packed with antioxidants and has antiviral and antimicrobial properties. It’s a great choice for supporting overall wellness and adding a dose of healthy greens to your dog’s diet. Basil thrives in warm, sunny conditions. How to Use: Chop a few fresh leaves and mix them into your dog’s treats or food.
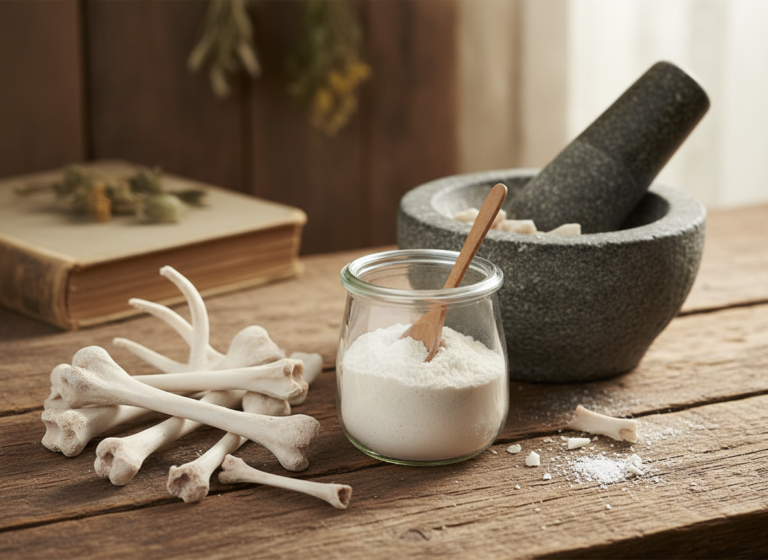
Ginger (Zingiber officinale)
While not a leafy herb, ginger root is easy to grow in a pot and is a must-have for any dog owner. It’s renowned for its ability to combat nausea, making it perfect for dogs prone to car sickness. It also has powerful anti-inflammatory properties, which can be beneficial for dogs with joint pain. How to Use: Use fresh ginger root, not the dried powder. Grate a very small amount (e.g., 1/4 teaspoon for a medium dog) into treat recipes. Introduce it slowly, as it can be spicy.
The Cost Analysis: Homegrown Herbs vs. Premium ‘Herbal’ Treats
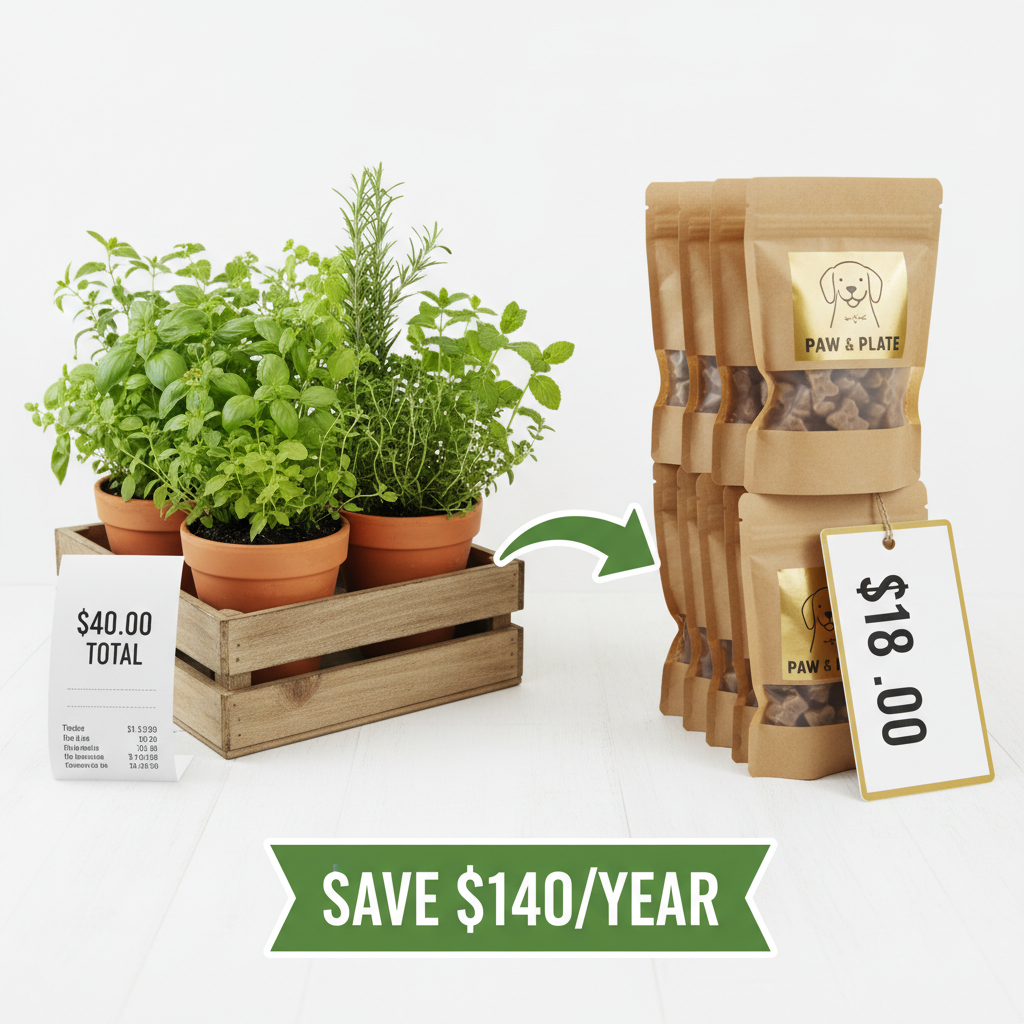
The sticker shock on ‘premium,’ ‘organic,’ or ‘holistic’ dog treats is a calculated part of the marketing. You’re paying for a brand, a fancy bag, and cross-country shipping. Let’s break down the real numbers and see where the money goes. We’ll compare the one-time setup cost of a basic container herb garden against the recurring monthly cost of a popular brand of premium herbal dog treats.
The initial investment in your garden is minimal, and it will produce fresh herbs for months, if not years, with proper care. The cost of a bag of premium treats, however, is a recurring expense that adds up significantly over the course of a year. The analysis below clearly shows that the DIY approach isn’t just healthier—it’s a massive financial win.
| Item/Expense | DIY Garden Cost (One-Time) | Premium Treat Cost (Recurring) | Financial Verdict |
|---|---|---|---|
| Source of Herbs | Packets of seeds (5 types) or starter plants: ~$15.00 | Proprietary ‘botanical blend’ (quantity unknown) | DIY offers transparency and volume. |
| Growing Medium/Container | Potting soil & 5 medium pots: ~$25.00 | N/A | A one-time investment for a long-term factory. |
| Monthly Cost | Water/Sunlight: Negligible | One 12oz bag of premium treats: ~$15.00 | The garden pays for itself in about 3 months. |
| Annual Cost | Initial Investment: ~$40.00 | $15/month x 12 months = $180.00 | Annual Savings: $140.00 |
The numbers don’t lie. For less than the cost of three bags of commercial treats, you can set up a system that provides a superior product for an entire year. This is the essence of hacking your dog’s nutrition: smarter spending for a better result.
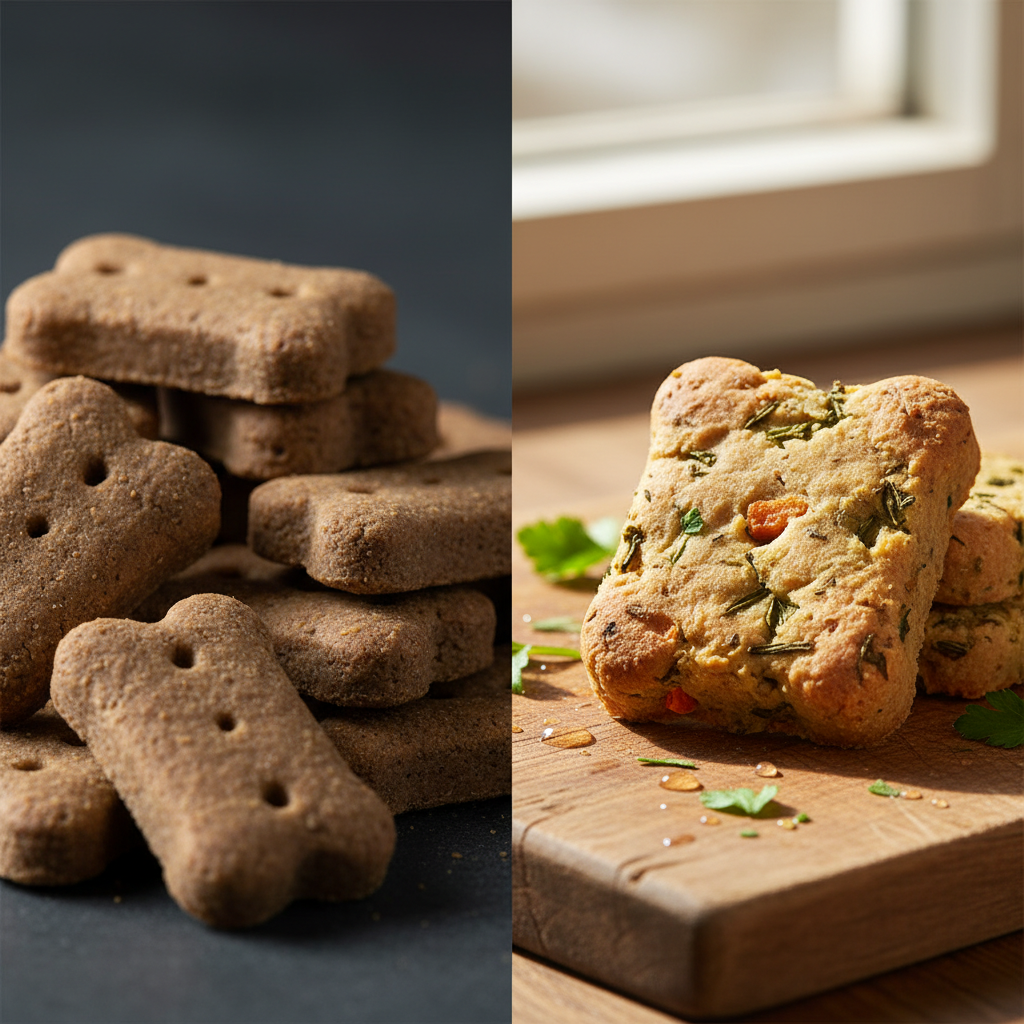
The Recipe: ‘Canine Hacker’s’ Fresh Breath Biscuits
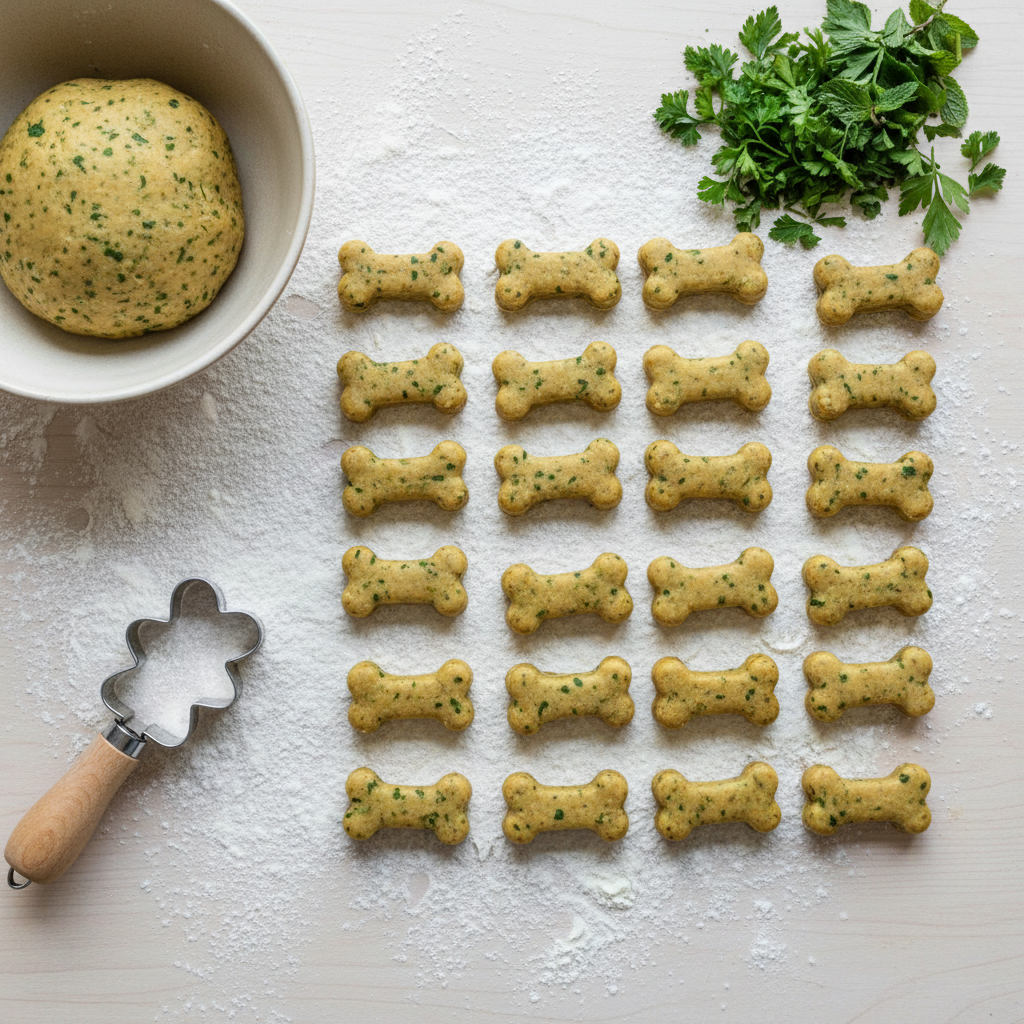
This is where your investment pays off. This recipe is simple, uses whole ingredients, and transforms your homegrown herbs into a treat that’s both delicious and functional. These biscuits are designed to be crunchy to help clean teeth, while the parsley and mint go to work on bad breath from the inside out.
Ingredients:
- 2 cups whole wheat flour (or oat flour for grain-free)
- 1/2 cup rolled oats
- 1 large egg
- 1/2 cup low-sodium chicken or beef broth
- 2 tablespoons coconut oil, melted
- 1/4 cup finely chopped fresh parsley
- 1 tablespoon finely chopped fresh mint
Instructions:
- Preheat & Prep: Preheat your oven to 350°F (175°C). Line a baking sheet with parchment paper.
- Combine Dry Ingredients: In a large bowl, whisk together the whole wheat flour and rolled oats. This creates the base of your biscuit.
- Add Wet Ingredients: Add the egg, broth, and melted coconut oil to the dry ingredients. Mix with a spatula until a crumbly dough begins to form.
- Incorporate Herbs: Add your freshly chopped parsley and mint. Now, use your hands to kne巒 the dough together inside the bowl until it forms a solid, slightly sticky ball. The warmth of your hands will help bring it all together.
- Roll & Cut: Lightly flour a clean surface and roll the dough out to about 1/4-inch thickness. Use a cookie cutter (bone shapes are classic) to cut out your biscuits. Gather and re-roll the scraps until all the dough is used.
- Bake: Place the biscuits on the prepared baking sheet. Bake for 20-25 minutes, or until the edges are golden brown. For an extra crunchy biscuit that’s better for dental health, turn off the oven and let the treats cool inside with the door cracked for another hour.
- Cool: Let the biscuits cool completely on a wire rack before serving.
The Long Game: Harvesting, Storing, and Batching for Success
Your herb garden is a living pantry. To keep it productive, you need to harvest correctly. For leafy herbs like parsley, mint, and basil, regularly snip the outer stems, which encourages the plant to grow fuller from the center. For rosemary, you can snip off the tips of the branches as needed. Never remove more than one-third of the plant at a time to ensure it remains healthy and productive.
What about when you have more herbs than you can use? Preservation is key.
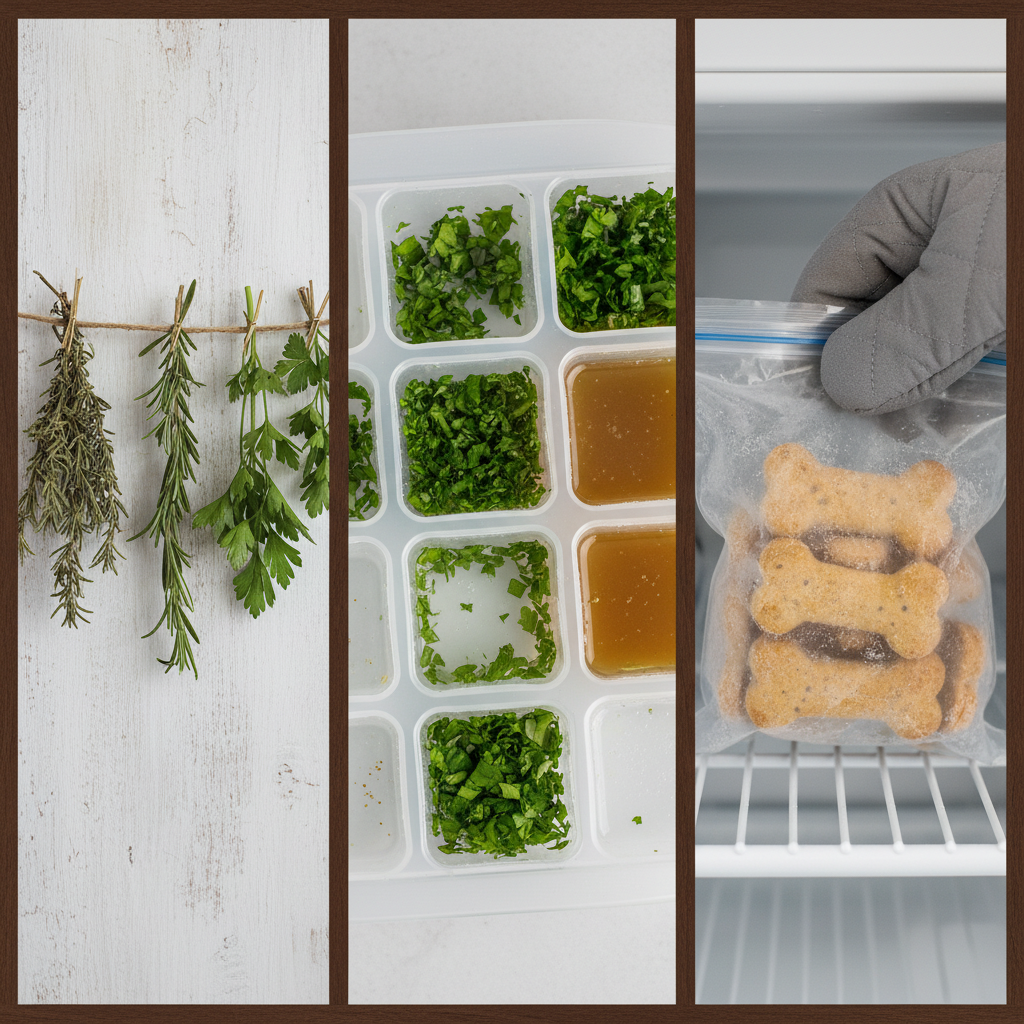
- Drying: Tie small bundles of herbs together with string and hang them upside down in a warm, dry, well-ventilated area away from direct sunlight. Once completely dry and crumbly, store them in airtight jars.
- Freezing: This is the best method for preserving the flavor of delicate herbs. Finely chop the fresh herbs and pack them into an ice cube tray. Top with water or low-sodium bone broth and freeze. You can pop one of these ‘flavor cubes’ into your dog’s meal for a nutritional boost.
Once you’ve baked a batch of your ‘Fresh Breath Biscuits,’ proper storage is crucial to prevent mold and maintain freshness.
- Short-Term (Up to 1 week): Store in an airtight container at room temperature. Make sure they were fully cooled and dried out to prevent moisture buildup.
- Medium-Term (Up to 3 weeks): Store in an airtight container in the refrigerator.
- Long-Term (Up to 3 months): Freeze the biscuits in a single layer on a baking sheet before transferring them to a freezer-safe bag. This prevents them from sticking together.
Insider Secret: Use your frozen herb-and-broth cubes as a refreshing, hydrating ‘pupsicle’ on a hot day. It’s a two-for-one hack: a cooling treat and a dose of fresh nutrients.
Conclusion
You now possess the knowledge to bypass the commercial pet food machine. By establishing a simple, dog-safe herb garden, you’ve unlocked a continuous supply of fresh, potent nutrients that can elevate your dog’s health and well-being. You’ve traded mystery ingredients for total transparency, marketing markups for significant savings, and stale, processed products for vibrant, living food. This is the core principle of being a Canine Nutrition Hacker: taking decisive, intelligent action to assume control over what goes into your dog’s bowl.
This isn’t just about baking treats; it’s about a fundamental shift in mindset. It’s about questioning the labels, demanding better, and having the skills to provide it yourself. Stop paying for clever marketing and start investing in your dog’s actual health. Your garden is ready. Your dog—and your wallet—will thank you for it.