Sew A DIY Dog Food Travel Bag (Free Pattern)
Traveling with your canine companion should be about adventure, not logistical headaches. Yet, every savvy pet owner knows the frustration of dealing with dog food on the road. You’re left choosing between a bulky, oversized plastic bin that eats up precious cargo space or a flimsy ziplock bag that’s one sharp corner away from spilling kibble all over your trunk. Commercial travel bags are often overpriced, poorly constructed, and rarely the right size. It’s a classic case of manufacturers selling inconvenience at a premium.
As the Canine Nutrition Hacker, I analyze everything that goes into our dogs, including the containers that hold their food. The solution isn’t to spend more; it’s to build better. This guide provides the complete blueprint for creating your own DIY Dog Food Travel Bag. We’re not just sewing a pouch; we’re engineering a durable, food-safe, and perfectly customized travel system. With this free pattern and our insider instructions, you’ll craft a bag that outperforms and outlasts store-bought alternatives for a fraction of the price. Let’s get to work.
The Insider’s Blueprint: Materials & Tools You Actually Need
Success in any project starts with the right components. Don’t waste money on unnecessary frills or cheap materials that will fail after one trip. This is your curated, no-nonsense list for a bag that’s built to last. We’re focusing on durability and safety.
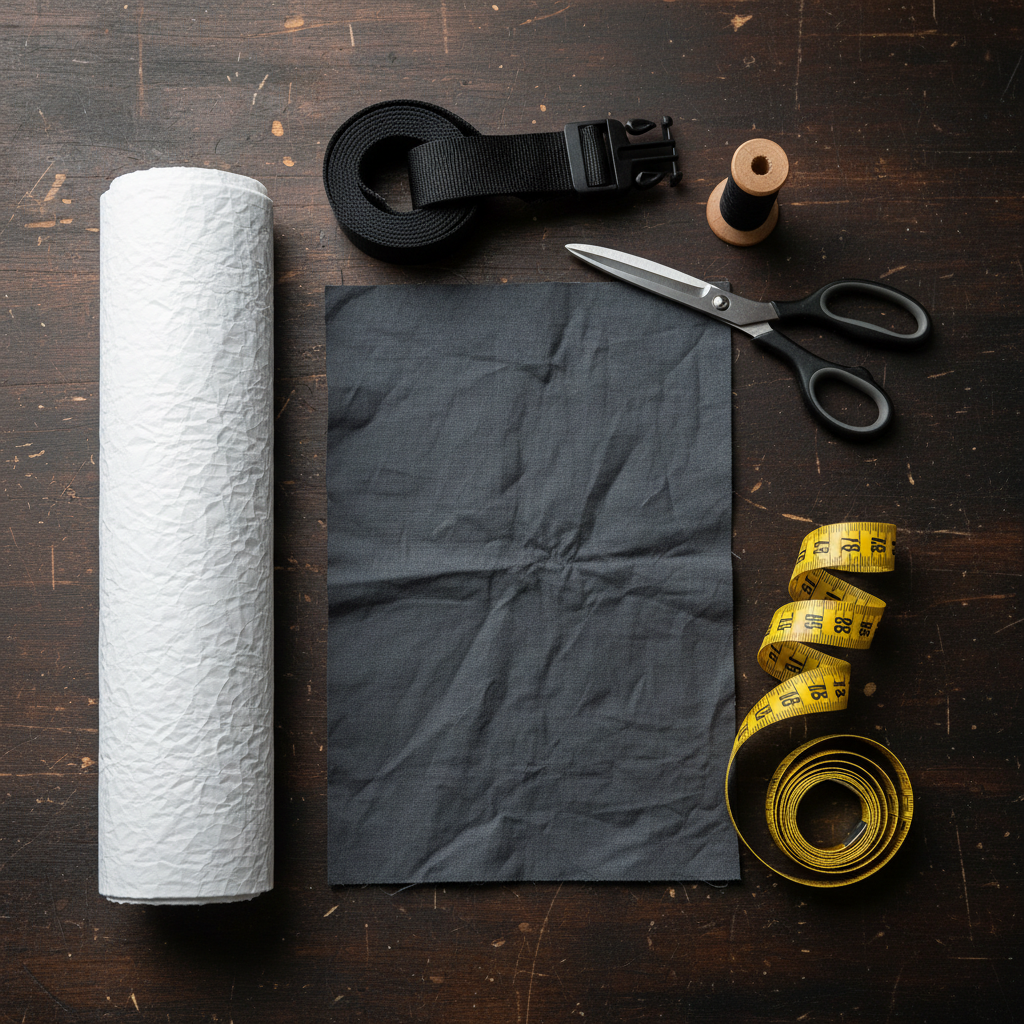
Essential Materials:
- Outer Fabric: 1/2 yard of heavy-duty fabric. Think 10oz canvas, denim, or Cordura. This is the bag’s armor; it needs to withstand being tossed in a car and dragged through a campsite.
- Liner Fabric: 1/2 yard of food-safe, waterproof liner. The gold standard is a PUL (Polyurethane Laminate) fabric or a ripstop nylon. This prevents oils from the kibble from seeping through and makes cleaning effortless. Do not compromise on a food-safe material.
- Webbing: 1 yard of 1-inch nylon or polypropylene webbing. This will form your closure strap and handle.
- Buckle: One 1-inch side-release buckle. Choose a sturdy plastic or metal buckle that can handle repeated use.
- Thread: Heavy-duty, all-purpose polyester thread. It needs to be strong enough to hold everything together under stress. Match the color to your outer fabric for a professional look.
Required Tools:
- Sewing Machine (a standard machine can handle this, just use the right needle)
- Heavy-Duty Sewing Needle (Size 90/14 or 100/16 is ideal for canvas)
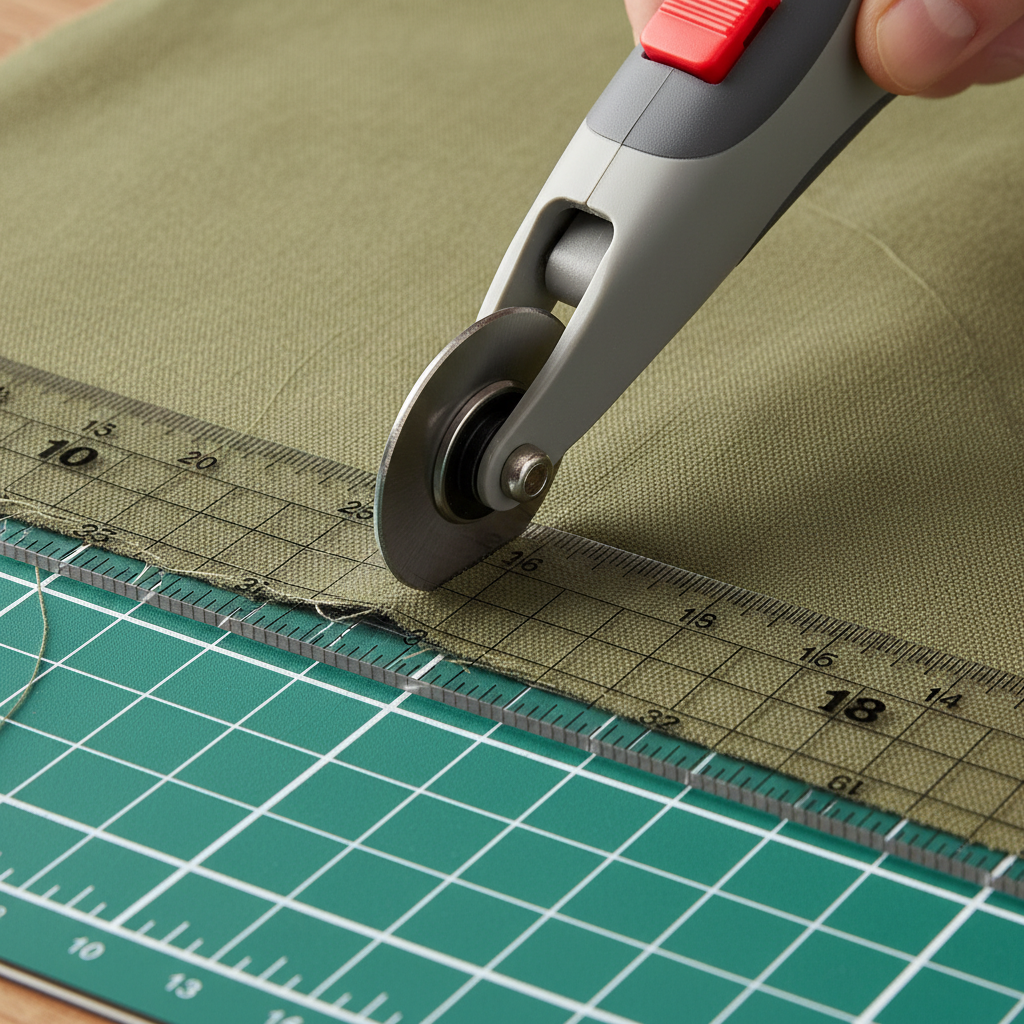
- Fabric Scissors or a Rotary Cutter & Mat
- Measuring Tape or Ruler
- Straight Pins or Sewing Clips
- Iron and Ironing Board
Hacker Tip: Check the remnant bin at your fabric store for high-quality canvas or denim at a steep discount. For a truly budget-friendly and eco-conscious hack, repurpose an old, durable pair of jeans or a canvas tote bag for your outer fabric. Just ensure the material is clean and free of weak spots.
The Free Pattern & Precision Cutting Guide
This pattern is designed for simplicity and function, creating a roll-top bag that holds approximately 10-12 cups of kibble—perfect for a weekend trip with a medium-to-large dog. The dimensions can be easily adjusted to fit your specific needs.
Pattern Dimensions (No Paper Pattern Needed):
You will cut four rectangular pieces in total. Precision is key. Use a ruler and a fabric marker to draw your rectangles directly onto the fabric before cutting.
- Outer Fabric: Cut TWO (2) pieces, each measuring 12 inches wide x 18 inches tall.
- Liner Fabric: Cut TWO (2) pieces, each measuring 12 inches wide x 18 inches tall.
Webbing & Strap Preparation:
- Cut your 1-inch webbing into two pieces:
- One piece: 10 inches long (this will hold the female end of the buckle).
- One piece: 6 inches long (this will hold the male end of the buckle).
Insider Tip: After cutting your nylon webbing, carefully use a lighter or a flame to melt the cut ends. This is a critical step that prevents the webbing from fraying over time, ensuring the structural integrity of your straps. Do this in a well-ventilated area.
Step-by-Step Assembly: Building Your Bag Like a Pro
Follow these steps methodically for a clean, professional finish. We will construct the outer bag and the liner separately, then join them together. Use a 1/2-inch seam allowance for all steps unless otherwise noted.
- Prepare the Straps: Take your 6-inch piece of webbing and thread it through the male end of the buckle. Fold the webbing in half and stitch it securely close to the buckle. Repeat with the 10-inch piece of webbing and the female end of the buckle. Set these aside.
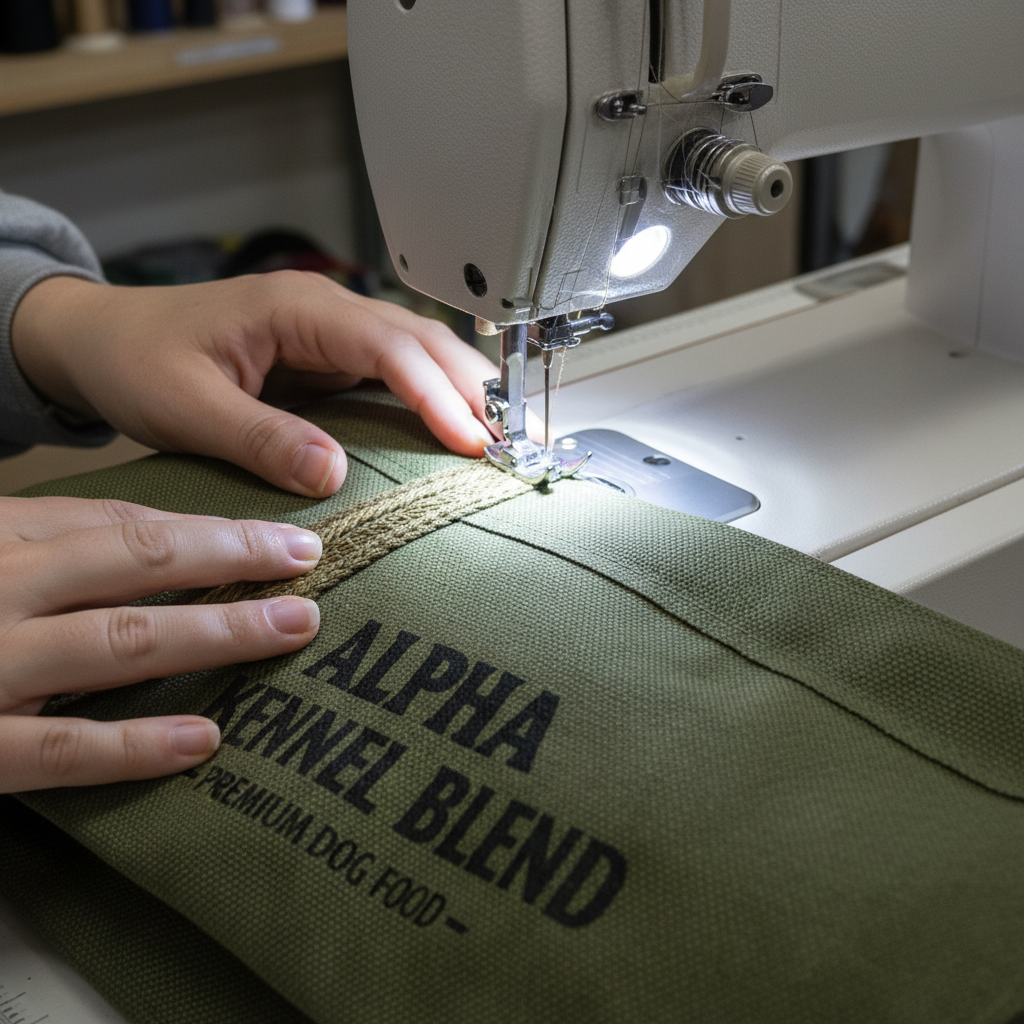
- Sew the Outer Shell: Place your two outer fabric pieces right sides together. Pin or clip them along the two long sides and one of the short sides (the bottom). Sew along these three sides, making sure to backstitch at the beginning and end of your seams for strength.
- Box the Corners (Outer Shell): To give the bag a flat bottom, you’ll ‘box’ the corners. At one of the bottom corners, match the side seam with the bottom seam, creating a triangle point. Measure 2 inches in from the tip of the triangle and draw a line across. Sew along this line. Trim the excess fabric from the triangle. Repeat on the other bottom corner. Turn the outer shell right side out. It should now stand on its own.
- Attach the Straps: Find the center of the top edge on one side of the outer shell. Place the 6-inch strap (with the male buckle) centered on the outside of the bag, with the raw edge of the webbing aligned with the raw edge of the bag’s top. The buckle should be pointing down. Baste it in place about 1/4 inch from the edge. On the opposite side of the bag, do the same with the 10-inch strap (female buckle).
- Sew the Liner: Place your two liner fabric pieces right sides together. Sew along the two long sides and the bottom, but this time, leave a 4-inch gap in the middle of the bottom seam. This hole is crucial for turning the bag later.
- Box the Corners (Liner): Repeat Step 3 to box the corners of the liner bag. Do not turn the liner right side out. Keep it with the wrong side facing out.
- Assemble the Bag: With the outer shell right side out and the liner wrong side out, place the outer shell *inside* the liner. The ‘right sides’ of both fabrics should be facing each other. Carefully align the top raw edges and the side seams of both the liner and the outer shell. Pin or clip them together all the way around the top opening.
- Sew the Top Seam: Sew all the way around the top edge of the bag, joining the liner and the outer shell. Backstitch at the start and end.
- Turn the Bag: Now, pull the entire outer shell through the 4-inch hole you left in the bottom of the liner. It will feel awkward, but take your time. Once fully turned, you’ll have the outer bag and the liner correctly oriented.
- Close the Liner: Push the liner down inside the bag. Find the 4-inch opening in the liner’s bottom seam. Tuck the raw edges in and sew the hole closed with a straight stitch very close to the edge (this is called an ‘edge stitch’).
- Topstitch for a Professional Finish: Push the liner neatly inside the outer bag. Press the top seam with an iron for a crisp edge. To prevent the liner from pulling out and to give the bag a finished look, topstitch all the way around the top opening, about 1/4 inch from the edge. This final step makes all the difference.
The Bottom Line: DIY Cost Analysis vs. Retail Price
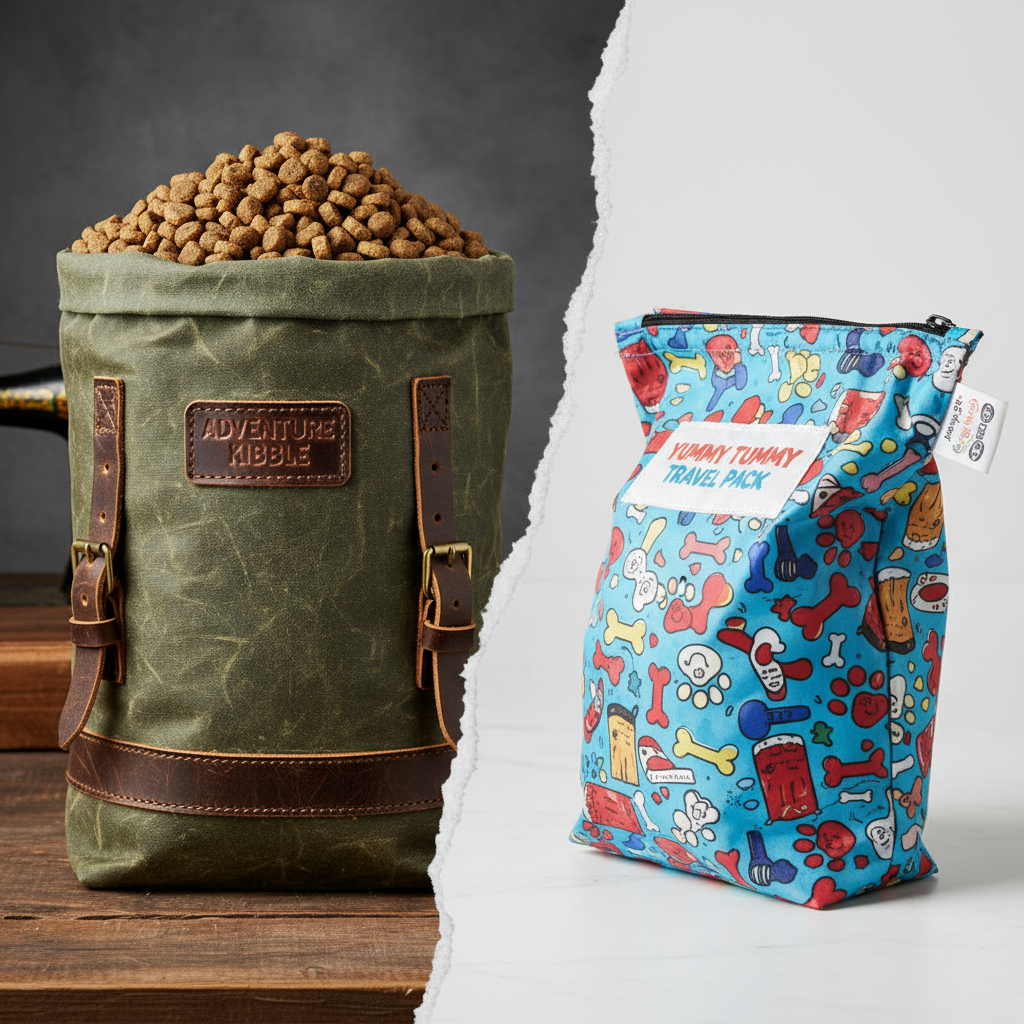
A core principle of the Canine Nutrition Hacker is value. Why pay a premium for a product you can make better and cheaper yourself? Store-bought dog food travel bags range from cheap, unreliable pouches to overpriced ‘designer’ gear. Let’s break down the real numbers for a bag of comparable quality and size.
| Component | DIY Cost (Approximate) | Retail Brand Example | Retail Price |
|---|---|---|---|
| Heavy-Duty Canvas (1/2 yd) | $6.00 | ||
| Food-Safe Liner (1/2 yd) | $7.00 | ||
| Nylon Webbing (1 yd) | $1.50 | ||
| Side-Release Buckle | $1.00 | ||
| Thread & Notions | $0.50 | ||
| Total DIY Cost | $16.00 | Total Retail Cost | $32.50 (average) |
| MONEY SAVED | $16.50+ | Quality Control | 100% Yours |
The financial savings are immediately obvious—you’re saving over 50% for a product where you controlled every component. You chose the durable fabric, the genuinely food-safe liner, and the heavy-duty buckle. There are no hidden weak points or cheap materials. You’ve not only saved money but also built a superior, longer-lasting product tailored exactly to your needs.
Hacker Upgrades: Customization & Long-Term Care
Now that you’ve mastered the basic build, it’s time to upgrade. A true hacker optimizes the system for peak performance and personalization.
Customization Upgrades:
- Add a Scoop Pocket: Before sewing the two outer shell pieces together, stitch a simple patch pocket onto the front of one piece. Size it to perfectly fit your dog’s food scoop.
- Embroider or Stencil: Personalize the bag with your dog’s name. Use an embroidery machine, hand-stitch the name, or use fabric paint and a stencil for a clean, modern look.
- Incorporate a Handle: Use an extra 8-10 inches of webbing, fold it into a loop, and baste it into one of the side seams near the top before you sew the liner and outer shell together. This creates a convenient grab-handle.
- Reflective Strips: For camping or low-light situations, sew a strip of reflective ribbon or fabric onto the bag for easy visibility.
Long-Term Care & Safety:
- Washing: Turn the bag inside out and wash on a gentle cycle with cold water. The food-safe liner is the most important part to clean. Hang to air dry; do not put it in a high-heat dryer, as this can damage the waterproof liner over time.
- Inspection: Important Safety Note: Before each trip, inspect the inside of the bag. Check for any loose threads that could be ingested or any tears in the waterproof liner that could compromise food safety and lead to spoilage.
- Storage: When not in use, ensure the bag is completely dry inside and out before storing it to prevent mildew.
Insider Secret: For an even more robust bag, apply a coat of natural canvas wax to the outer shell. This adds another layer of water resistance, making the bag nearly impervious to the elements during camping trips or rainy travel days.
Conclusion
You’ve done more than just follow a pattern. You’ve rejected the overpriced, under-engineered options on the market and invested a little time to create a superior solution. This durable, food-safe travel bag is a testament to the hacker mindset: identify a problem, analyze the components, and build a better, more efficient system. You now have a piece of custom gear that’s perfectly suited to your adventures, saves you money, and reduces plastic waste.
Every time you roll down the top and click that buckle, you’ll have the satisfaction of knowing you built it yourself, with materials you trust. That’s the ultimate win for a savvy pet owner. Now go plan your next trip.