Homemade Ginger Dog Biscuits to Soothe Car Sickness
The whining, the drooling, the inevitable cleanup—a dog with car sickness can turn any road trip into a stressful ordeal. Many pet owners resort to expensive, chemically-laden chews or prescription medications without realizing there’s a powerful, natural remedy available in their own kitchen. We’re not here to offer fluffy advice; we’re here to provide a tactical solution. This guide will equip you with a simple, cost-effective recipe for homemade ginger biscuits designed to soothe your dog’s unsettled stomach before you even leave the driveway.
SAFETY DISCLAIMER: I am not a veterinarian. This recipe is for supplemental feeding and should be considered a treat, not a meal replacement. These biscuits are not a cure for severe or chronic vomiting, which requires professional veterinary attention. Always consult with your veterinarian before introducing new foods into your dog’s diet, especially if your pet has underlying health conditions, is pregnant, or is on medication. Ginger can interact with certain medications, particularly blood thinners. Introduce these treats slowly and monitor for any adverse reactions.
The Science Behind the Soothing: Why Ginger is Your Co-Pilot
To effectively combat a problem, you must first understand the tools at your disposal. The efficacy of these biscuits isn’t magic; it’s based on the proven therapeutic properties of their core ingredients. Commercial treats often mask low-quality fillers with artificial flavors. We, as Canine Nutrition Hackers, prioritize functional ingredients that serve a distinct purpose.
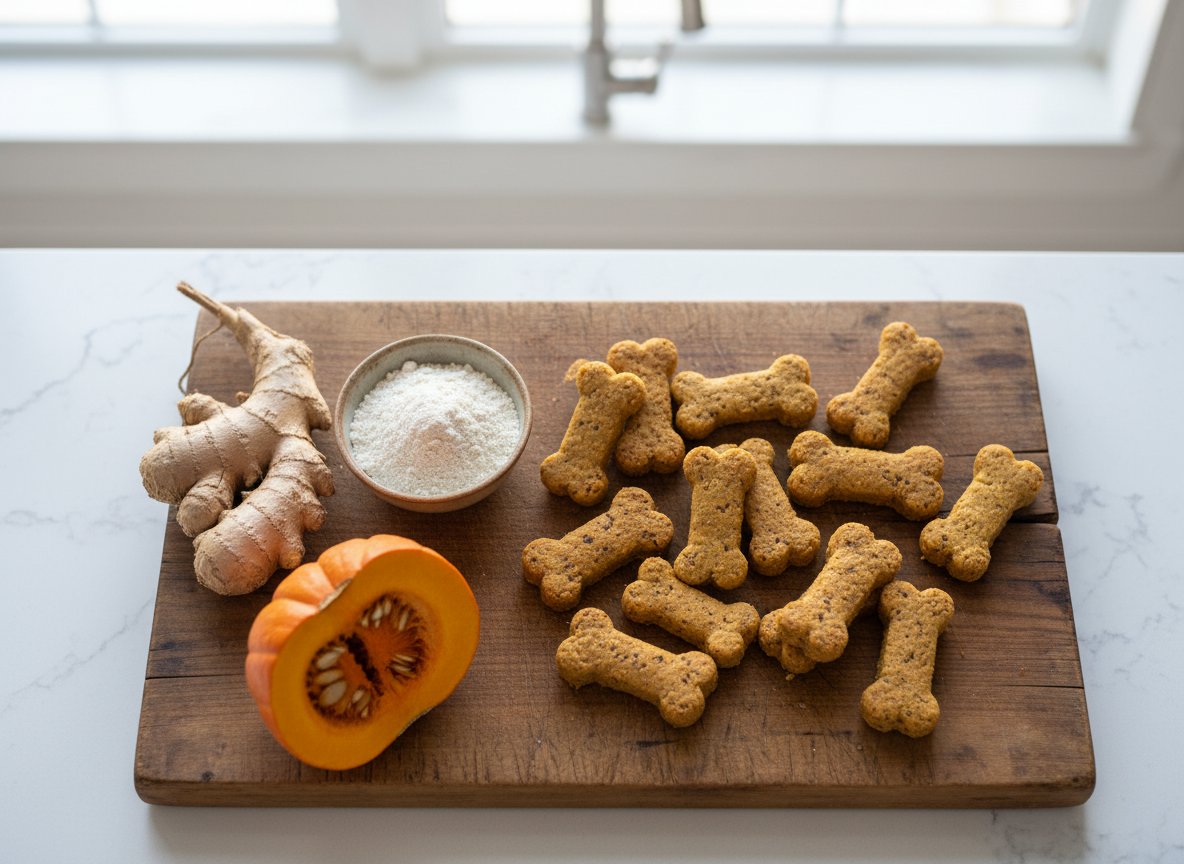
Hero Ingredient #1: Ginger
The star of this recipe is Zingiber officinale, or common ginger. Its antiemetic (anti-nausea) properties are well-documented in both human and veterinary science. The power comes from bioactive compounds called gingerols and shogaols. These compounds work by accelerating gastric emptying and stimulating normal intestinal motility. In layman’s terms, ginger helps move food and gas through the digestive system efficiently, preventing the backup and discomfort that leads to nausea. For motion sickness, it’s believed to block serotonin receptors in the gut that trigger the vomiting reflex. We use a precise, safe amount to provide the benefit without causing irritation.
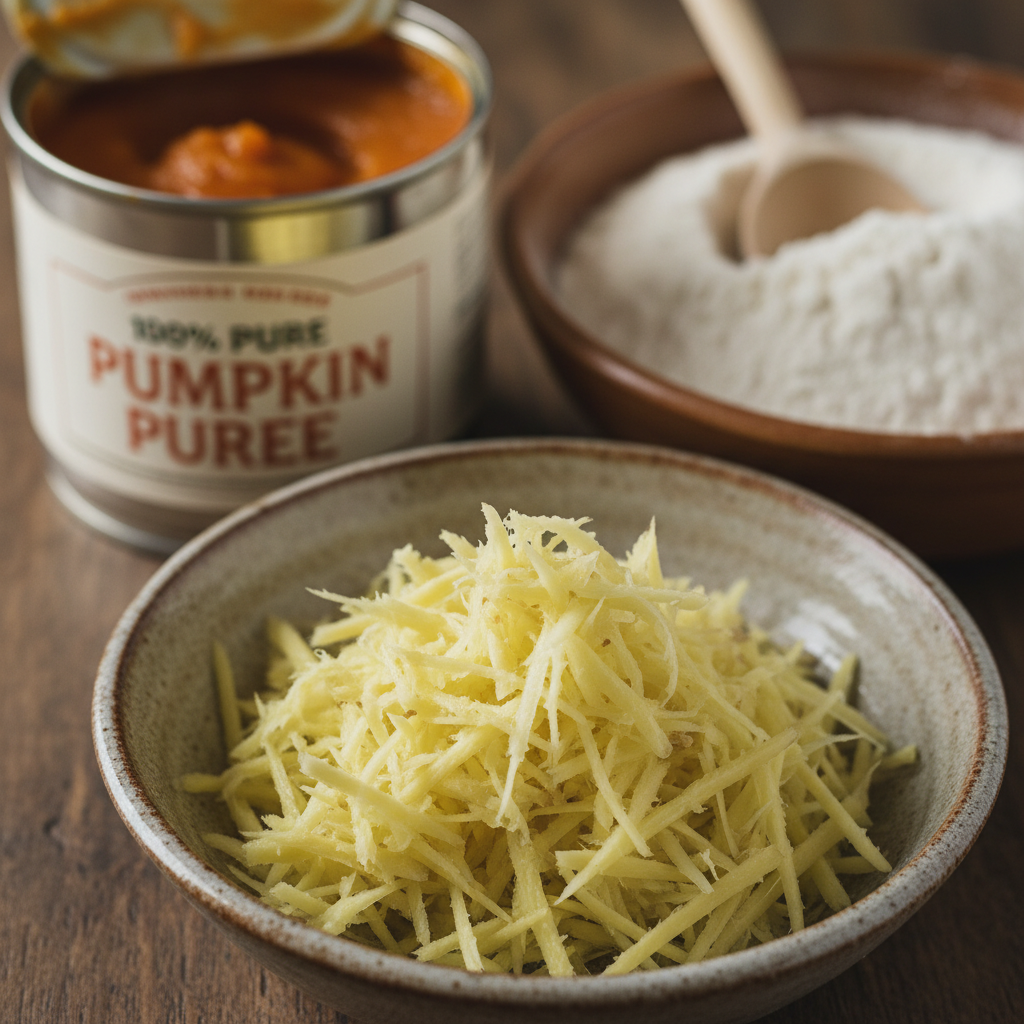
Hero Ingredient #2: Pumpkin Puree
Pure, 100% pumpkin puree (not pumpkin pie filling, which is loaded with sugar and spices) is a digestive powerhouse for dogs. It’s rich in soluble fiber, which can help with both constipation and diarrhea by absorbing excess water and adding bulk to the stool. In this context, it creates a soothing, stable environment in the gut, making it less susceptible to the turmoil of motion. It also acts as a natural binder for our biscuit dough.
The Foundation: Oat Flour
We avoid common allergens and inflammatory grains like wheat. Instead, we use oat flour, which you can easily make by blending rolled oats. Oats are a gentle, low-gluten source of fiber and carbohydrates, providing sustained energy without spiking blood sugar. It’s an ideal, non-irritating base that ensures the biscuit is both palatable and easy to digest.
Forensic Cost Analysis: DIY Biscuits vs. Store-Bought Calming Chews
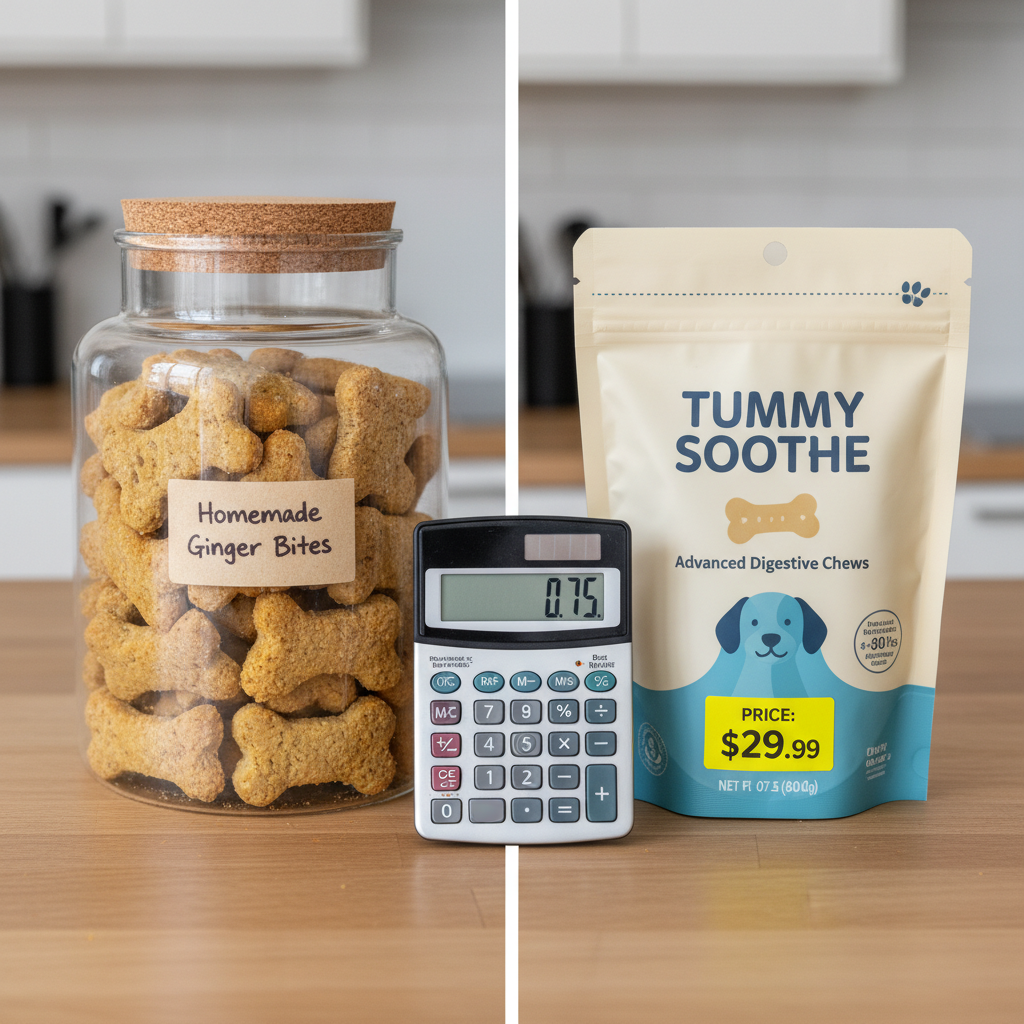
The pet supplement market is a billion-dollar industry built on convenience and clever marketing. Brands charge a premium for ‘calming’ or ‘tummy soothing’ treats, often using the same core ingredients you can buy yourself for a fraction of the price. A savvy owner analyzes the value proposition. Let’s break down the real cost of peace of mind on the road.
By making these biscuits at home, you gain absolute control over quality, eliminate preservatives and fillers, and achieve a significant cost savings. The initial investment in ingredients pays dividends over dozens of batches.
Insider Secret: Many commercial ‘ginger’ treats use a minuscule amount of ginger powder or artificial flavoring. When you make them yourself, you control the dosage and ensure your dog is getting a therapeutic amount of the active ingredient, not just a ginger-flavored cookie.
| Feature | DIY Ginger-Pumpkin Biscuits | Premium Store-Bought ‘Tummy’ Chews |
|---|---|---|
| Approx. Cost Per Treat | $0.08 – $0.15 | $0.75 – $1.50 |
| Key Active Ingredient | Freshly grated or organic ground ginger | Often ginger powder, chamomile, or proprietary ‘blends’ |
| Ingredient Control | Absolute. You source every component. | None. You rely on the manufacturer’s claims. |
| Fillers & Preservatives | Zero. No corn, soy, BHA, BHT, or artificial colors. | Commonly contains glycerin, molasses, soy lecithin, and chemical preservatives. |
| The Verdict | Vastly superior cost-effectiveness and ingredient quality. Requires a small time investment. | High cost for convenience, with potential for unwanted fillers and questionable active ingredient dosage. |
The Canine Nutrition Hacker’s Blueprint: Soothing Ginger-Pumpkin Biscuits
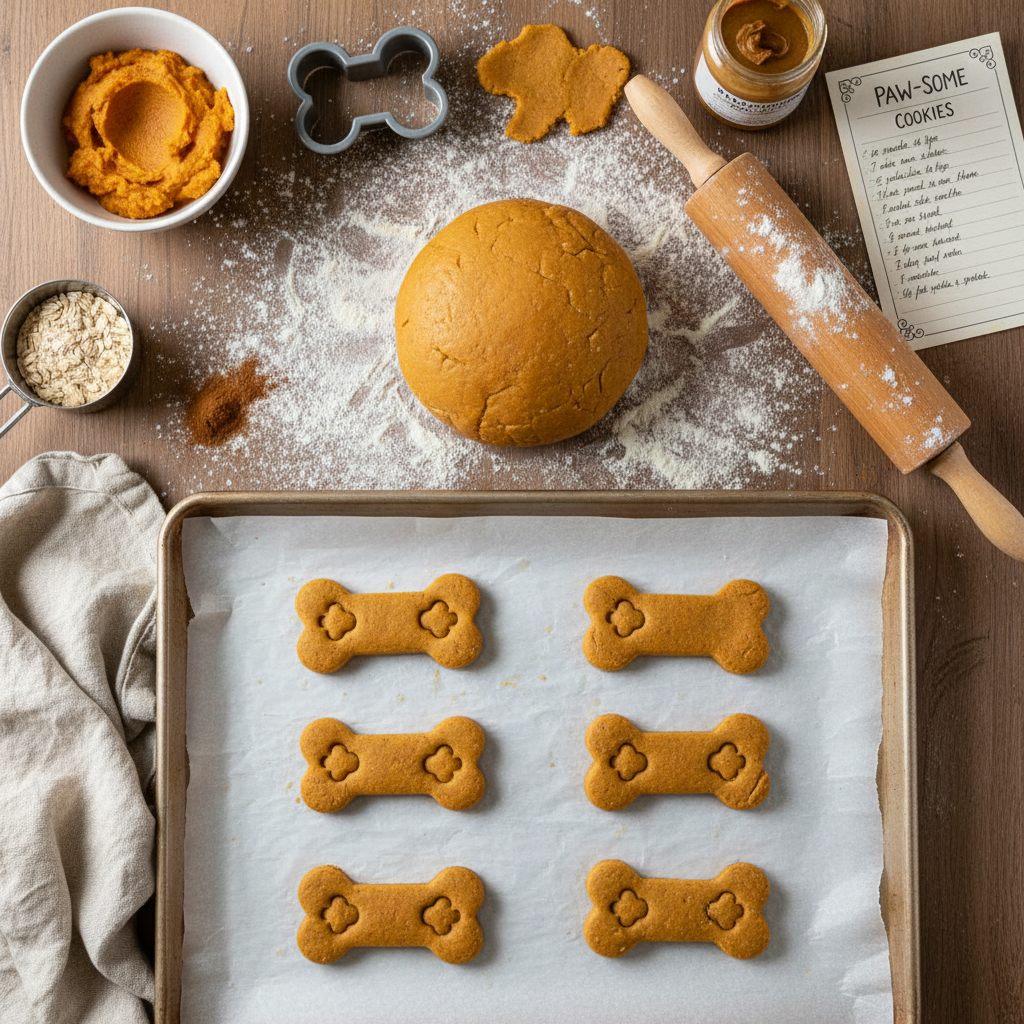
This is the exact blueprint. Follow it precisely for consistent, effective results. This recipe is formulated to be simple, using common pantry items, while maximizing digestive benefits. Do not substitute ingredients without understanding their nutritional impact.
Required Ingredients
- 2 cups Oat Flour (if you don’t have it, blend 2.5 cups of old-fashioned rolled oats until fine)
- 1/2 cup 100% Pure Pumpkin Puree
- 1/4 cup Water (plus more if needed)
- 1 large Egg
- 1 tablespoon Coconut Oil, melted
- For Small Dogs (under 25 lbs): 1/2 teaspoon ground ginger or 1 teaspoon freshly grated ginger
- For Medium/Large Dogs (over 25 lbs): 3/4 teaspoon ground ginger or 1.5 teaspoons freshly grated ginger
Essential Equipment
- Mixing Bowls
- Measuring Cups and Spoons
- Whisk or Fork
- Rolling Pin
- Baking Sheets
- Parchment Paper
- Bone-shaped cookie cutter (optional)
Step-by-Step Instructions
- Preheat & Prep: Preheat your oven to 350°F (175°C). Line a large baking sheet with parchment paper to prevent sticking.
- Combine Wet Ingredients: In a large bowl, whisk together the pumpkin puree, egg, melted coconut oil, and water until smooth and fully combined.
- Incorporate Ginger: Whisk in your measured amount of ground or freshly grated ginger. Ensure it is evenly distributed throughout the wet mixture for consistent dosage in each biscuit.
- Add Dry Ingredient: Gradually add the oat flour to the wet mixture. Stir with a spatula until a thick, slightly sticky dough begins to form. Do not overmix.
- Form the Dough: Dust your hands and a clean work surface with a little extra oat flour. Knead the dough gently for about 30 seconds until it comes together into a cohesive ball. If the dough is too dry, add water one teaspoon at a time. If too sticky, add a sprinkle of oat flour.
- Roll and Cut: Roll the dough out to approximately 1/4-inch thickness. Use a cookie cutter to cut out shapes and place them on your prepared baking sheet. Alternatively, you can use a knife or pizza cutter to cut the dough into small, bite-sized squares.
- Bake: Bake for 20-25 minutes, or until the edges are golden brown and the biscuits are firm to the touch. For a crunchier treat, turn off the oven, crack the door, and let the biscuits cool inside the oven for an additional hour.
- Cool Completely: Transfer the biscuits to a wire rack to cool completely before serving or storing. This is a critical step to prevent moisture buildup and mold.
Proper Protocol: Dosage and Timing for Maximum Effect
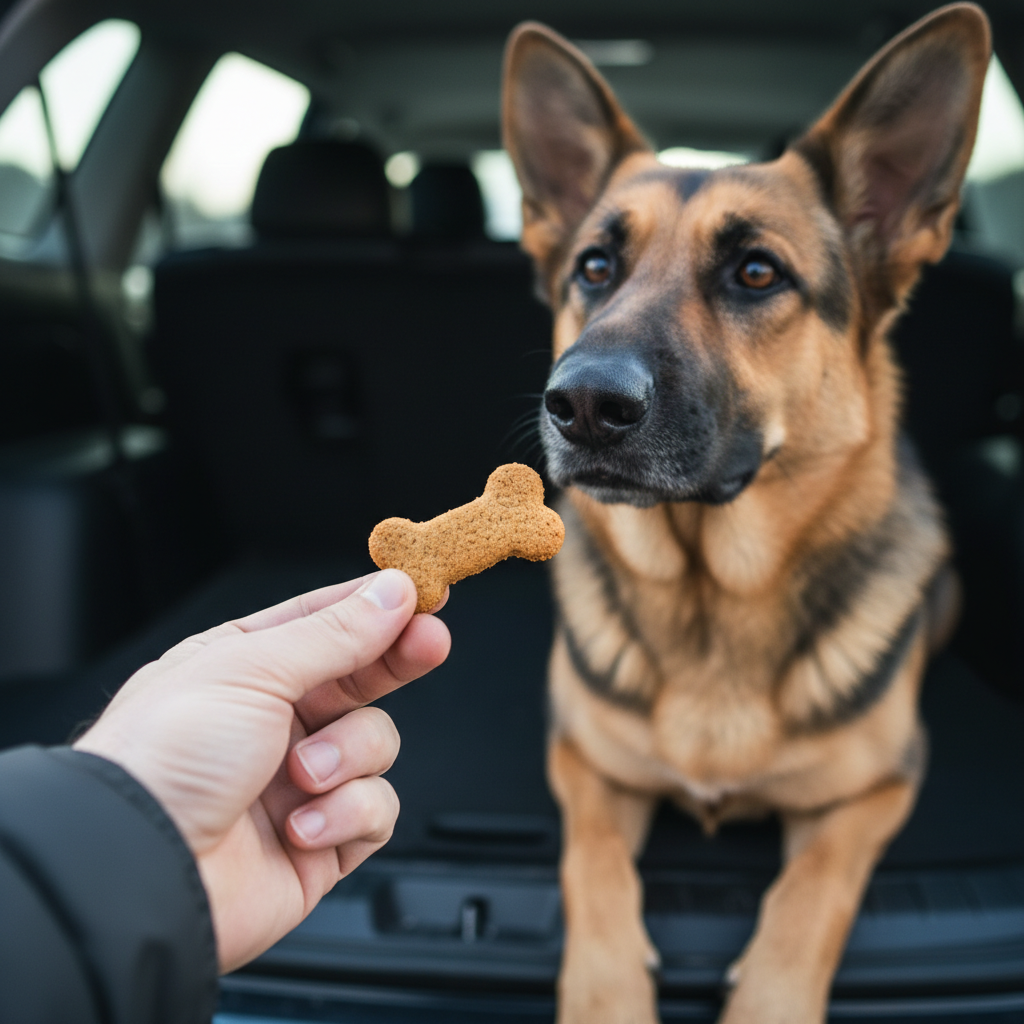
Creating the perfect biscuit is only half the battle; deploying it effectively is what ensures a peaceful journey. Timing and dosage are critical. Giving the treat as you’re pulling out of the garage is too late. The active compounds in ginger need time to be absorbed and start working on the gastrointestinal tract.
Hacker Tip: The ideal window for administration is 30 to 60 minutes before you begin your car journey. This allows the ginger to effectively settle the stomach before the motion begins.
Recommended Dosage Guidelines
These are general guidelines. Always start with a smaller amount to see how your dog reacts. The goal is a therapeutic effect, not to fill their stomach.
- Small Dogs (under 25 lbs): 1 small biscuit.
- Medium Dogs (25-60 lbs): 2 small biscuits or 1 medium biscuit.
- Large Dogs (over 60 lbs): 2-3 biscuits, depending on size and sensitivity.
WARNING: Do not exceed the recommended dosage. While ginger is safe, too much can lead to an opposite effect, causing heartburn or stomach upset. Observe your dog. If you notice any lethargy, excessive panting, or other adverse signs, discontinue use and consult your vet.
The Batch Cooking Playbook: Storing Your Arsenal Against Nausea
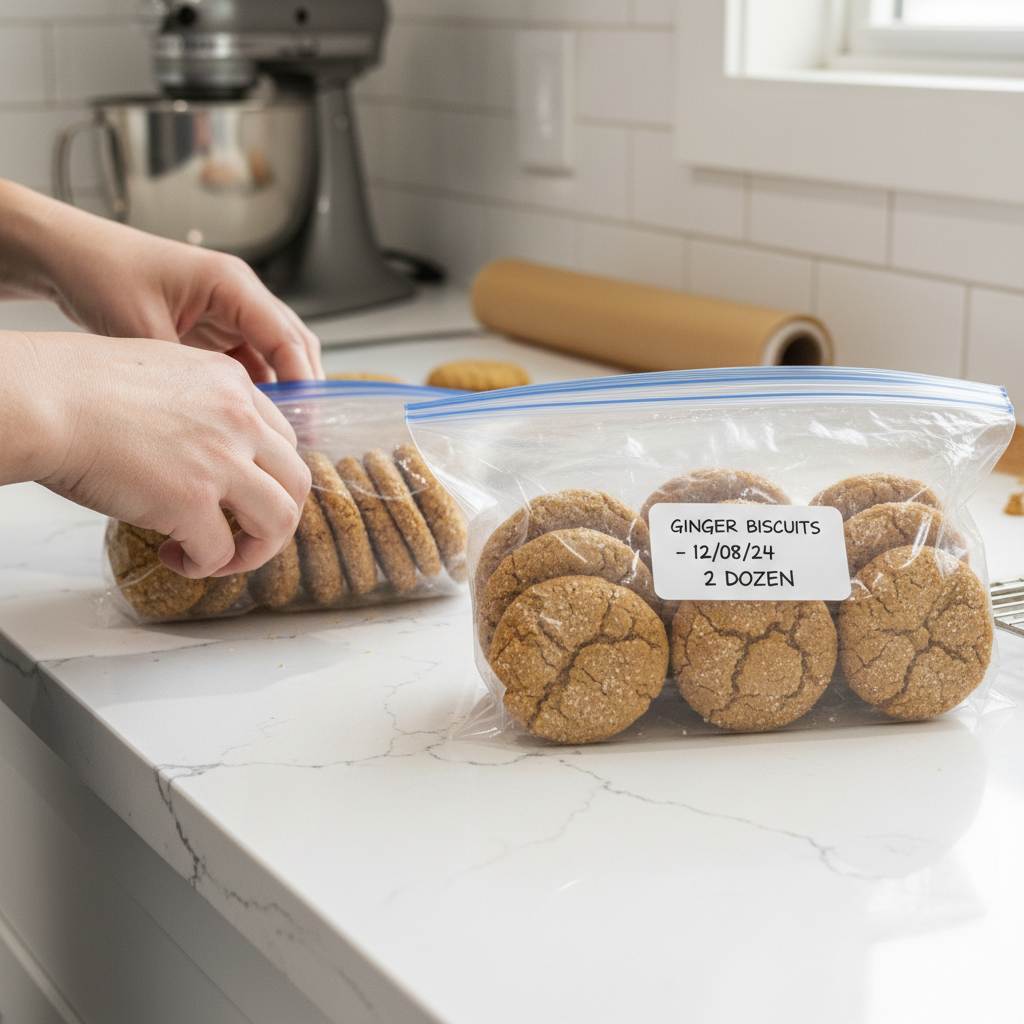
Your time is valuable. This recipe is designed for batch cooking, allowing you to prepare a month’s supply of travel treats in under an hour. Proper storage is non-negotiable to maintain freshness and potency, and to prevent mold, as these treats contain no artificial preservatives.
Short-Term Storage (Up to 1 Week)
Once the biscuits are 100% cooled—any residual warmth will create condensation and spoilage—place them in an airtight container. A glass jar with a sealing lid or a high-quality food storage container is ideal. Store them on the counter or in a cool, dark pantry. They will remain fresh and crunchy for up to 7 days.
Long-Term Storage (Up to 3 Months)
For maximum efficiency, freezing is your best strategy. This locks in the freshness and the potency of the ginger.
- Flash Freeze: Arrange the completely cooled biscuits in a single layer on a baking sheet. Place the sheet in the freezer for 1-2 hours, or until the biscuits are frozen solid. This crucial step prevents them from sticking together in a giant clump.
- Package for Freezing: Transfer the frozen biscuits into a freezer-safe zip-top bag or a vacuum-seal bag. Squeeze out as much air as possible before sealing. Label the bag with the date.
- Thawing: Simply take out the number of biscuits you need an hour or two before you plan to use them and let them thaw at room temperature. Do not microwave them, as it can create hot spots and alter the texture.
By following this protocol, you’ll always have a supply of soothing treats ready for any impromptu car ride, saving you from last-minute trips to the pet store.
Conclusion
You now possess the knowledge and the tactical blueprint to effectively combat your dog’s car sickness. By investing a small amount of time, you’ve moved beyond the role of a passive consumer and have become a proactive guardian of your dog’s well-being. You’ve replaced overpriced, questionable commercial products with a homemade, whole-food solution that is more effective, significantly cheaper, and made with complete transparency. You have control over every single ingredient, ensuring your dog gets the best. Keep this recipe in your arsenal and transform travel from a source of anxiety into just another adventure you can share with your loyal companion. Remember to always observe your pet, consult with your veterinarian for persistent health issues, and take pride in providing the very best for your dog.