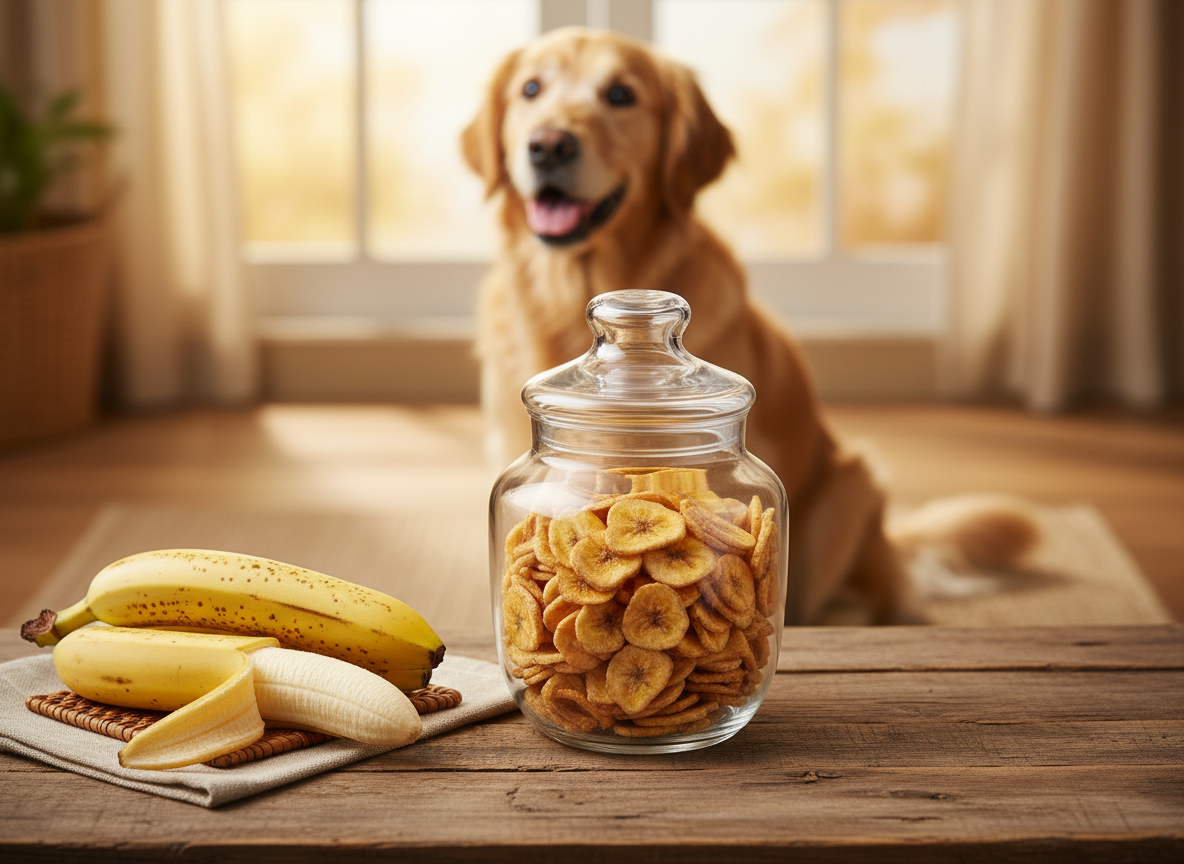
Easy Dehydrated Banana Chips: A Healthy Crunchy Dog Treat
Walk down any pet store aisle and you’re bombarded with brightly colored bags promising ‘natural,’ ‘wholesome,’ and ‘healthy’ treats for your dog. But turn that bag over and you’ll enter a world of deceptive marketing and questionable ingredients. The truth is, most commercial dog treats are the equivalent of canine junk food, loaded with sugars, fillers, and chemical preservatives designed for shelf stability, not your dog’s health. You are paying a premium for marketing, not nutrition.
This guide is your exit strategy. We’re going to bypass the entire system by creating a superior treat with just one ingredient you already have in your kitchen: the banana. Dehydrated banana chips are not only incredibly easy to make, but they’re also a powerhouse of potassium and fiber. More importantly, you control 100% of the process. No hidden sugars, no mystery ‘meat by-products,’ no artificial anything. Just pure, crunchy goodness.
SAFETY DISCLAIMER: I am The Canine Nutrition Hacker, not a veterinarian. The information provided here is for educational purposes based on extensive research and experience. These treats are intended for supplemental feeding only and should be given in moderation. Always consult with your veterinarian before introducing new foods into your dog’s diet, especially if they have underlying health conditions like diabetes.
Deconstructing the Commercial Treat: What You’re Really Paying For
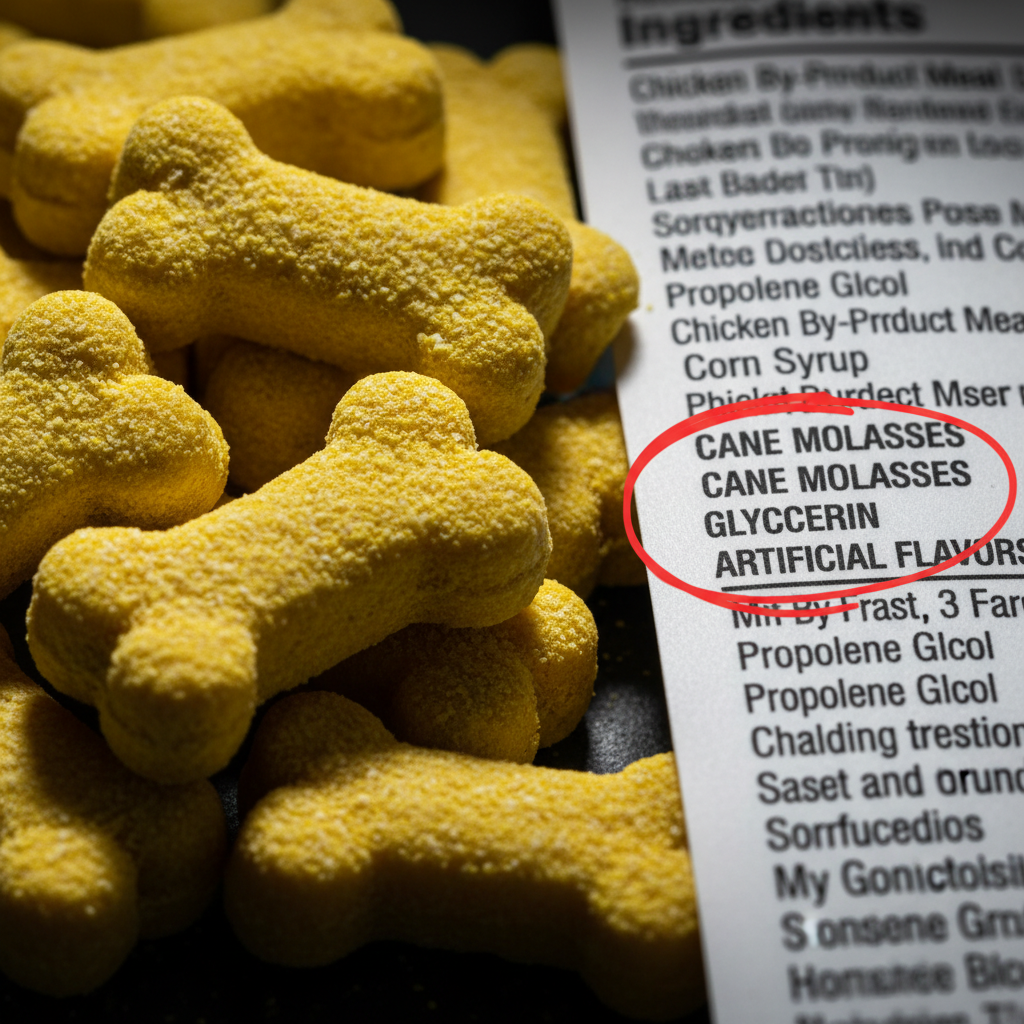
Before we build the perfect treat, we must first dissect the enemy. Let’s grab a hypothetical bag of ‘Banana-Bites’ from the shelf. The front of the bag shows a happy dog frolicking in a field. The words ‘Vet Recommended’ and ‘All Natural’ are plastered in bold letters. Now, let’s apply a forensic lens to the ingredient label—the only part of the packaging that tells the truth.
The ‘First 5 Ingredients’ Truth
The first five ingredients make up the bulk of any product. Here’s what we typically find in commercial ‘fruit-flavored’ treats:
- Wheat Flour: A common, cheap filler and one of the most prevalent allergens for dogs. It provides little nutritional value and is used to bulk up the treat.
- Glycerin: A sweetener and humectant used to keep treats soft and chewy. While generally considered safe, it adds unnecessary sugar to your dog’s diet.
- Cane Molasses: Another word for sugar. It enhances flavor and acts as a binder, but it’s a primary contributor to canine obesity and dental problems.
- Vegetable Oil: Often a vague term for a low-quality oil blend (like soy or corn oil), which can be pro-inflammatory.
- Natural Banana Flavor: This is a chemical cocktail created in a lab to mimic the taste of banana. It is not, in fact, from a real banana.
You have to read far down the list, often after the salt and chemical preservatives like BHA or BHT, to find ‘dried banana powder’ in a minuscule quantity. You are essentially paying for a sugary, wheat-based biscuit that has been sprayed with banana perfume.
Hacker Tip: If you can’t pronounce the first five ingredients, or if sugar (under any of its sneaky names like molasses, corn syrup, or fructose) is listed, drop the bag and walk away. Your dog’s health isn’t worth their marketing budget.
The Cost-Benefit Analysis: Hacking Your Treat Budget
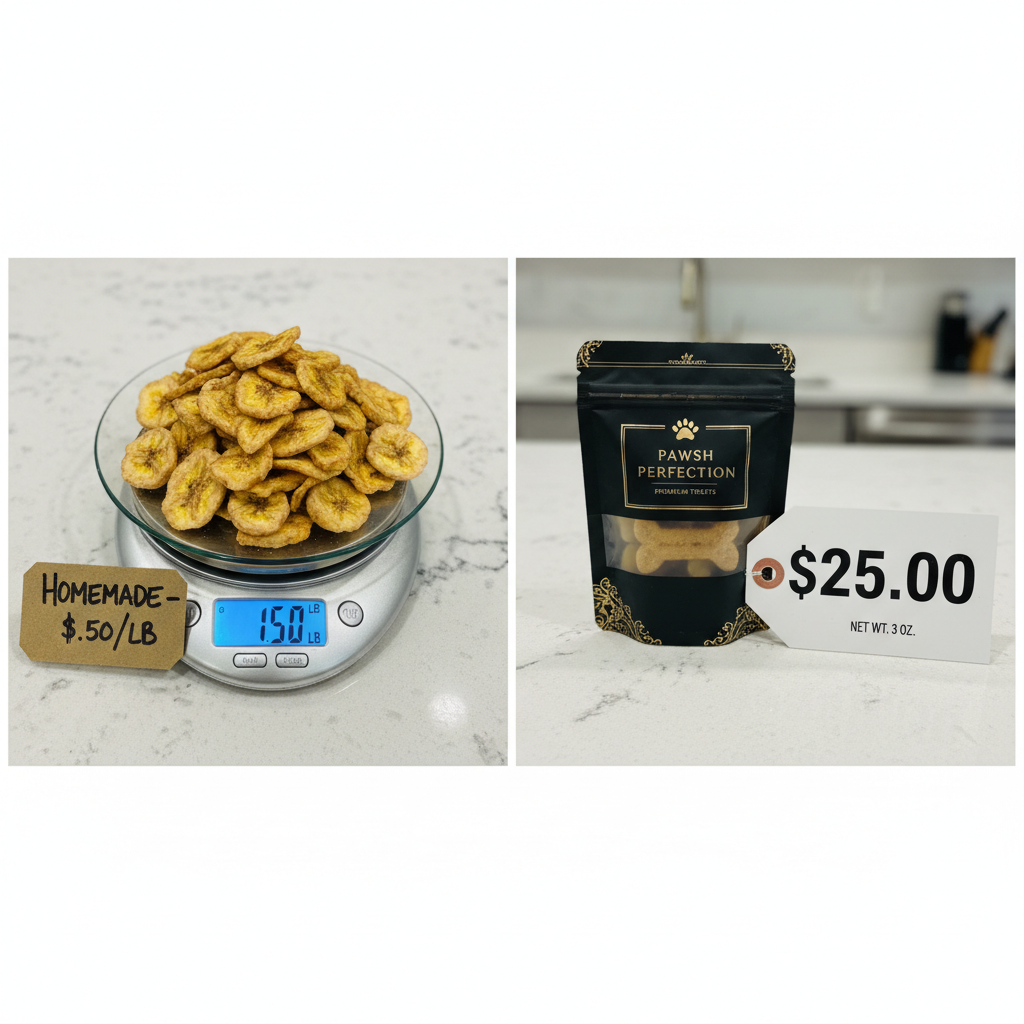
The illusion that commercial treats are a convenient, cost-effective option shatters under scrutiny. When you analyze the cost per ounce of actual nutritional content, homemade is the undisputed champion. The initial investment in a dehydrator might seem like a hurdle, but the long-term savings are substantial, not to mention the invaluable health benefits.
Let’s break down the numbers for a clear, no-nonsense comparison. We’ll compare making a batch at home (both with a dehydrator and a standard oven) to buying a bag of ‘premium’ single-ingredient banana chips from a boutique pet store.
| Metric | DIY (Dehydrator Method) | DIY (Oven Method) | Premium Store-Bought |
|---|---|---|---|
| Initial Equipment Cost | $40 – $150 (one-time) | $0 (uses existing oven) | $0 |
| Ingredient Cost (per lb of bananas) | ~$0.60 | ~$0.60 | N/A |
| Energy Cost (per batch) | ~$0.50 | ~$1.20 | $0 |
| Yield from 1 lb of Bananas | ~3.5 ounces of dried chips | ~3.5 ounces of dried chips | N/A |
| Final Cost Per Ounce | ~$0.31 | ~$0.51 | $3.50 – $5.00+ |
The data is undeniable. Even using the less energy-efficient oven method, you are producing a superior product for a fraction of the price. A single 3.5oz bag of boutique dehydrated banana chips can cost upwards of $12. You can produce the same amount at home for about a dollar. The dehydrator pays for itself within the first few months of bypassing the commercial treat aisle. You’re not just saving money; you’re investing in a tool that allows you to take complete control over your dog’s treat quality for years to come.
The Canine Nutrition Hacker’s Blueprint: Dehydrated Banana Chips
This is where the theory ends and the action begins. This blueprint is designed for simplicity and perfect results every time. We will cover the optimal dehydrator method and a reliable oven-based workaround for those without the dedicated equipment.
Required Equipment & Ingredients
- Food Dehydrator: The best tool for the job. It provides consistent, low-temperature air circulation for evenly dried, crunchy chips.
- Mandoline Slicer (Recommended): For perfectly uniform slices. Consistency in thickness is the absolute key to even drying. A sharp knife and steady hand also work.
- Airtight Storage Container: A glass mason jar with a good seal is ideal for long-term storage.
- Oven & Baking Sheets (Alternative): If you don’t have a dehydrator, your oven can work, but it requires more attention.
- Ingredient: 3-4 ripe bananas. Choose bananas with some brown spots. The starches have converted to sugar, making them naturally sweeter and more flavorful (in a good way!) for your dog.
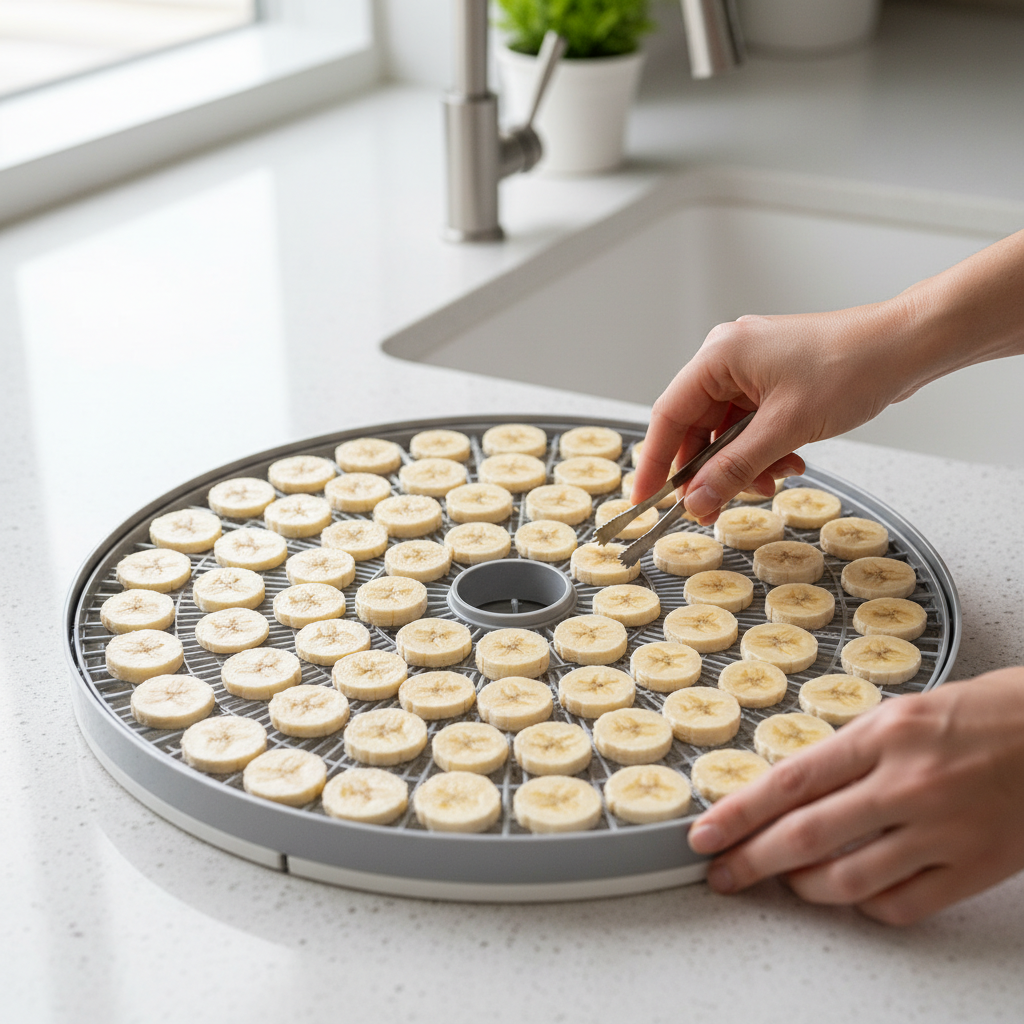
The Process: Dehydrator Method (Optimal)
- Preparation: Peel the bananas. Using a mandoline or sharp knife, slice the bananas into uniform rounds, approximately 1/8 to 1/4 inch thick. Thinner slices yield a crispier chip, while thicker slices will be chewier.
- Arrangement: Place the banana slices on the dehydrator trays in a single layer. Ensure the slices are not overlapping, as this will prevent them from drying evenly.
- Dehydration: Set your dehydrator to 135°F (or 57°C). This temperature is ideal for fruits, as it dries them efficiently without cooking them.
- Patience: Let the dehydrator run for 6-10 hours. The exact time will depend on the thickness of your slices, the humidity in your home, and your specific dehydrator model.
- Check for Doneness: The chips are ready when they are leathery or crisp, depending on your preference. For a crunchy chip, they should snap when you try to bend them. If they are still pliable, they need more time.
The Process: Oven Method (The Workaround)
- Preparation: Preheat your oven to its lowest possible temperature, ideally between 170-200°F (75-95°C). Any hotter and you will bake or burn the bananas. Slice the bananas as described above.
- Arrangement: Line baking sheets with parchment paper. Arrange the banana slices in a single, non-overlapping layer.
- Drying: Place the baking sheets in the oven. Crucially, prop the oven door open slightly with a wooden spoon. This allows moisture to escape, which is essential for dehydration rather than baking.
- Flip & Rotate: Bake for 2-3 hours, flipping the slices halfway through to promote even drying.
- Check for Doneness: The chips are ready when they are dry to the touch and have reached your desired level of crispiness. They will continue to crisp up as they cool.
Insider Secret: For an anti-inflammatory and digestive boost, you can sprinkle a tiny amount of Ceylon cinnamon on the slices before dehydrating. Do not use standard Cassia cinnamon, as it contains higher levels of coumarin, which can be harmful to dogs in anything more than minuscule quantities.
Long-Term Storage & Serving Protocols
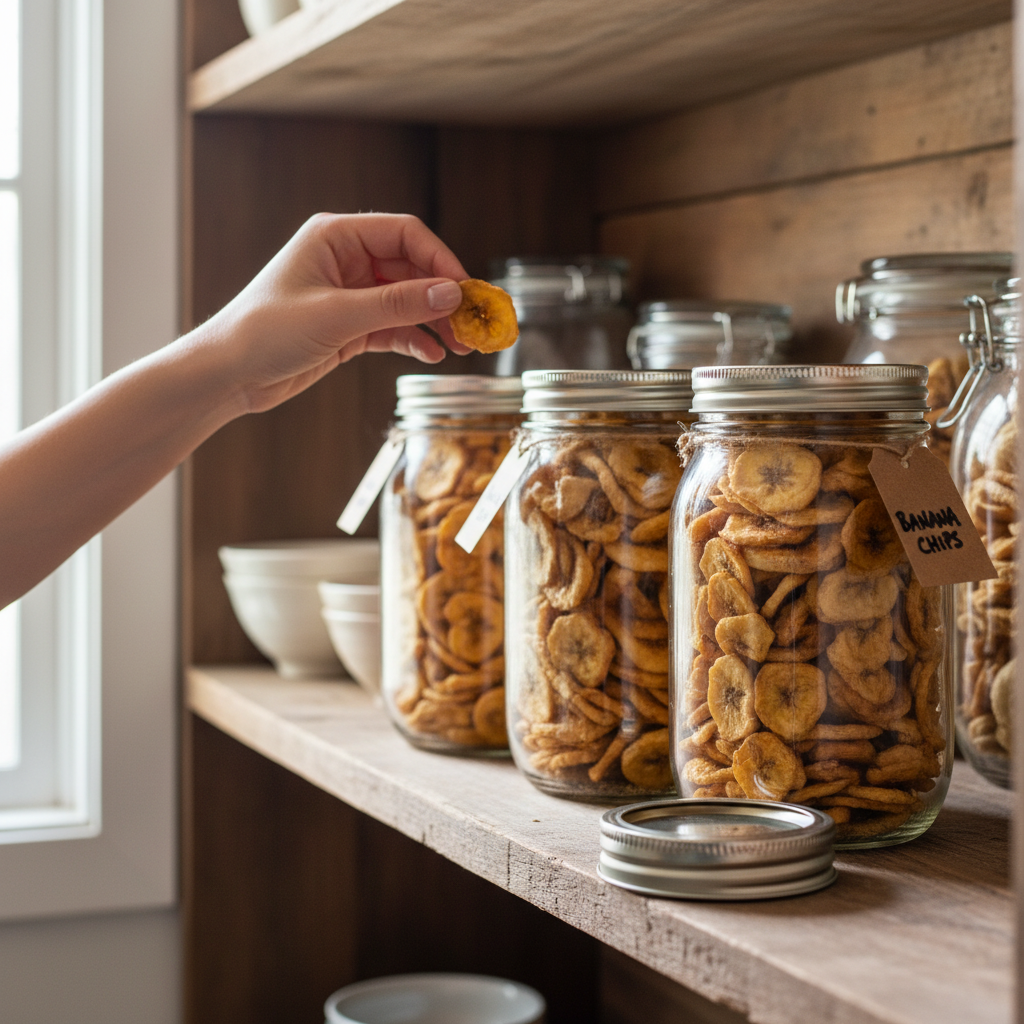
You’ve successfully created a batch of pristine, single-ingredient dog treats. Your final mission is to store them correctly to preserve their crunch and prevent spoilage. Improper storage is the number one reason homemade treats fail.
Ensuring Maximum Shelf Life: The Conditioning Protocol
This is a step most people skip, but it’s critical for long-term storage. When you take the chips out of the dehydrator, some may have slightly more residual moisture than others. Conditioning equalizes this moisture content.
- Cool Down: Let the banana chips cool completely to room temperature on the trays. Do not put warm chips in a container.
- Condition: Place the cooled chips into a large, airtight glass jar, but only fill it about two-thirds full. Seal the jar and let it sit on your counter for 24-48 hours.
- Shake: Shake the jar a couple of times a day. This separates the slices and redistributes any moisture. If you see any condensation forming on the inside of the jar, the chips are not dry enough and need to go back into the dehydrator for another hour or two.
- Store: Once you are confident no condensation is forming, the chips are ready for long-term storage. Kept in a cool, dark place, they will last for several months.
Serving Guidelines: Treats, Not Meals
Just because they are healthy doesn’t mean they can be fed with abandon. These are treats and should be factored into your dog’s total daily caloric intake. Bananas are a source of natural sugar, so moderation is key.
- Small Dogs (under 20 lbs): 1-2 chips per day.
- Medium Dogs (20-50 lbs): 3-4 chips per day.
- Large Dogs (over 50 lbs): 4-5 chips per day.
Important Warning: Overfeeding even healthy treats like bananas can lead to excess sugar intake, which can contribute to weight gain and unbalance their primary diet. Always provide access to fresh water. These treats are excellent for training rewards or as a simple ‘good boy’ snack.
Conclusion
You have now successfully hacked the dog treat industry. By investing a small amount of time, you’ve created a product that is nutritionally superior, exponentially cheaper, and infinitely safer than the vast majority of products on pet store shelves. You’ve replaced chemical preservatives with a simple drying process and artificial flavors with the real, unadulterated goodness of a single ingredient.
This is about more than just one recipe. It’s a mindset shift. It’s about looking at every label with a critical eye and reclaiming control over what goes into your dog’s body. Stop paying premium prices for marketing and fillers. Start hacking your dog’s diet one healthy, homemade treat at a time. Your dog, and your wallet, will thank you.