How to Make High-Value Dehydrated Beef Liver Training Treats
Walk down any pet store aisle and you’re bombarded with a wall of brightly colored bags, all promising to be the ‘perfect’ training treat. They boast ‘real meat’ and ‘grain-free’ formulas, but turn the bag over. What you’ll find is a laundry list of ingredients you can’t pronounce, mysterious ‘meat by-products,’ sugar-based binders like molasses, and a price tag that’s frankly insulting. You’re paying a premium for marketing, not nutrition. This ends today.
As The Canine Nutrition Hacker, my mission is to empower you to see through the industry noise and take control of what goes into your dog’s body. The single most effective, high-value training tool in my arsenal doesn’t come in a fancy bag. It’s dehydrated beef liver. And you’re about to learn how to make it yourself for a fraction of the cost, with zero fillers, zero preservatives, and 100% pure, unadulterated canine-cracking power.
SAFETY DISCLAIMER: I am a dedicated canine nutrition analyst, not a veterinarian. The information provided here is for educational purposes based on extensive research and experience. While these single-ingredient treats are generally safe, always consult with your veterinarian before introducing new foods into your dog’s diet, especially if they have pre-existing health conditions like liver or kidney issues. Treats should only make up a small portion (no more than 10%) of your dog’s daily caloric intake. Always supervise your pet when giving them any treat.
The Forensic Analysis: Store-Bought vs. Homemade Liver Treats
The Forensic Analysis: Store-Bought vs. Homemade Liver Treats
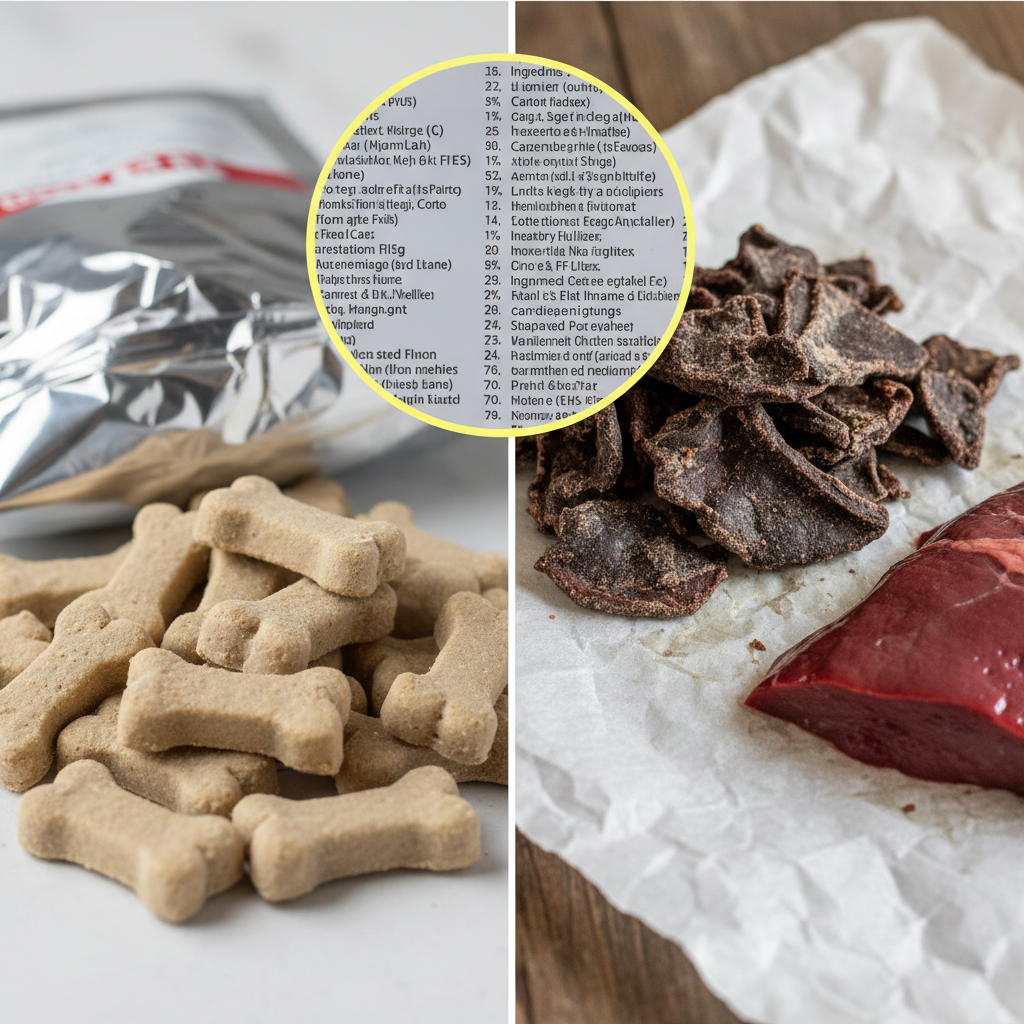
Before we dive into the ‘how,’ let’s establish the ‘why.’ The difference between a commercial liver treat and your homemade version is staggering, not just in quality but in pure economic terms. Let’s put them under the microscope.
The ‘First 5 Ingredients’ Truth
Pick up a popular bag of ‘liver bites’ and examine the label. The first ingredient might be liver, but what follows? Often, you’ll see things like: pea flour, potato starch, molasses, glycerin, and salt. These are cheap fillers and humectants designed to add weight, create a soft texture, and extend shelf life. Your dog doesn’t need them. In some cases, they can even contribute to inflammation and weight gain. Your homemade version has one ingredient: Beef Liver. That’s it. No fillers, no junk, no deception.
The Real Cost Breakdown
The numbers don’t lie. Commercial brands leverage convenience to charge exorbitant prices. By investing a little time, you keep that money in your pocket. Let’s break down the cost for a typical 8-ounce batch of finished treats.
| Metric | Premium Store-Bought Brand | DIY Canine Hacker Method |
|---|---|---|
| Primary Ingredient | Beef Liver, Pea Flour, Glycerin, etc. | 100% Beef Liver |
| Typical Price | $15.00 for a 6 oz. bag | $4.00 for 1 lb. fresh beef liver |
| Price Per Ounce | $2.50 / ounce | Approx. $0.50 / ounce (finished product) |
| Yield from 1 lb. Raw | N/A | Approx. 8 ounces dehydrated |
| Savings Verdict | Premium Price for Fillers | 80% SAVINGS for a PURE product |
As you can see, you’re looking at a staggering 80% reduction in cost for a product that is nutritionally superior in every conceivable way. Over a year of consistent training, this translates to hundreds of dollars in savings.
Insider Secret: Many commercial ‘liver’ treats use clever wording like ‘liver flavor’ or list liver far down the ingredient list. If it’s not the first ingredient, you’re likely buying a grain or starch-based treat with a hint of liver for taste. Always read the full label.
Sourcing and Prep: The Foundation of a Perfect Treat
Sourcing and Prep: The Foundation of a Perfect Treat
The quality of your final product is dictated entirely by the quality of your starting ingredient. Fortunately, beef liver is both inexpensive and widely available. Here’s how to source it and prepare it for perfect dehydration.
Where to Source Your Liver
You don’t need to find a specialty supplier. High-quality beef liver can be found at several places:
- Your Local Supermarket: Most grocery stores carry beef liver in the meat or offal section. It’s usually very affordable.
- Butcher Shops: A local butcher is an excellent source. They can often provide fresher liver and may even be able to tell you about its origin.
- Farmer’s Markets: If you have access to a farmer’s market, you might find vendors selling liver from grass-fed, pasture-raised cattle. This is the gold standard, offering a better fatty acid profile, but conventional liver works perfectly well.
The Preparation Protocol
Proper prep is non-negotiable. It’s the difference between clean, uniform treats and a frustrating, messy ordeal. Follow these steps precisely.
- Rinse and Pat Dry: Rinse the liver under cold running water to remove any surface residue. Pat it completely dry with paper towels. Excess moisture will only prolong the dehydration time.
- Trim the Unwanteds: Carefully inspect the liver for any tough membranes, sinew, or large deposits of fat. Use a sharp knife to trim these away. You want to be left with pure, clean muscle.
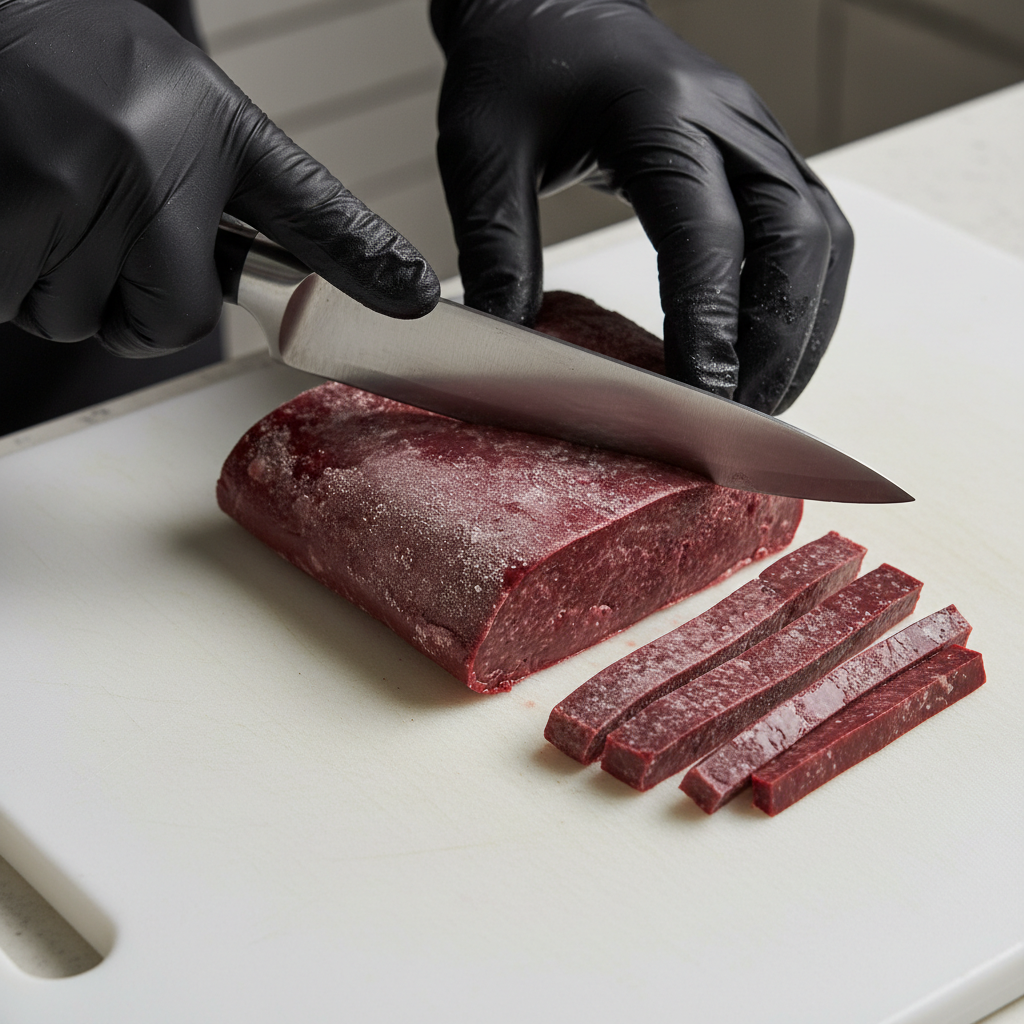
- The Partial Freeze: This is the most important step. Place the trimmed liver flat on a baking sheet lined with parchment paper and put it in the freezer for 1.5 to 2 hours. You don’t want it frozen solid, but it should be very firm and icy to the touch. This firms up the tissue, allowing for paper-thin, even slicing.
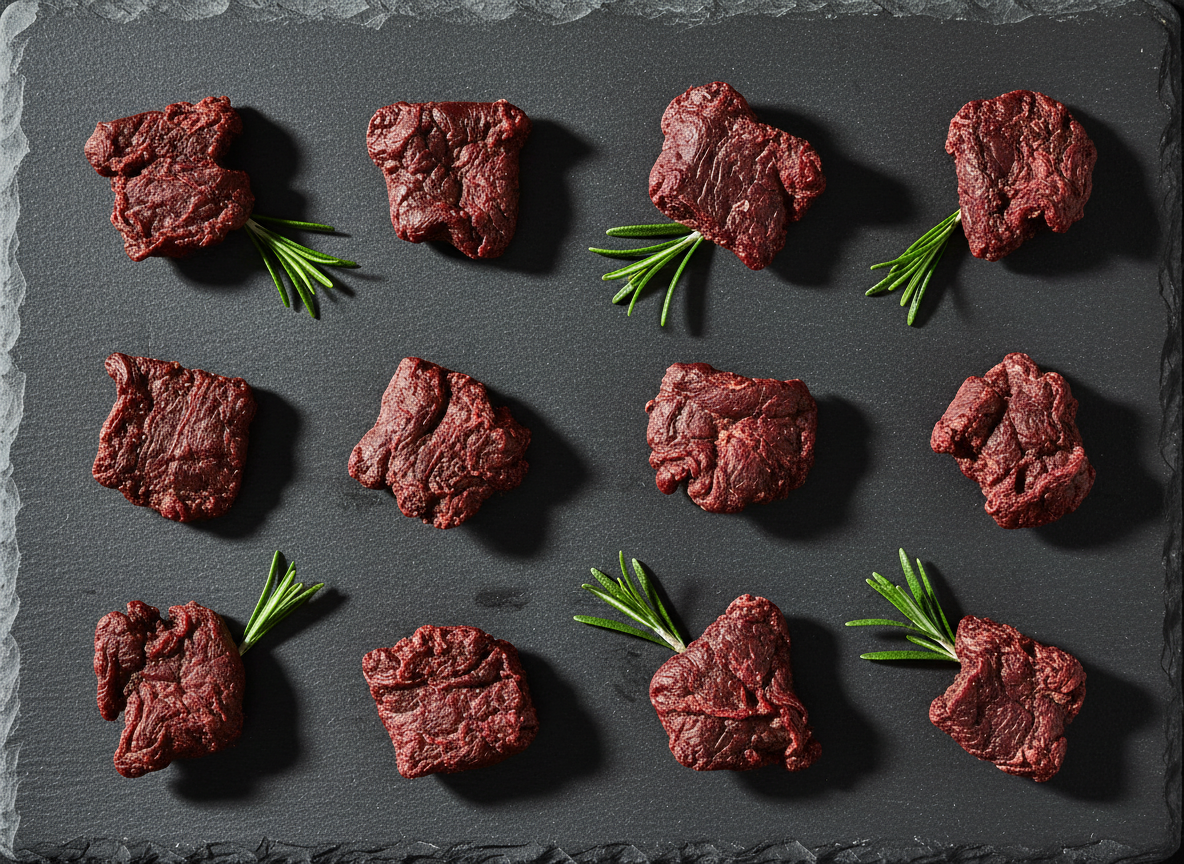
- Slice for Success: Once partially frozen, transfer the liver to a cutting board. Using your sharpest knife, slice the liver against the grain into uniform strips, no thicker than 1/4 inch (about 6mm). The thinner you slice, the faster they will dehydrate. Consistency is key for even drying.
Hacker Tip: Having trouble getting clean slices? Your knife isn’t sharp enough or your liver isn’t firm enough. If the liver starts to thaw and get mushy, put it back in the freezer for another 30 minutes. A sharp blade and a firm piece of liver are the secret handshake to perfect prep.
The Complete Dehydration Blueprint: From Raw to Reward

The Complete Dehydration Blueprint: From Raw to Reward
This is where the magic happens. The process of dehydration slowly removes moisture, concentrating the flavor and creating a shelf-stable, nutrient-dense treat. We’ll cover the two primary methods: using a food dehydrator and a standard kitchen oven.
Method 1: The Dehydrator (Recommended)
A dedicated food dehydrator is the most efficient tool for this job. It provides consistent, low-temperature air circulation for perfect results every time.
- Arrange the Slices: Lay the prepared liver slices on the dehydrator trays in a single layer. Ensure there is space between each piece for air to circulate freely. Do not overlap the slices.
- Set the Temperature: Set your dehydrator to a temperature between 145°F and 160°F (63°C to 71°C). This temperature is high enough to kill any potential bacteria like Salmonella or E. coli while being low enough to dry the meat without cooking it.
- The Waiting Game: Dehydration time will vary based on the thickness of your slices and the humidity in your home. Expect it to take anywhere from 6 to 12 hours.
- Check for Doneness: After about 5-6 hours, start checking the treats. A fully dehydrated piece of liver will be hard, dark, and brittle. It should not be chewy or flexible. The ultimate test is to take a piece out, let it cool completely for 10 minutes, and then try to bend it. It should snap cleanly in two. If it bends, it needs more time.
Method 2: The Conventional Oven
No dehydrator? No problem. Your oven can do the job, but it requires a bit more attention to ensure proper airflow.
- Preheat and Prepare: Preheat your oven to its lowest possible temperature setting, ideally around 150°F to 170°F (65°C to 77°C). If your oven doesn’t go this low, use the lowest setting and prop the door open slightly with the handle of a wooden spoon to allow moisture to escape and prevent the oven from getting too hot.
- Use Cooling Racks: Do not place the liver directly on a baking sheet. This will trap moisture underneath. Instead, place wire cooling racks onto the baking sheets and arrange the liver slices on the racks. This allows air to circulate all around each piece.
- The Long Bake: Place the baking sheets in the oven. The drying time will be similar to a dehydrator, typically 5 to 10 hours. It’s a good idea to rotate the trays halfway through to promote even drying.
- The Snap Test: Just like with the dehydrator method, the treats are done when they are hard, brittle, and snap when bent after cooling. Do not under-dry them. Any remaining moisture is a breeding ground for bacteria and mold.
The Hacker’s Guide to Storage and Shelf Life
The Hacker’s Guide to Storage and Shelf Life
You’ve put in the work to create a batch of pristine, high-quality treats. The final step is to store them correctly to protect your investment and ensure they remain safe and potent for weeks or even months.
The Critical Cooling Period
Before you even think about storage, the treats must be 100% cooled to room temperature. Package them while they are still warm, and condensation will form inside the container, reintroducing moisture and guaranteeing spoilage. After the ‘snap test’ confirms they’re done, turn off the appliance, and let them cool completely for at least one hour.
Storage Tiers: From Countertop to Deep Freeze
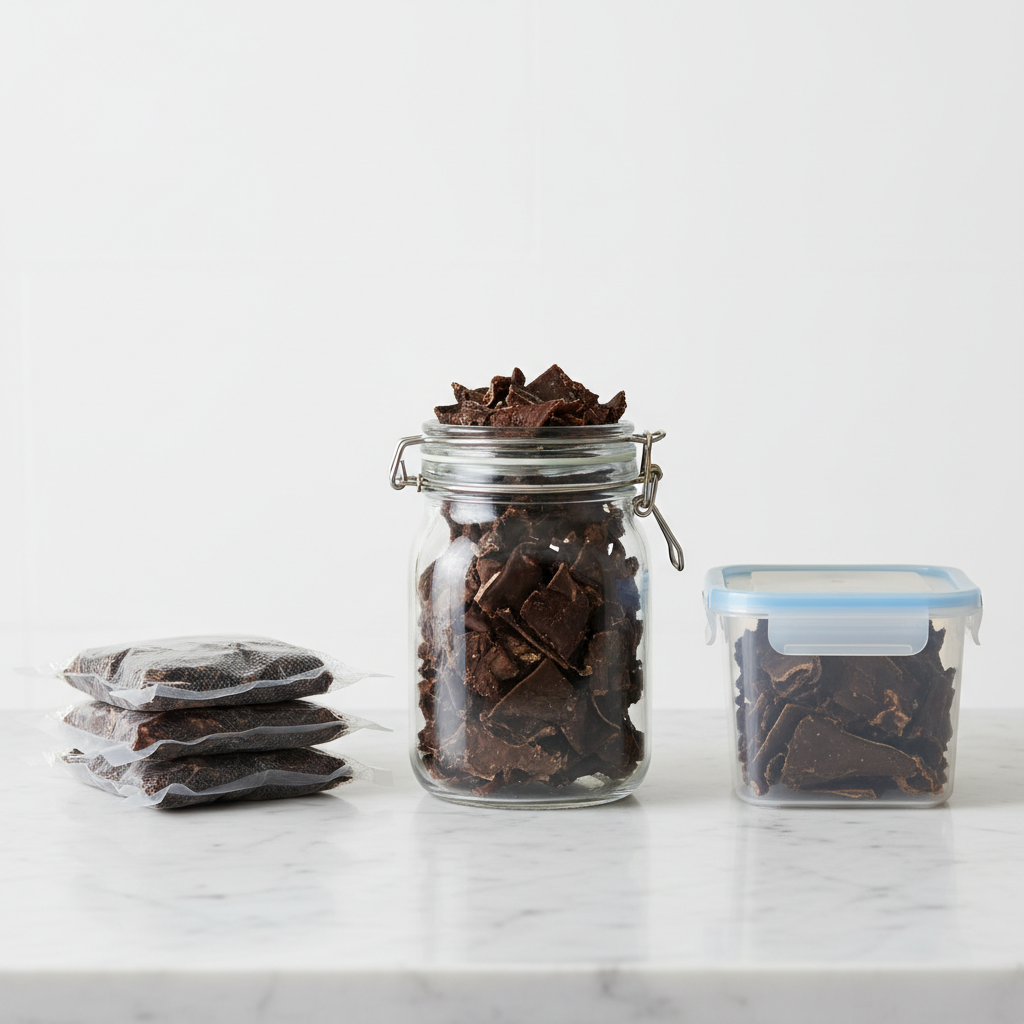
Your storage method depends on how quickly you plan to use the treats.
- Short-Term (1-2 Weeks): For treats you’ll use in the near future, an airtight container like a glass mason jar or a Tupperware container is sufficient. Store it in a cool, dark place like a pantry. Do not store them in a Ziploc bag for more than a few days, as they are not truly airtight.
- Medium-Term (1-3 Months): For longer storage, you need to remove as much air as possible. A vacuum sealer is the best tool for this. Vacuum-sealing portions of the treats will dramatically extend their shelf life in the pantry.
- Long-Term (6+ Months): For maximum longevity, the freezer is your best friend. Place the treats (ideally vacuum-sealed) in the freezer. They will last for many months with no degradation in quality. They also make a great cooling treat for your dog on a hot day straight from the freezer.
Always inspect your treats before giving them to your dog. Look for any signs of mold (white or green fuzzy spots) or an off, rancid smell. If you detect either, discard the entire batch immediately. Your dog’s safety is paramount.
Insider Secret: For the ultimate pantry shelf life, purchase food-grade oxygen absorber packets online. Tossing one of these small packets into your airtight mason jar of treats will remove any residual oxygen, creating a perfect preservation environment and keeping the treats ‘snappy’ for months. This is the same technology used in commercial food packaging.
High-Value Application: Maximizing Training Impact
High-Value Application: Maximizing Training Impact
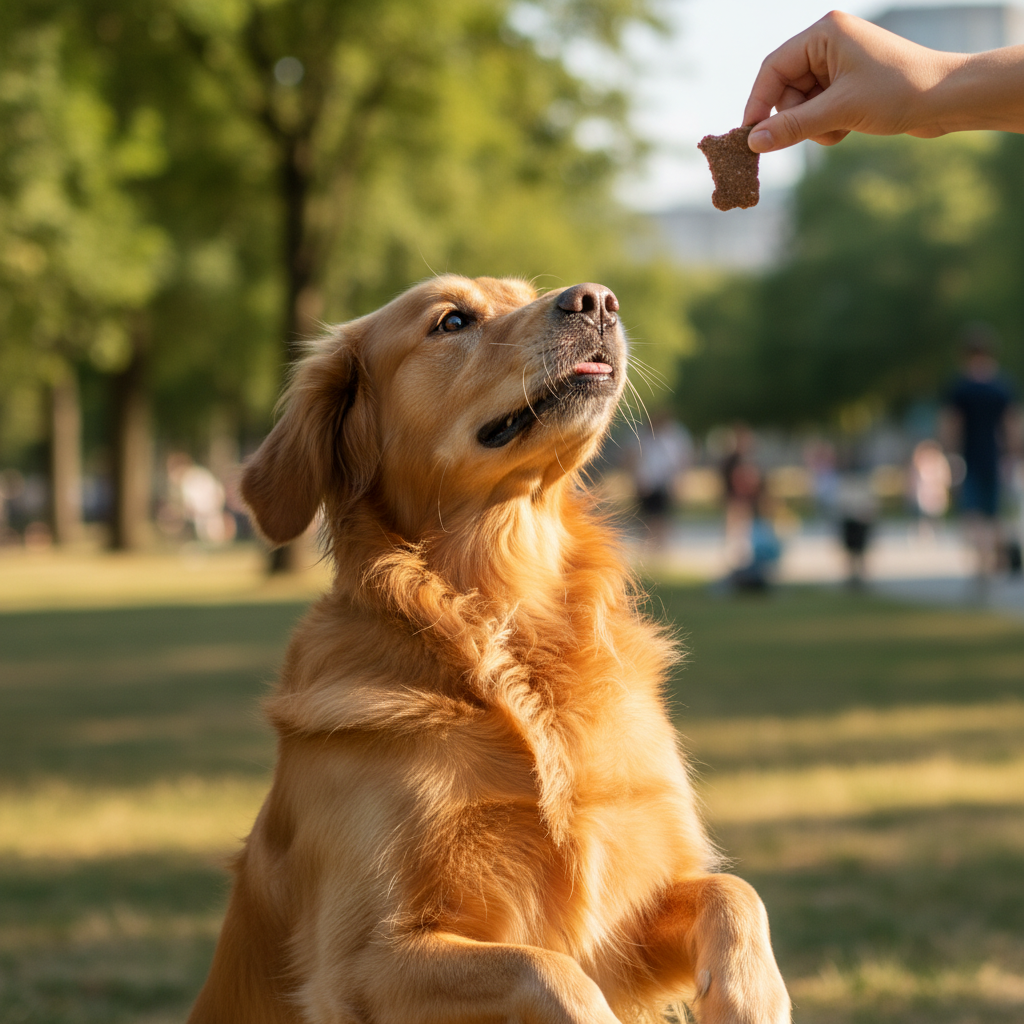
Not all treats are created equal. A piece of kibble is a low-value reward. A biscuit might be medium-value. But pure, dehydrated beef liver? That is the definition of a high-value reward. Its intense, concentrated aroma and flavor are almost irresistible to dogs, making it a powerful tool in your training toolkit.
When to Deploy the ‘Good Stuff’
You don’t want to use these treats for every ‘sit’ and ‘stay.’ Overuse can diminish their power. Reserve them for specific, high-stakes scenarios to get the most impact:
- Teaching Critical Behaviors: Use them when teaching a life-saving command like ‘come’ (recall) or ‘leave it.’ The high-value reward creates a much stronger positive association with the command.
- Proofing in High-Distraction Environments: Working on loose-leash walking past a park full of squirrels? The allure of a piece of liver can be stronger than the allure of the distraction, keeping your dog’s focus on you.
- Counter-Conditioning and Desensitization: For dogs with fear or reactivity issues (e.g., fear of the vet, reactivity to other dogs), these treats can be used to build new, positive associations with their triggers.
- Complex Skills and Dog Sports: When teaching multi-step behaviors for agility, nose work, or competitive obedience, the high drive created by a top-tier reward is essential.
The Golden Rule of Moderation
Beef liver is incredibly nutrient-dense. It’s rich in Vitamin A, iron, copper, and other essential nutrients. This is great, but it also means it must be fed in moderation. An excess of Vitamin A can be toxic (hypervitaminosis A). Adhere strictly to the 10% rule: treats should make up no more than 10% of your dog’s total daily caloric intake. For most dogs, this means just a few small pieces per day. Break the treats into smaller, pea-sized bits for training sessions to make them last longer and control the portion size. You’re delivering a powerful taste, not a full meal.
Conclusion
You now possess the complete blueprint to opt-out of the commercial treat industry’s game of high prices and low quality. By investing a small amount of time, you’ve learned how to create a training tool that is cheaper, healthier, and exponentially more effective than almost anything you can buy in a store. You control the single ingredient, you control the quality, and you reap the financial rewards. This is the core philosophy of the Canine Nutrition Hacker: breaking down the system to build something better for your dog and your wallet. Stop buying, start making, and watch your training results soar to a level you never thought possible.