Turn Any Bowl into a Slow Feeder: Easy DIY Insert Tutorial
If you have a dog that inhales their food in seconds, you’re not alone. But what seems like a quirky habit is actually a significant health risk. The pet industry’s solution? An endless aisle of expensive, molded plastic bowls that often cost a premium for a simple concept. They’re counting on your concern to drive a purchase. I’m here to tell you there’s a better, cheaper, and more effective way. We’re going to bypass the marketing gimmicks and build a superior solution ourselves.
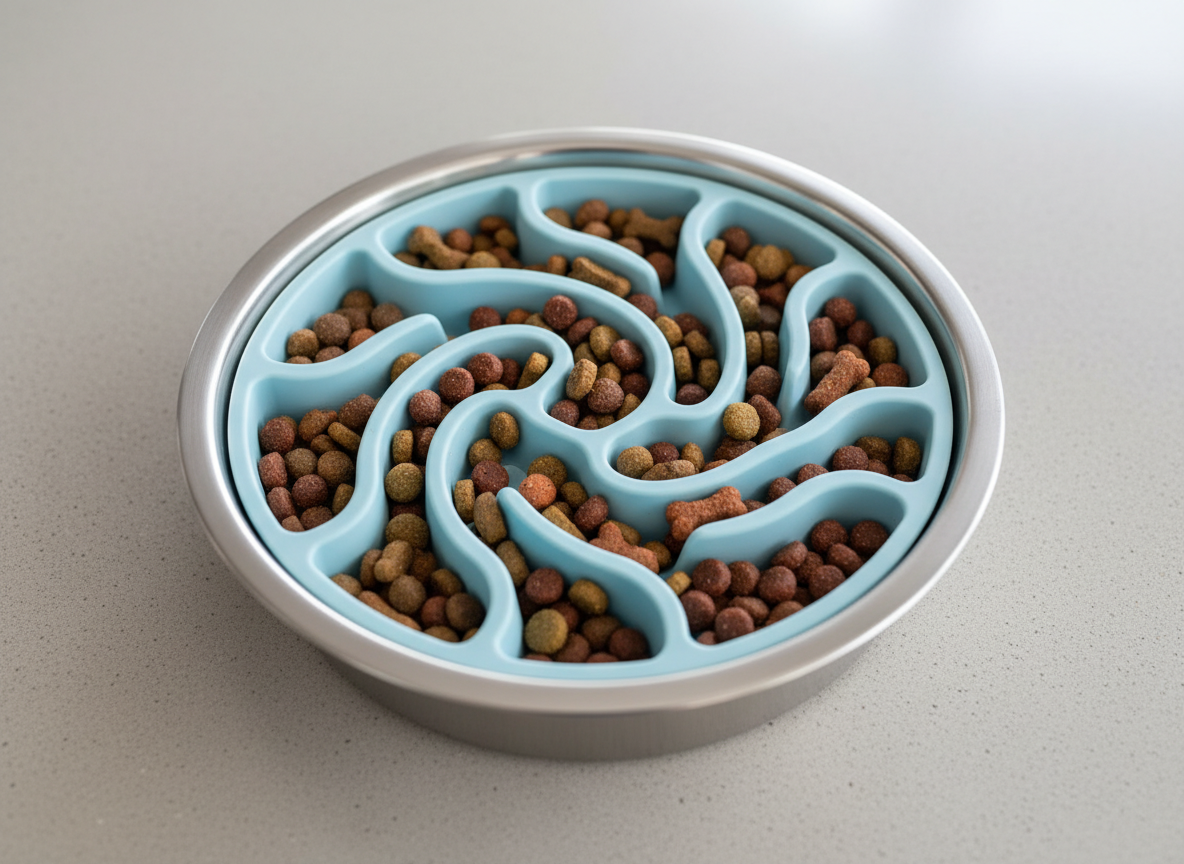
As The Canine Nutrition Hacker, my mission is to empower you to make smarter, healthier choices for your dog without draining your wallet. This guide will walk you through, step-by-step, how to create a custom, food-safe slow feeder insert that fits any bowl you already own. We’ll use one specific, safe material to create a durable, effective tool that slows your dog’s eating, aids digestion, provides mental stimulation, and saves you money. It’s time to take control of your dog’s mealtime safety.
Why Speed Eating is a Red Flag: The Risks You Can’t Ignore

Before we build, let’s understand the enemy. A dog that eats too fast isn’t just ‘enthusiastic’; they’re actively putting their health on the line. This behavior is often rooted in instinct, especially in multi-dog households or in rescues with a history of food scarcity. But instinct can be deadly in a domestic setting.
The Specter of Bloat (GDV)
The most severe risk is Gastric Dilatation-Volvulus (GDV), commonly known as bloat. When a dog eats too quickly, they swallow large amounts of air along with their kibble. This air can cause the stomach to expand like a balloon (dilatation). In the worst-case scenario, this bloated stomach can twist on its axis (volvulus), cutting off blood flow to the stomach and spleen, and trapping gas inside. This is a catastrophic, life-threatening emergency. The stomach tissue begins to die, shock sets in, and without immediate, emergency surgery, it is almost always fatal. Deep-chested breeds like Great Danes, Weimaraners, and German Shepherds are at higher risk, but no dog is immune.
Immediate Discomfort and Long-Term Issues
Even if you dodge the bullet of GDV, speed-eating creates other problems:
- Regurgitation and Vomiting: The stomach is overwhelmed by the rapid influx of food and can’t begin digestion properly, leading to the food coming right back up. This is different from vomiting; it’s undigested food expelled shortly after eating.
- Choking Hazard: A ravenous dog may not chew their kibble properly, creating a serious choking risk, especially with larger kibble sizes.
- Gagging and Discomfort: The sheer volume of food and air being swallowed can cause immediate discomfort, gagging, and coughing fits during and after meals.
Slowing your dog’s eating isn’t about convenience; it’s a critical, preventative health measure. It forces them to chew, reduces air intake, and allows their stomach to process the meal as nature intended.
The Slow Feeder Industry Exposed: Why You’re Overpaying for Molded Plastic
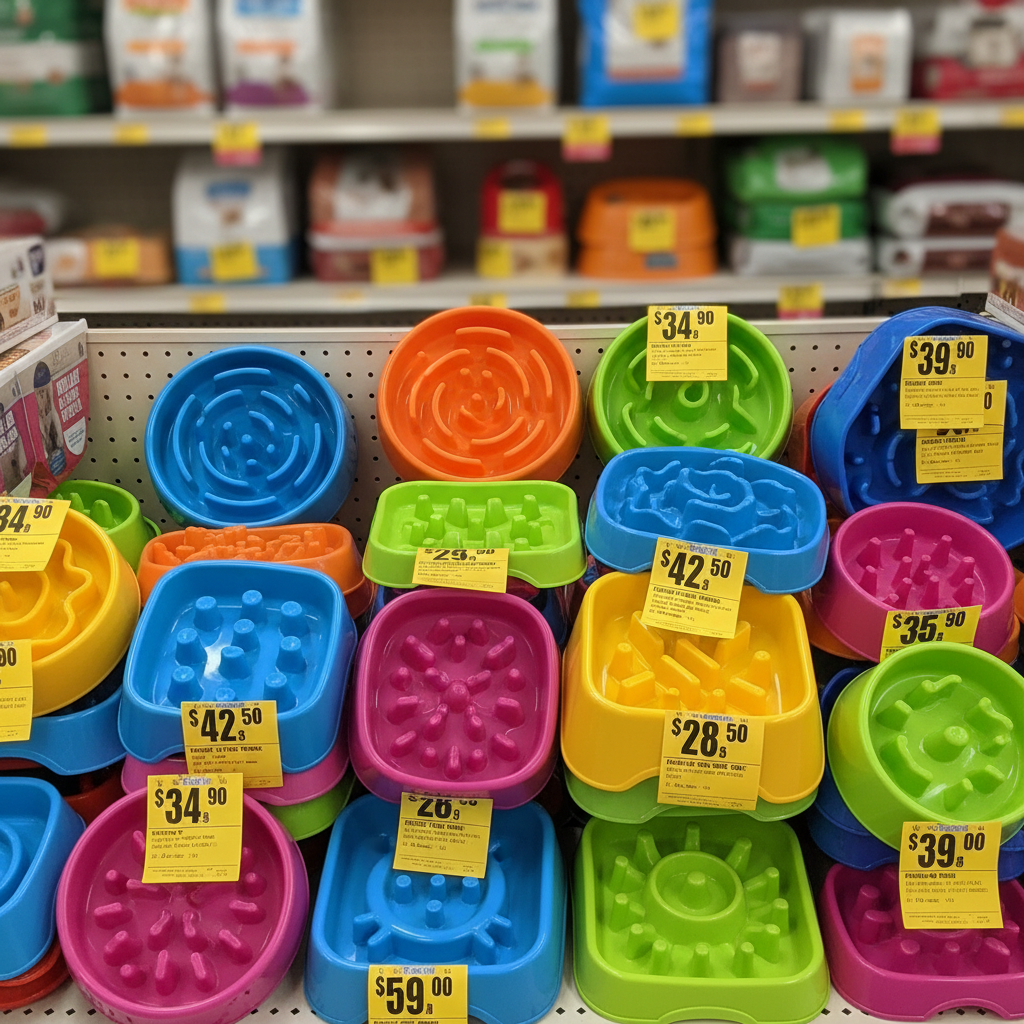
Walk into any pet store, and you’ll see the industry’s answer: walls of slow feeder bowls. They come in every shape, color, and level of complexity. While the intention is good, the execution is often a masterclass in overpricing. You are paying for molded plastic, not revolutionary technology. Let’s break down the common options and their true value.
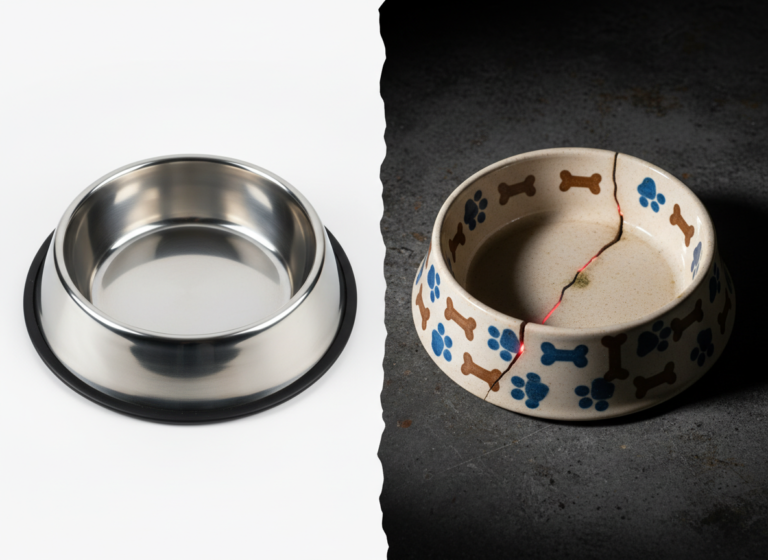
Most commercial bowls are made from ABS plastic. While generally considered safe, they are prone to scratching. Those tiny scratches can become breeding grounds for bacteria, potentially leading to canine acne or other skin irritations around the muzzle. Stainless steel and ceramic are better, but they come with a higher price tag and their fixed patterns may not be ideal for your dog’s specific needs or snout shape.
Insider Secret: The markup on a simple molded plastic bowl is immense. The manufacturing cost is pennies on the dollar. You’re paying for marketing, shelf space, and the perception of a high-tech solution to a simple problem. The fixed patterns also mean that once your smart dog ‘solves’ the puzzle, its effectiveness diminishes.
Let’s compare the typical market offerings:
| Material Type | Average Price Range | Pros | Cons |
|---|---|---|---|
| ABS Plastic | $15 – $30 | Cheap, lightweight, widely available. | Scratches easily (bacteria risk), can be flimsy, fixed patterns. |
| Ceramic | $25 – $45 | Heavy (won’t slide), easy to clean. | Can chip or crack, heavy, more expensive. |
| Stainless Steel | $30 – $50 | Durable, hygienic, dishwasher safe. | Very expensive, limited pattern options, can be noisy. |
| Our DIY Insert | $5 – $8 (for multiple) | Customizable, fits any bowl, food-safe, extremely cheap. | Requires one-time effort and curing time. |
As you can see, the DIY approach offers the best of all worlds: the hygiene of a high-end material with a price tag lower than the cheapest plastic option. You maintain the ability to use your preferred bowl—be it stainless steel, ceramic, or a travel bowl—while adding the functionality of a slow feeder.
The Canine Hacker’s Toolkit: Sourcing Food-Safe Materials for Pennies
This entire project hinges on using the right material. Cutting corners here is not an option, as your dog’s health is on the line. We are not using craft glue, hardware-store silicone, or anything that isn’t certified safe for contact with food.
SAFETY DISCLAIMER: You must use 100% Food-Grade Silicone Sealant. Look for products specifically labeled ‘aquarium safe’ or ‘food contact safe’. These are formulated without the anti-mildew chemicals (fungicides) found in standard bathroom and kitchen sealants, which are toxic if ingested. Do not proceed unless you have the correct material. When in doubt, check the manufacturer’s data sheet online. Your dog’s safety is your responsibility.
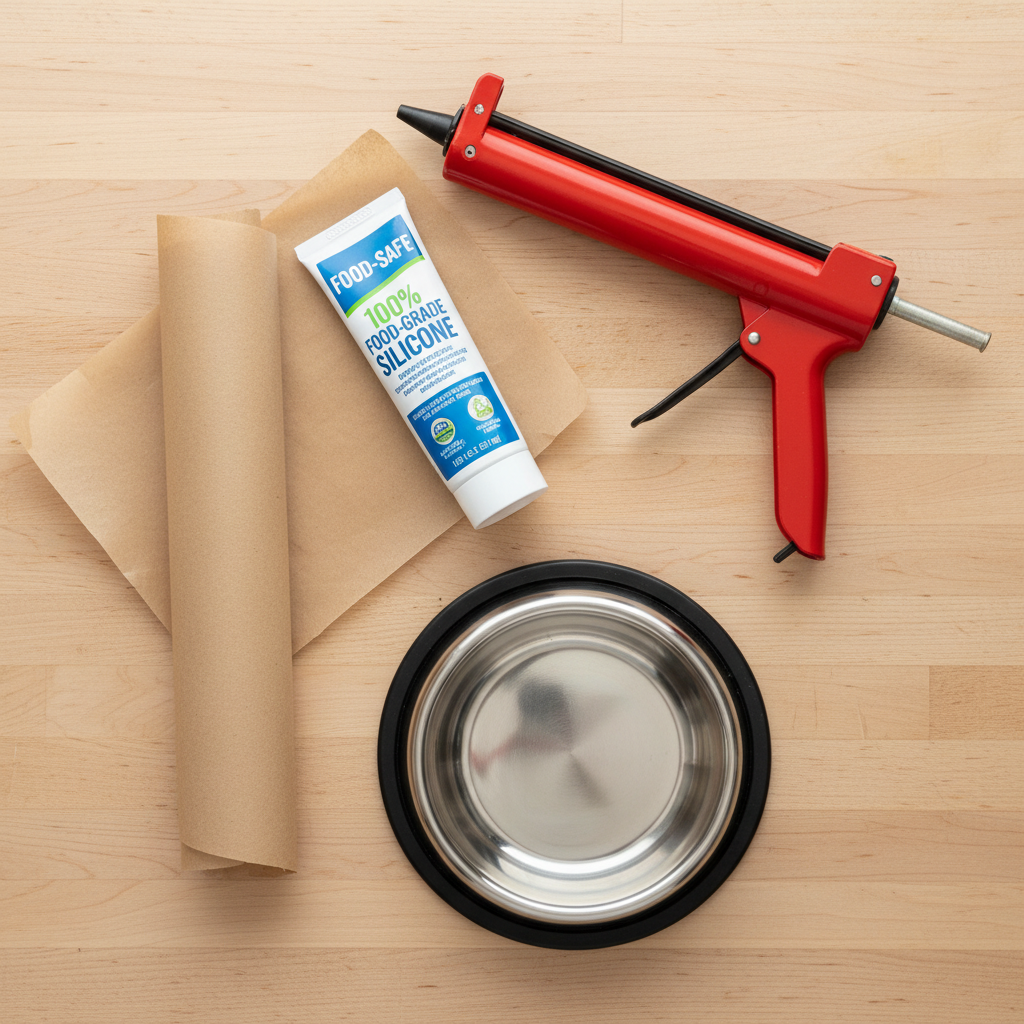
Here is your complete, no-nonsense shopping list:
- The Core Material: A tube of 100% Food-Grade, Non-Toxic Silicone Sealant. A common brand is GE Silicone 1 (for windows and doors), which is 100% silicone and does not contain fungicides, making it a popular choice for aquarium builders and considered safe after curing. Always double-check the label for ‘100% Silicone’ and the absence of mildew inhibitors. One tube is enough to make dozens of inserts.
- The Applicator: A standard caulking gun. This is essential for applying the silicone smoothly and evenly.
- The Base: A roll of parchment paper (not wax paper). Silicone will not stick to parchment paper, making it the perfect removable base for our mold.
- The Mold: Your dog’s actual food bowl. We will use it to trace the exact size and shape needed for a perfect fit.
- Optional: A pair of disposable nitrile gloves to keep your hands clean.
Why Food-Grade Silicone is the Only Choice
Silicone is a polymer that is incredibly stable and inert once fully cured. This means it doesn’t leach chemicals into food. It’s also non-porous, so it won’t harbor bacteria like scratched plastic. Furthermore, it’s durable, flexible, and can withstand high temperatures, making it top-rack dishwasher safe. The cost of a tube is minimal, and the result is a professional-grade, custom-fit product that rivals or exceeds the safety and functionality of store-bought options.
Step-by-Step Tutorial: Fabricating Your Custom Insert in 15 Minutes
With our materials sourced, it’s time for the fabrication. This process is simple and requires no special skills, only a little patience for the curing time. Work in a well-ventilated area, as the silicone releases acetic acid (which smells like vinegar) as it cures.
- Create Your Template: Place your dog’s bowl upside down on a sheet of parchment paper. Trace around the inside bottom of the bowl with a pencil. Remove the bowl, and you should have a perfect circle outlining the base. This is your work area.
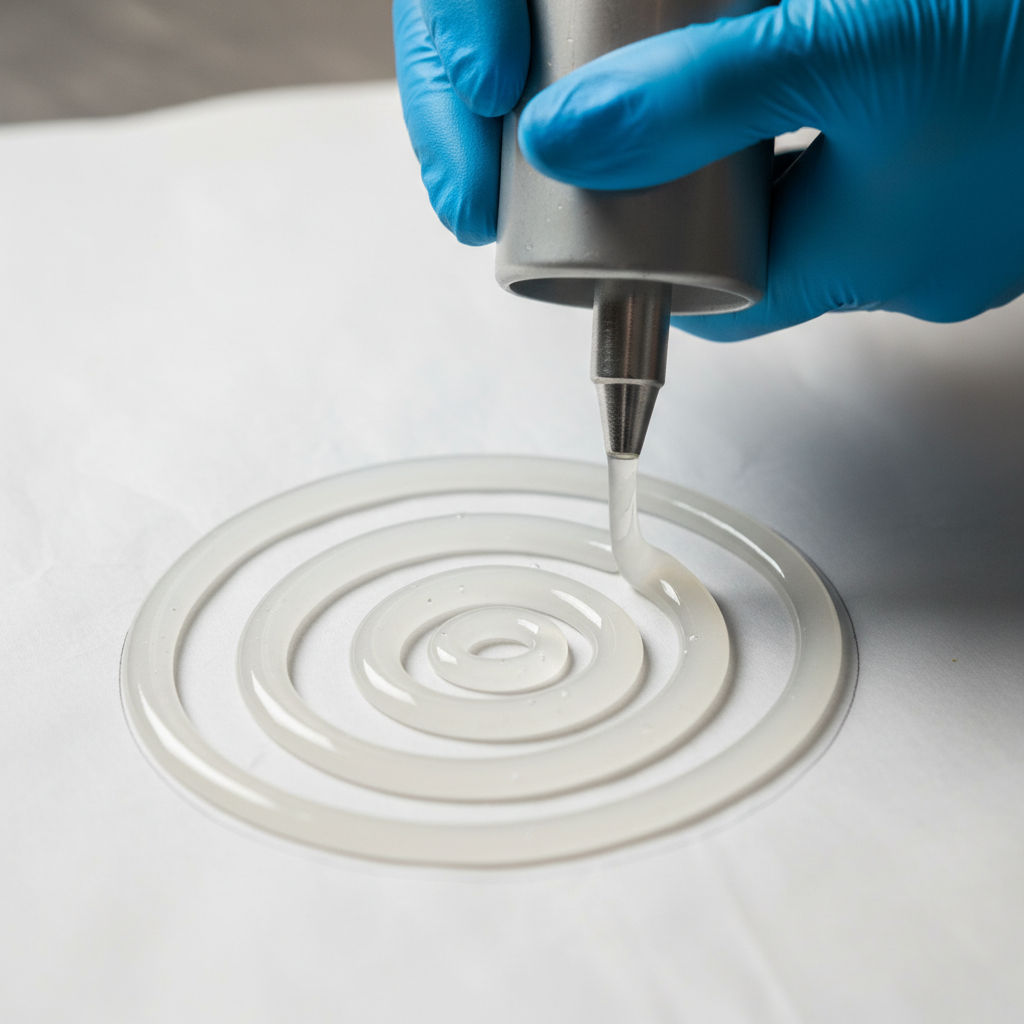
- Load the Silicone: Prepare your caulking gun with the tube of food-grade silicone. Snip the tip of the tube at a 45-degree angle. A smaller opening allows for more control.
- Design Your Pattern: This is the creative part. Squeeze the silicone onto the parchment paper inside your traced circle. Create any pattern you like. For beginners, simple, thick, wavy lines or a large spiral are effective. For dogs that need more of a challenge, you can create a more complex maze with intersecting lines and blobs. Important: Ensure the height of your silicone beads is lower than the rim of the bowl to avoid your dog simply eating over the top. About half an inch to an inch is usually sufficient. Make sure there are no enclosed spaces where a dog’s tongue could get stuck.
- Let It Cure (The Hardest Part): This step is non-negotiable. Place the parchment paper with the silicone pattern on a flat surface in a well-ventilated area, away from pets and children. It needs to cure for a minimum of 24 to 48 hours. It is fully cured when it is firm to the touch and there is absolutely no remaining vinegar smell. Do not rush this process. An uncured insert is not safe.
- Peel and Prep: Once fully cured, your silicone insert will peel effortlessly off the parchment paper. The bottom will be perfectly flat. Before its first use, wash the new insert thoroughly with hot water and dish soap to remove any surface residue from the curing process. Rinse it completely.
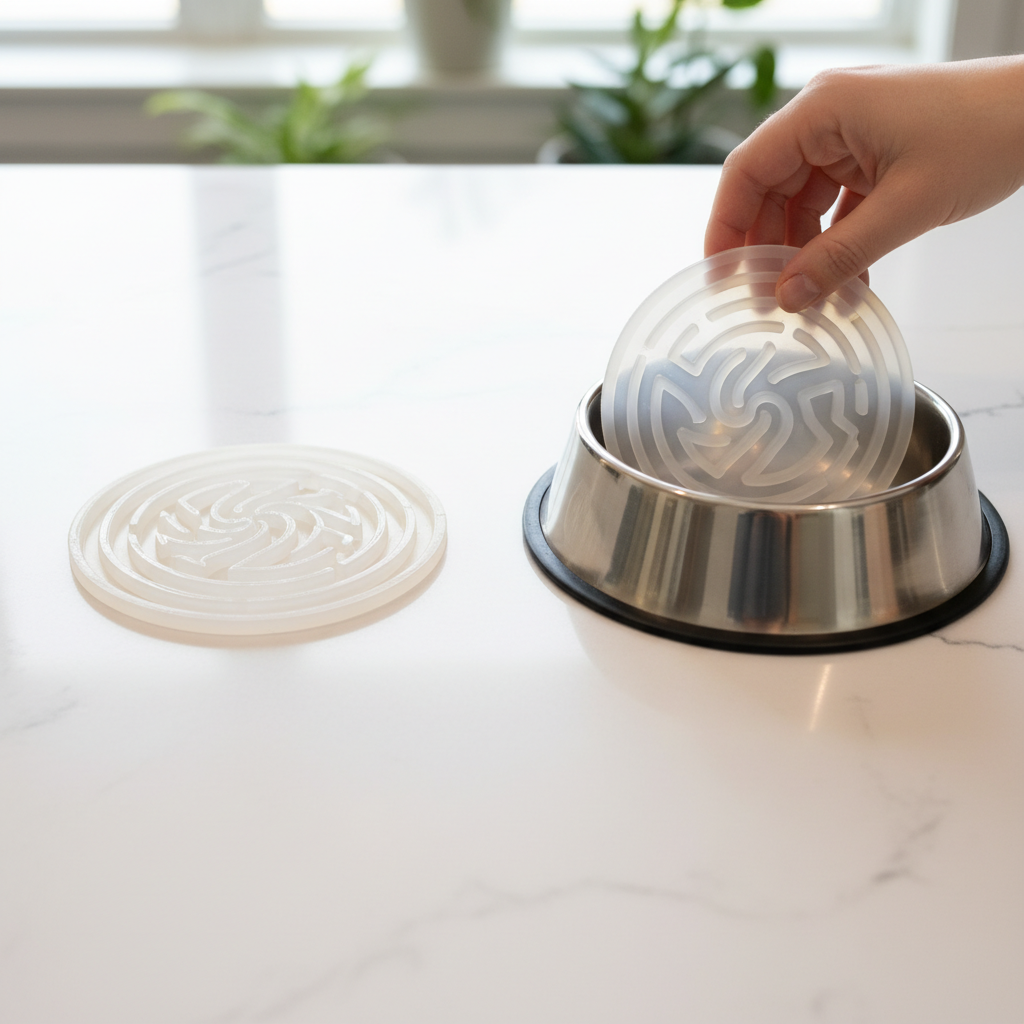
- Installation: Dry the insert and your dog’s bowl. Place the insert into the bowl. The weight of the kibble will hold it in place. You have now successfully turned your standard bowl into a custom, high-performance slow feeder.
Long-Term Use: Cleaning, Maintenance, and Advanced Hacks
Your DIY slow feeder insert is built to last, but proper care will ensure it remains safe and effective for years. The beauty of 100% silicone is its resilience and ease of maintenance.
Cleaning and Inspection
Cleaning is simple. After each meal, remove the insert and wash it by hand with hot, soapy water, or place it on the top rack of your dishwasher. Its flexibility allows you to get into all the nooks and crannies. Periodically, you should inspect the insert for any signs of damage. While extremely durable, a powerful chewer might manage to damage it. If you see any tears or pieces breaking off, discard it immediately and create a new one. Given the low cost, replacement is trivial.
Hacker Tip: Create multiple inserts with varying difficulty levels. Start with a simple swirl pattern. Once your dog masters it, swap in a more complex maze design. This ‘progressive difficulty’ keeps your dog’s mind engaged at mealtimes, turning feeding into a continuous enrichment activity. It prevents them from becoming complacent and starting to speed-eat again.
Beyond Kibble: Expanding the Insert’s Use
This insert isn’t just for dry kibble. Its food-safe properties make it a versatile feeding tool:
- Wet Food: Smear wet or raw food into the channels of the insert to slow down consumption and make the meal last longer.
- Enrichment Mat: Use it as a mini ‘lick mat’. Smear dog-safe peanut butter, plain yogurt, or pumpkin puree onto it and freeze for a long-lasting, soothing treat. This is excellent for crate training or anxiety reduction.
- Medication Hack: If you need to give your dog a crushed pill or liquid medication, mixing it with a small amount of a high-value treat (like yogurt) and smearing it on the mat can make medicine time less stressful.
By investing 15 minutes of your time and a few dollars, you’ve created a multi-functional tool that enhances your dog’s health, provides daily mental stimulation, and adapts to their evolving needs.
Conclusion
You’ve now seen how to bypass the overpriced, underperforming commercial market and engineer a superior solution for your dog’s mealtime safety. You’ve moved beyond being a simple consumer and become a proactive, informed owner—a true Canine Hacker. This simple DIY project does more than just slow your dog’s eating; it reduces the risk of life-threatening bloat, improves digestion, and turns a mundane meal into an engaging mental puzzle.
The total cost is a fraction of a single store-bought bowl, and the result is infinitely more adaptable. You’ve empowered yourself with the knowledge to protect your dog and your finances. This is the core philosophy: question the market, understand the risks, and find smarter solutions. Welcome to the club.