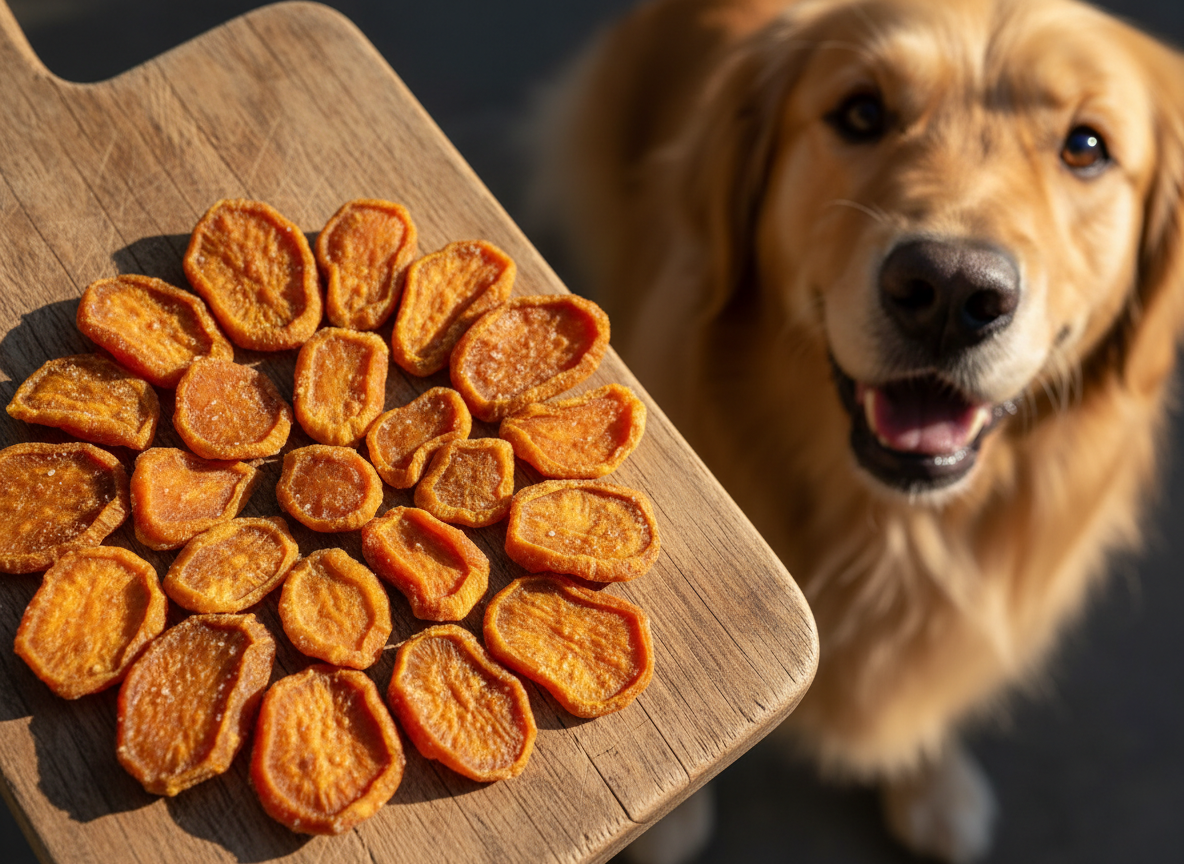
How to Make Dehydrated Sweet Potato Dog Chews (Safe & Cheap)
Walk down any pet store aisle and you’ll be bombarded with slick packaging promising ‘all-natural,’ ‘grain-free,’ and ‘wholesome’ sweet potato chews. They tout their simplicity and health benefits, and for a good reason—sweet potatoes are a nutritional powerhouse for our canine companions. But flip that bag over and look at the price tag. You are paying an exorbitant premium, often upwards of 2000%, for a product you can make at home for literal pennies. It’s a classic case of marketing over matter.
As The Canine Nutrition Hacker, my job is to cut through that noise. I analyze labels, break down costs, and empower you to provide the absolute best for your dog without being exploited by the pet food industry. Commercial chews can be a minefield of hidden preservatives, questionable sourcing, and unnecessary additives designed to extend shelf life, not enhance your dog’s health. Making your own isn’t just about saving money; it’s about taking absolute control over every single thing that goes into your dog’s body.
This guide provides the definitive blueprint for creating perfect, safe, and ridiculously cheap dehydrated sweet potato dog chews. We will dissect the costs, detail the nutritional science, and provide a foolproof step-by-step protocol. It’s time to hack your dog’s treat jar.
IMPORTANT SAFETY DISCLAIMER: I am a canine nutrition analyst, not a veterinarian. The information provided here is for educational purposes. These chews are intended as a supplementary treat and should not replace a balanced diet. Always consult with your veterinarian before introducing new foods into your dog’s diet, especially if they have pre-existing health conditions like diabetes. Treats should make up no more than 10% of your dog’s daily caloric intake.
Why You Should Ditch Store-Bought Chews: A Cost and Ingredient Exposé

The allure of convenience is powerful. Grabbing a bag of treats off the shelf is easy, but this convenience comes at a steep, often hidden, cost. Manufacturers bank on you not doing the math or scrutinizing the fine print. Let’s pull back the curtain and conduct a forensic analysis of what you’re really paying for.
The ‘First 5 Ingredients’ Truth (or Lack Thereof)
Even with a single-ingredient treat like sweet potato chews, there are games to be played. Some brands add ‘natural flavors’ (an unregulated mystery term), preservatives like potassium sorbate to make them shelf-stable for years, or even glycerin to keep them soft and chewy—an ingredient that adds sweetness and calories with no nutritional benefit. The purest brands simply list ‘dehydrated sweet potato,’ but their price reflects boutique marketing, not the cost of the raw ingredient.
The real issue is the astronomical markup. You are paying for the factory, the packaging, the shipping, the marketing team, and the retailer’s profit margin. You are not paying for a better sweet potato. In fact, you have no real way of knowing the quality or origin of the produce used. By making them yourself, you control the source. You can choose fresh, organic, locally-grown sweet potatoes if you wish, and still come out financially ahead.
Real Cost Breakdown: DIY vs. Premium Store-Bought
The numbers don’t lie. Let’s break down the cost for a standard 8-ounce (227g) bag of premium sweet potato chews versus the cost of making the same amount at home. Sweet potatoes lose about 75% of their weight during dehydration, so we need approximately 32 ounces (2 lbs) of fresh sweet potatoes to yield 8 ounces of finished chews.
| Metric | Premium Store-Bought Chews | DIY Homemade Chews |
|---|---|---|
| Source Cost | $15.00 – $25.00 for an 8oz bag | Approx. $2.00 for 2 lbs of fresh sweet potatoes (@ $0.99/lb) |
| Cost Per Ounce | $1.87 – $3.12 | $0.25 |
| Ingredient Control | Unknown quality, potential for preservatives | 100% control over quality and purity (e.g., organic) |
| Annual Savings (1 bag/month) | Baseline | $156.00 – $276.00 |
| The Hacker’s Verdict | Convenient but grossly overpriced with potential for unwanted additives. A poor value proposition. | An incredibly high-value proposition. Massive cost savings, superior quality control, and zero additives. The clear winner. |
Insider Secret: The pet treat industry thrives on what I call ‘nutritional theater.’ They take a simple, cheap ingredient, apply a minimal process, and wrap it in a fancy bag with pictures of happy dogs in fields of gold. Your job is to look past the stage and at the raw numbers. The savings here are not minor; they are monumental over the life of your pet.
The Nutritional Powerhouse: Unpacking the Benefits of Sweet Potatoes

Before we start the recipe, it’s critical to understand *why* sweet potatoes are such a superior choice for a dog treat. This isn’t just about finding a cheap alternative; it’s about providing a treat that actively contributes to your dog’s health and well-being. This humble root vegetable is packed with essential vitamins and minerals.
Key Nutritional Components & Their Roles
- Beta-Carotene: This is the antioxidant that gives sweet potatoes their vibrant orange color. In the body, it converts to Vitamin A, which is crucial for healthy vision, immune function, cell growth, and skin and coat health.
- Vitamin C: While dogs can produce their own Vitamin C, supplementation through diet can be beneficial, especially during times of stress or illness. It’s a powerful antioxidant that helps reduce inflammation and cognitive aging.
- Manganese: This essential mineral plays a vital role in processing proteins and carbohydrates, as well as promoting bone health and producing energy.
- Dietary Fiber: Sweet potatoes are an excellent source of soluble and insoluble fiber. This promotes a healthy digestive system by regulating bowel movements, feeding beneficial gut bacteria, and helping your dog feel full and satisfied.
Are Sweet Potatoes 100% Safe? The Hacker’s Nuances
Yes, sweet potatoes are overwhelmingly safe and beneficial for dogs, but there are critical distinctions to be made. You must know the rules to do this safely.
- Never Feed Raw: Raw sweet potato is difficult for dogs to digest and can cause intestinal blockage. The dehydration process effectively ‘cooks’ the potato, breaking down starches and making it safe and digestible.
- Sweet Potatoes vs. Yams: While often used interchangeably in stores, true yams are a different vegetable entirely. What you find in most US grocery stores labeled as a ‘yam’ is actually a variety of sweet potato. Both are safe.
- Avoid White Potatoes: Do not substitute with white, red, or purple potatoes. These belong to the nightshade family and contain solanine, a compound that can be toxic to dogs, especially when the potato is green. Stick to orange or yellow sweet potatoes.
- Moderation is Key: Remember the 10% rule. Due to their fiber and natural sugar content, overfeeding sweet potato chews can lead to stomach upset or weight gain. They are a treat, not a meal. For a 50lb dog, one or two medium-sized chews per day is a reasonable amount.
The Safe Chef’s Guide: Your Foolproof Dehydration Protocol
This is where the theory ends and the action begins. This protocol is designed for consistency and safety, ensuring you get a perfect batch of chews every single time. There are no complex steps or exotic ingredients. The process is simple, but precision is your ally.
Ingredients & Equipment
- Ingredients: 2-3 large sweet potatoes. Look for ones that are firm, with smooth skin and no bruises or soft spots.
- Primary Equipment (Choose One): A food dehydrator OR a conventional oven.
- Supporting Equipment: A sharp knife or mandoline slicer, a vegetable brush, a cutting board, and baking sheets with wire cooling racks (for the oven method).
Preparation Protocol: The Key to a Perfect Chew
The success of your final product is determined in the preparation stage. Do not rush this.
- Wash and Scrub Thoroughly: Using a vegetable brush, scrub the sweet potatoes under cool running water. You want to remove all dirt and debris. There is no need to peel them. The skin is packed with fiber and nutrients and will add a nice texture to the finished chew.
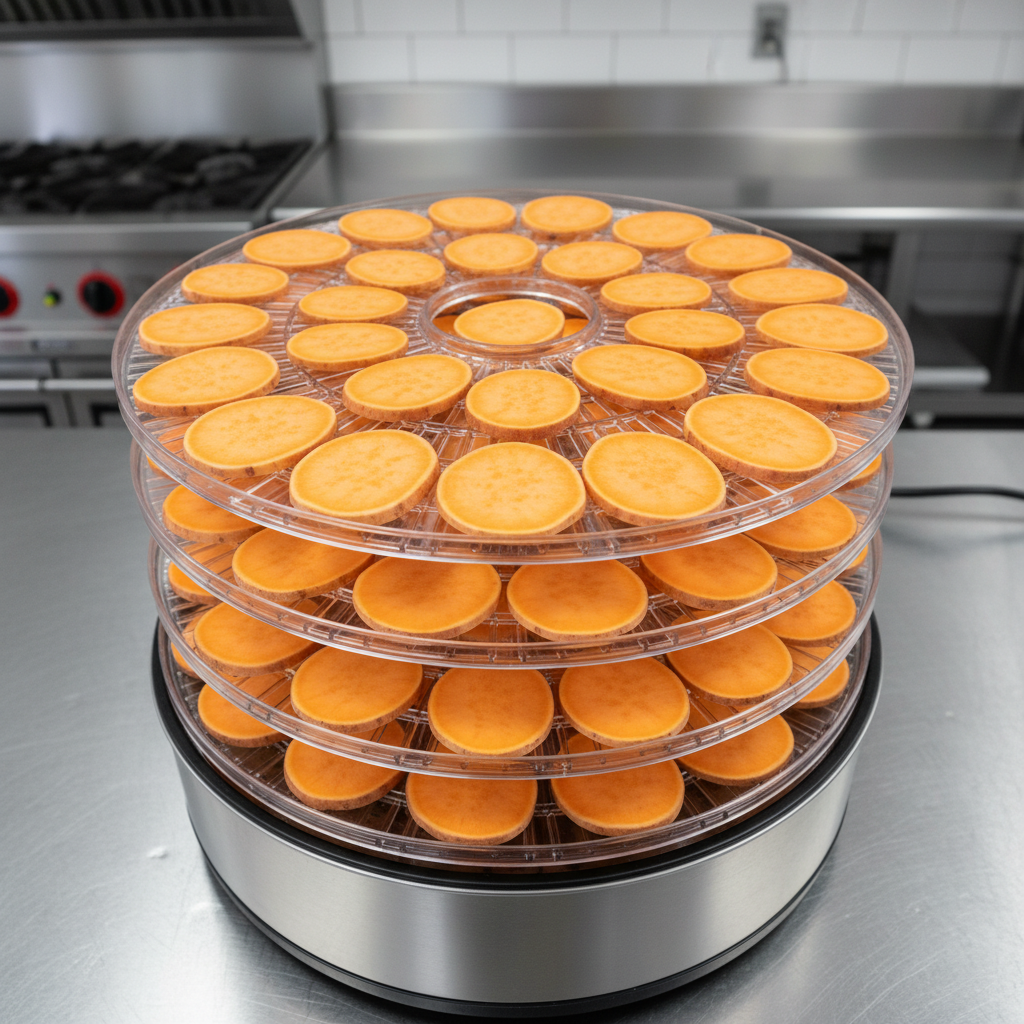
- Slice for Uniformity: This is the most critical step. You must slice the sweet potatoes to a uniform thickness. A thickness of 1/4 inch (about 6mm) is ideal. If slices are too thick, they will not dehydrate fully in the center and can harbor mold. If they are too thin, they will become brittle crisps rather than satisfying chews. A mandoline slicer is the best tool for perfect uniformity, but careful work with a sharp knife is also effective. You can slice them into rounds or lengthwise into longer strips.
Dehydration Method 1: The Food Dehydrator (Preferred)
A dehydrator provides consistent, low-temperature air circulation, which is the ideal method for this task.
- Arrange the slices on the dehydrator trays in a single layer. Ensure there is space between each slice for air to flow freely. Do not overlap them.
- Set the dehydrator temperature to 135°F (57°C). This is the sweet spot for efficiently removing moisture without cooking the potato too quickly.
- Dehydrate for 8 to 12 hours. The exact time will depend on your dehydrator, the humidity in your home, and the thickness of your slices.
- Begin checking for doneness at the 8-hour mark. The perfect chew should be leathery and flexible. You should not be able to squeeze any moisture out of it. If it snaps easily, it’s overdone (though your dog will still love it). If it’s still soft in the middle, it needs more time.
Dehydration Method 2: The Oven (Hacker’s Alternative)
No dehydrator? No problem. Your oven can work as a less-efficient but perfectly functional alternative.
- Preheat your oven to its lowest possible temperature, ideally between 175-200°F (80-95°C). If your oven runs hotter, you may need to prop the door open slightly with a wooden spoon to allow moisture to escape and prevent the slices from baking instead of dehydrating.
- Place wire cooling racks onto baking sheets. Arrange the sweet potato slices in a single layer on top of the wire racks. The racks are essential for allowing air to circulate underneath the slices.
- Place the baking sheets in the oven.
- Bake for 6 to 10 hours, flipping the slices every 2-3 hours to promote even drying.
- Check for doneness using the same method as above: the final product should be dry to the touch and leathery, not soft or brittle.
Level Up Your Chews: Flavor Hacks and Storage Secrets
Once you’ve mastered the basic chew, you can begin to introduce variations and perfect your long-term storage strategy. Proper storage is non-negotiable for preventing spoilage and protecting your investment of time.
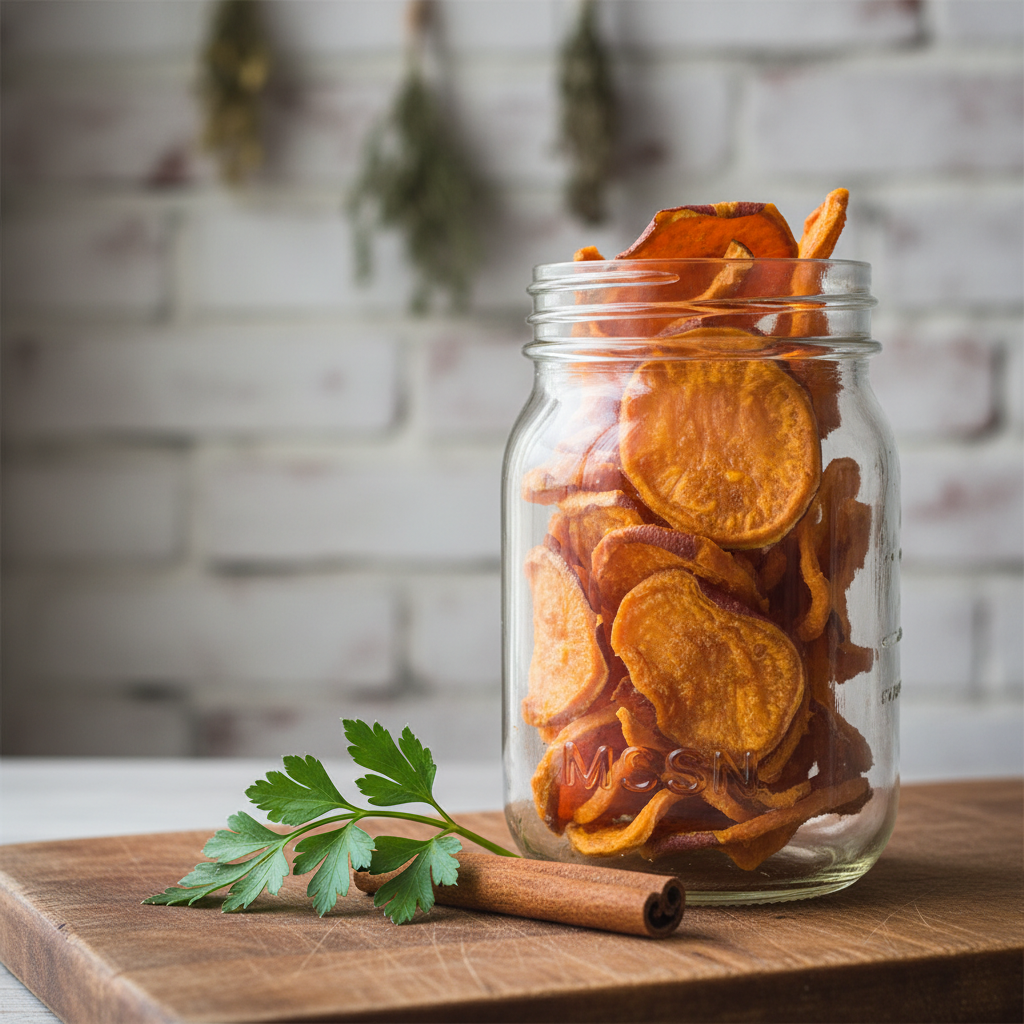
Conditioning and Storage: The Non-Negotiable Final Step
Before you bag them up, you must ‘condition’ the chews. This equalizes the moisture level among all the pieces and is the professional secret to preventing mold.
- After the chews have cooled completely to room temperature, place them loosely into an airtight glass jar or container. Do not pack them tightly.
- Seal the container and let it sit on your counter for 5-7 days.
- Shake the jar once a day. If you see any condensation forming on the inside of the jar, it means the chews are not fully dehydrated. You must immediately return them to the dehydrator or oven for another 1-2 hours.
- Once they pass the conditioning phase with no condensation, they are ready for storage.
The ‘Batch Cooking’ Strategy: Storage and Shelf Life
- Short-Term (1-2 weeks): Store the conditioned chews in an airtight container in a cool, dark place like a pantry.
- Medium-Term (1-3 months): For longer storage at room temperature, add a food-grade silica gel packet to your airtight container. This will absorb any ambient moisture and drastically reduce the risk of mold.
- Long-Term (6+ months): The freezer is your best friend. Place the conditioned chews in a vacuum-sealed bag or a heavy-duty freezer bag with as much air removed as possible. They will last for at least 6-12 months with no degradation in quality.
Hacker Tip: Portion your frozen chews into smaller weekly bags. This way, you only expose a small amount to air and moisture at a time, keeping the master stash perfectly preserved in the freezer.
Flavor Customization (Optional Advanced Tactic)
If you want to add an extra layer of flavor and nutritional benefit, you can lightly coat the wet slices *before* dehydrating. Use these sparingly.
- Ground Cinnamon: A very light dusting. Cinnamon is known for its anti-inflammatory properties. Ensure it is Ceylon cinnamon, not Cassia cinnamon, which can be harmful in larger quantities.
- Finely Chopped Parsley: Great for freshening breath. Press the fresh, finely minced parsley onto the slices.
- Turmeric: A tiny pinch of turmeric mixed with a drop of coconut oil and brushed onto the slices can add powerful anti-inflammatory benefits.
CRITICAL WARNING: Never use garlic powder, onion powder, salt, sweeteners (especially Xylitol, which is highly toxic), or any other common human spices without verifying they are safe for dogs. When in doubt, stick to plain sweet potato.
Conclusion
You now possess the complete blueprint to opt out of the overpriced commercial treat market. By investing a few hours, you’ve converted a couple of dollars’ worth of sweet potatoes into a large batch of premium, single-ingredient dog chews. You’ve achieved three critical goals: you’ve saved a significant amount of money, you’ve provided a treat packed with genuine nutritional value, and you’ve maintained 100% control over the quality and safety of the ingredients.
This is the core philosophy of the Canine Nutrition Hacker. It’s not about being cheap; it’s about being smart. It’s about understanding the system and refusing to pay for marketing and packaging instead of pure, unadulterated nutrition. You’ve removed the middlemen and the mystery additives. The result is a healthier treat for your dog and a healthier balance in your bank account. Now, go reclaim your dog’s treat jar.